5-17
POWR
E
ASSEMBLY AND ADJUSTMENT
NOTE:
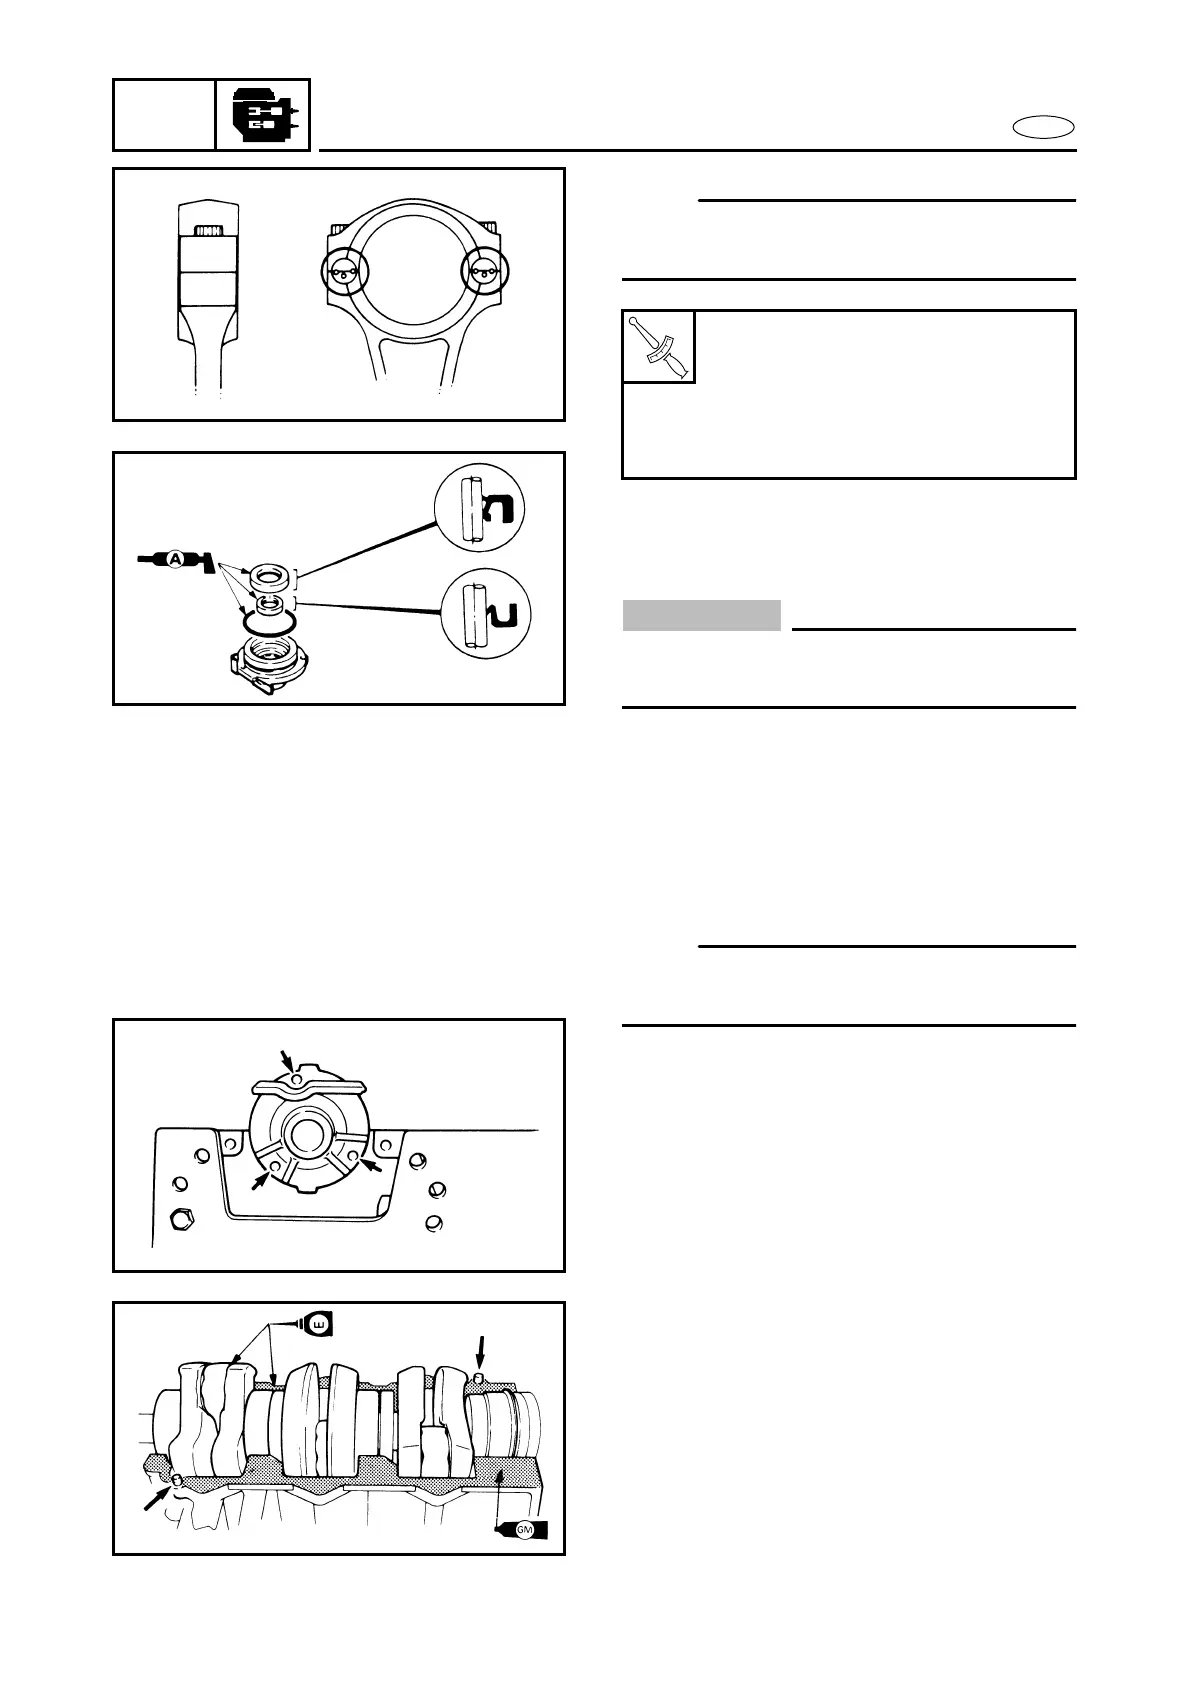
Replace the cap bolts each time the con-
necting rod is disassembled.
G79000-1*
OIL SEAL HOUSING
1. Press-fit the oil seals one by one.
CAUTION:
When press-fitting the oil seal, be sure that
if faces in the correct direction.
2. Fit the new O-ring in the grooves in the
oil seal housing outer surfaces.
3. After installing the oil seal and O-ring,
pack the oil seal lip and outer surface of
the O-ring with water resistant grease.
NOTE:
Avoid cutting or stretching the oil seal
housing O-ring.
4. Install the oil seal housing onto the cyl-
inder and align the bolt holes.
T
R
.
.
Connecting rod big end:
(75, 80, 90 hp)
1st step:
12 Nm (1.2 m • kg, 8.7 ft • lb)
2nd step:
35 Nm (3.5 m • kg, 25 ft • lb)
G74000-0*
CRANK CYLINDER ASSEMBLY
(50, 60, 70 hp)
1. Lubricate the piston-rings and pistons
with 2-stroke outboard-motor oil and
install the crank assembly into the cylin-
der block.