5-45
POWR
E
CRANKSHAFT AND PISTON/
CONNECTING ROD ASSY.
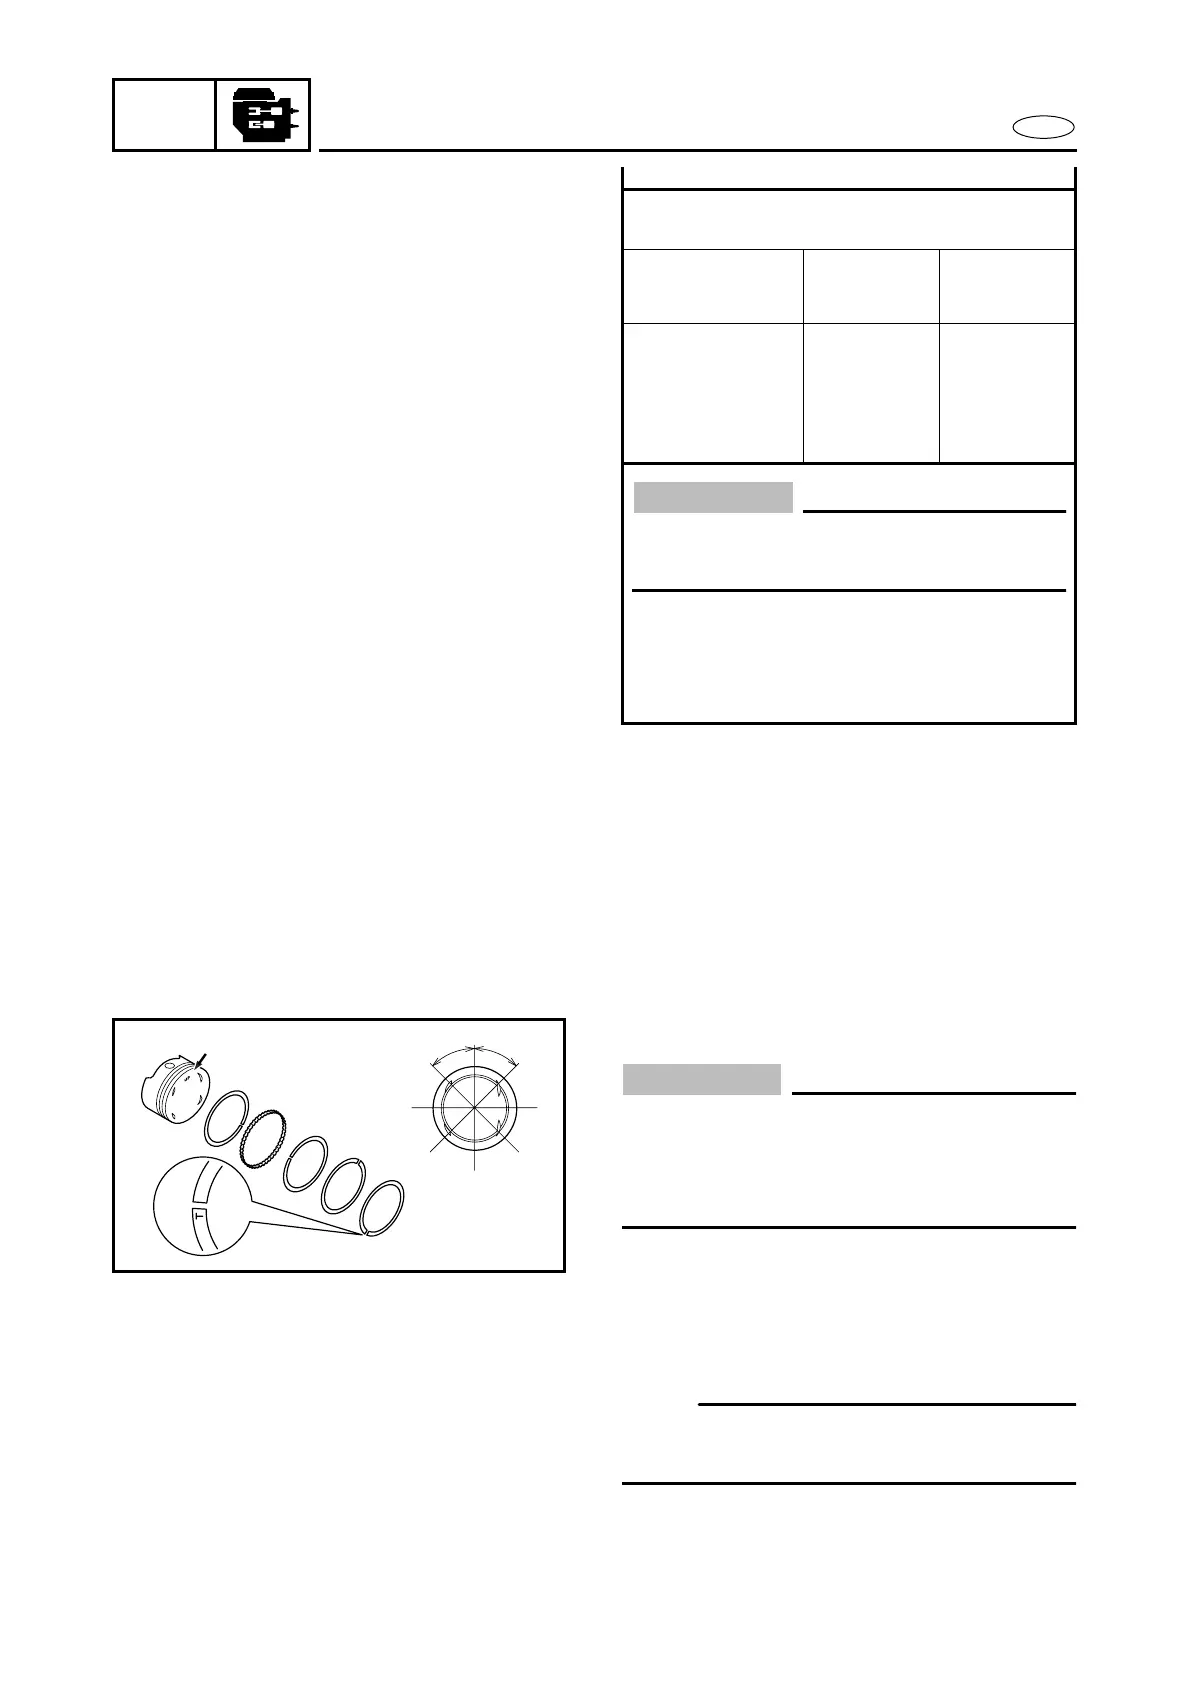
Connecting rod bearing selection table
(20 ˚C (68 ˚F))
Measurement
value using a
Plastigauge
(mm)
Upper bearing Lower bearing
0.023 ~ 0.035
0.036 ~ 0.042
0.043 ~ 0.049
0.050 ~ 0.057
0.058 ~ 0.065
0.066 ~ 0.071
Yellow
Yellow
Green
Green
Blue
Blue
Yellow
Green*
Green
Blue*
Blue
Red*
●
If the measurement value is more than
the maximum value (0.071 mm),
replace the crankshaft, connecting rod,
or both.
CAUTION:
The (*) mark indicates that the color of the
upper and lower bearings are different.
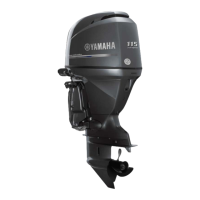
Piston ring installation
CAUTION:
●
Do not scratch the piston or break the pis-
ton rings.
●
After installing the piston rings, check
that they move smoothly.
1. Install:
●
Oil ring (#3 and #4)
●
2nd ring (#2)
●
Top ring (#1)
NOTE:
●
Offset the piston-ring end gaps as shown.
●
Piston rings should be replaced as a set.
UP
#1
#1
#2
#2
#4
#4
#3
#3
45° 45°