6 - 43
CHAS
HANDLEBAR
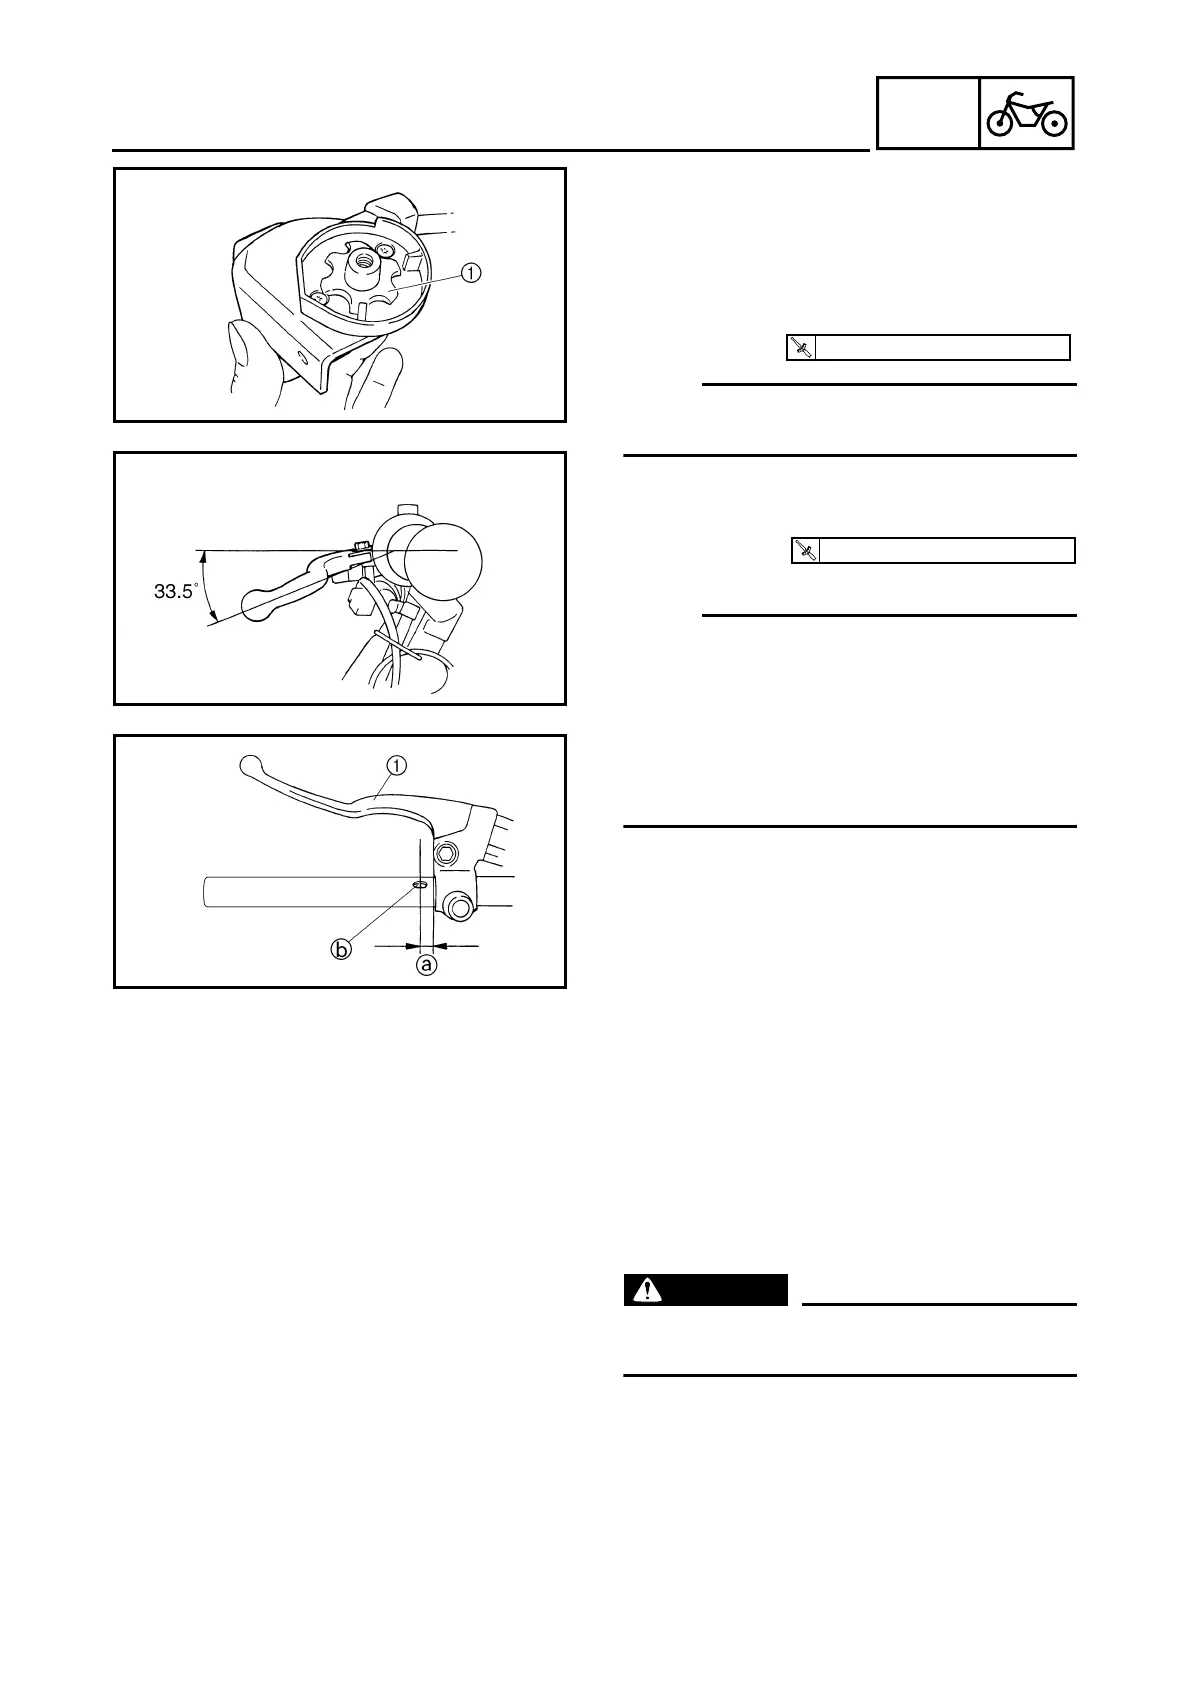
5. Install:
• spring washer 1
• washer
• starter cable
• starter lever
• washer
• screw
NOTE:
_
Install the spring washer in the direction
shown.
6. Install:
• rear brake lever assembly 1
• rear brake cable
NOTE:
_
• Install the rear brake lever within 33.5° from
the horizontal line shown in the illustration.
• After installing the rear brake lever assembly,
make sure that the clearance a between the
center of the hole b in the handlebar and the
rear brake lever assembly 1 is 10.3 mm
(0.41 in).
T
R
.
.
7 Nm (0.7 m · kg, 5.1 ft · lb)
T
R
.
.
7 Nm (0.7 m · kg, 5.1 ft · lb)
7. Install:
• handlebar grip
▼▼▼▼ ▼ ▼▼▼▼ ▼ ▼▼▼▼ ▼ ▼▼▼▼ ▼ ▼▼▼▼ ▼ ▼▼▼▼ ▼▼▼
a. Apply a thin coat of rubber adhesive onto
the left end of the handlebar.
b. Slide the handlebar grip over the left end of
the handlebar.
c. Wipe off any excess rubber adhesive with a
clean rag.
WARNING
_
Do not touch the handlebar grip until the
rubber adhesive has fully dried.
▲▲▲▲ ▲ ▲▲▲▲ ▲ ▲▲▲▲ ▲ ▲▲▲▲ ▲ ▲▲▲▲ ▲ ▲▲▲▲ ▲▲▲






 To Next Page