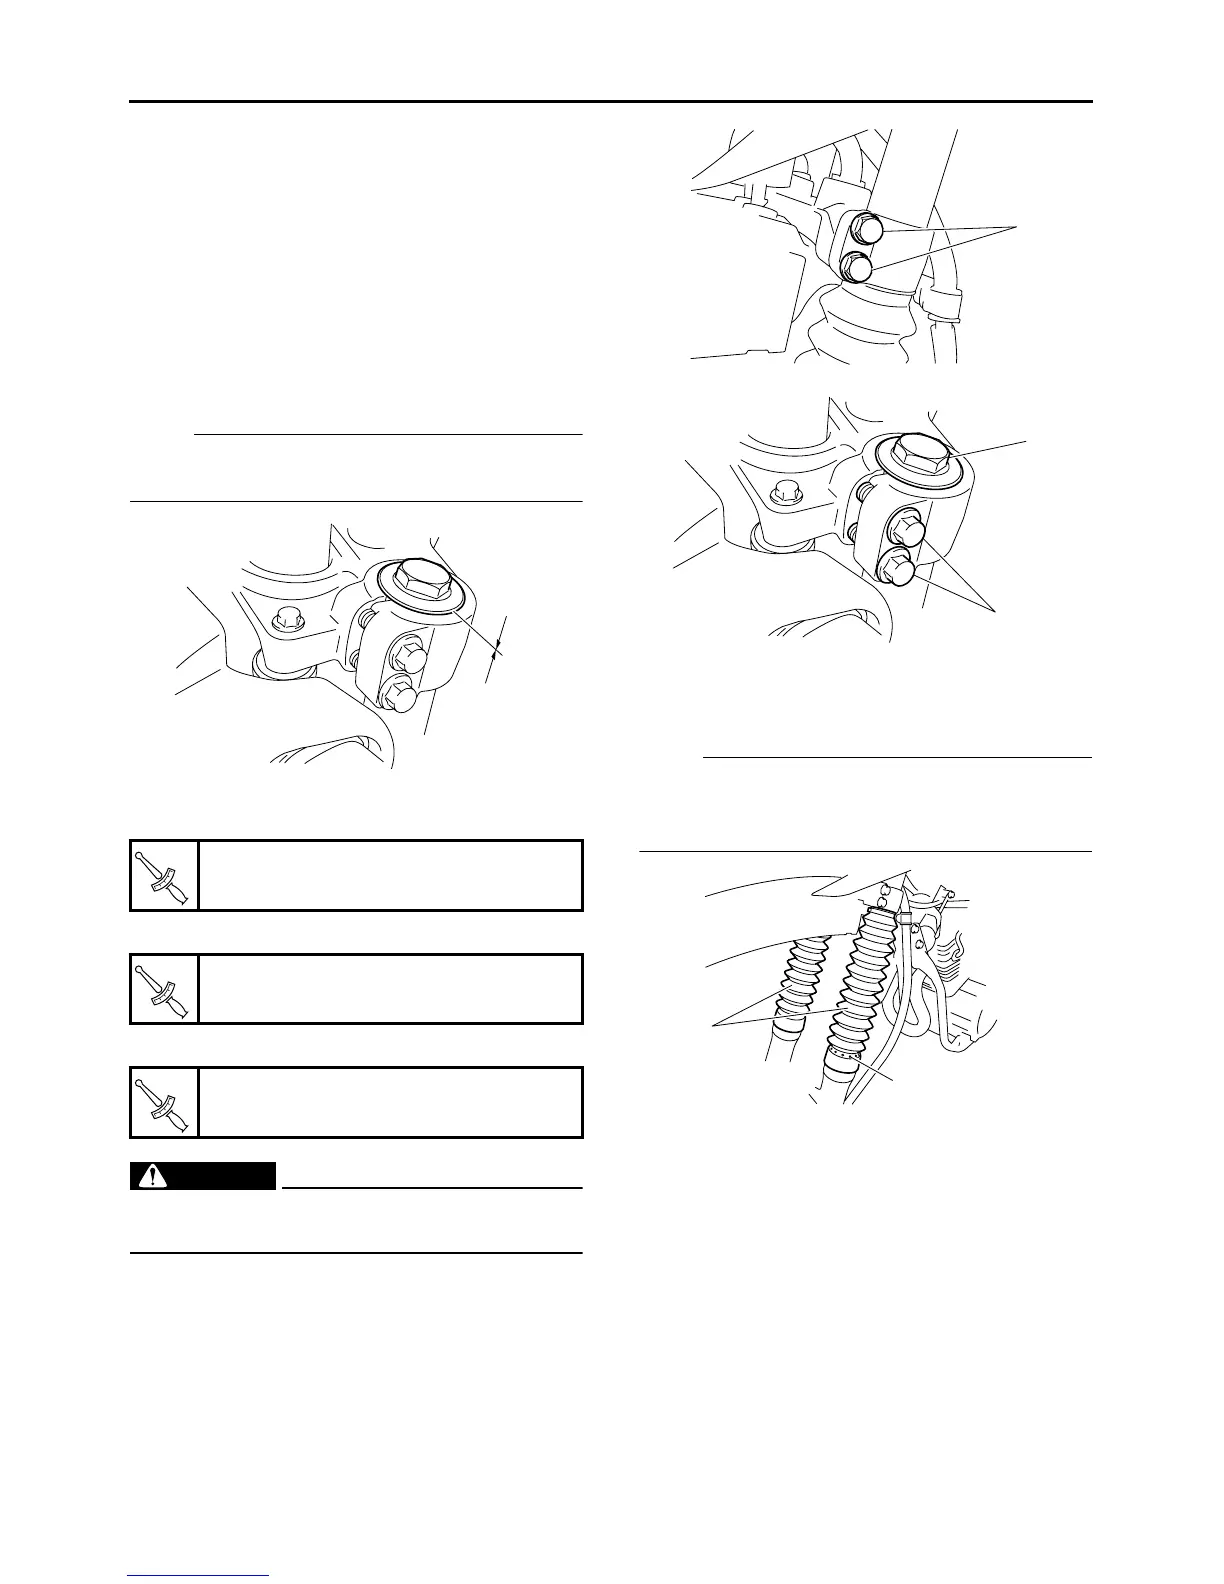
1. Install:
2. Install:
The inner tube top face must match the upper
bracket top face.
3. Tighten:
● Lower bracket pinch bolt “1”
● Front fork cap bolt “2”
● Upper bracket pinch bolt “3”
WARNING
EWA13680
Make sure the brake hoses are routed prop-
erly.
4. Install:
●
Dust boots “1”
● Clamp screw
NOTE:
Direct air-bleeding hole “a” of the dust boot out-
ward of the vehicle, and press and assemble the
dust boot top end to the lower bracket.
Lower bracket pinch bolt
23 Nm (2.3 m•kg, 17 ft•lb)
Front fork cap bolt
23 Nm (2.3 m•kg, 17 ft•lb)
Upper bracket pinch bolt
23 Nm (2.3 m•kg, 17 ft•lb)
T
R
.
.
T
R
.
.
T
R
.
.
1
3
2
a
1


 To Next Page