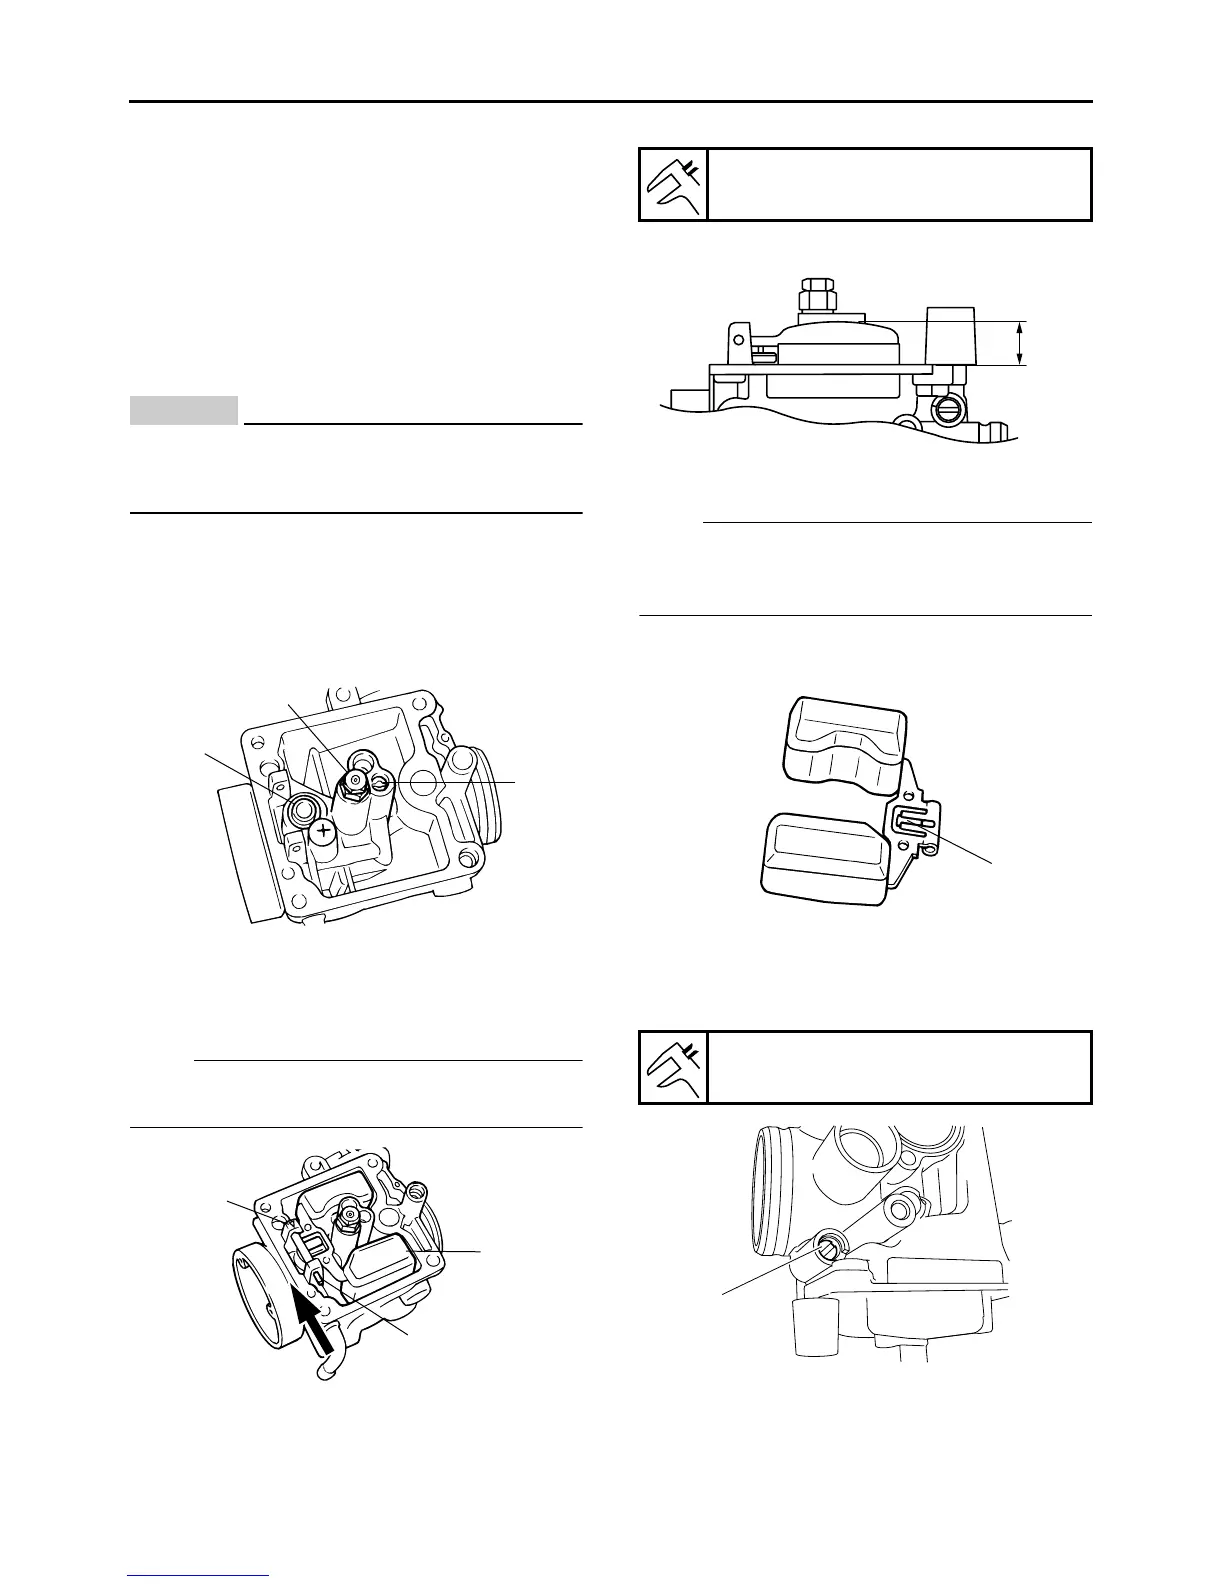
13.Check:
ECA14110
●
Before assembling the carburetor, wash all
of the parts in a petroleum-based solvent.
● Always use a new gasket.
1. Install:
● Needle jet
● Main jet holder
● Main jet “1”
●
Pilot jet “2”
● Needle valve seat “3”
2. Install:
● Needle valve
● Float “1”
●
Float pin “2”
NOTE:
Install the float pin in the reverse direction of ar-
row “a”.
3. Check:
●
Float height (dimention H) “a”
Remove the float chamber rubber gasket,
and measure the height from the float cham-
ber matching face to the float top face.
NOTE:
Temporarily lift the float, and check the oil level
when the needle valve end slightly touches the
float tongue.
Out of specification → Bend the loat tongue
“1” and adjust.
4. Install:
● Float chamber
● Pilot screw “1”
5. Install:
●
Piston valve
● Jet needle holder
● Jet needle kit “1”
1
3
2
1
2
a
Float height
11.9 mm (0.47 in)
Pilot screw turn out
2–1/2
a
1
1


 To Next Page