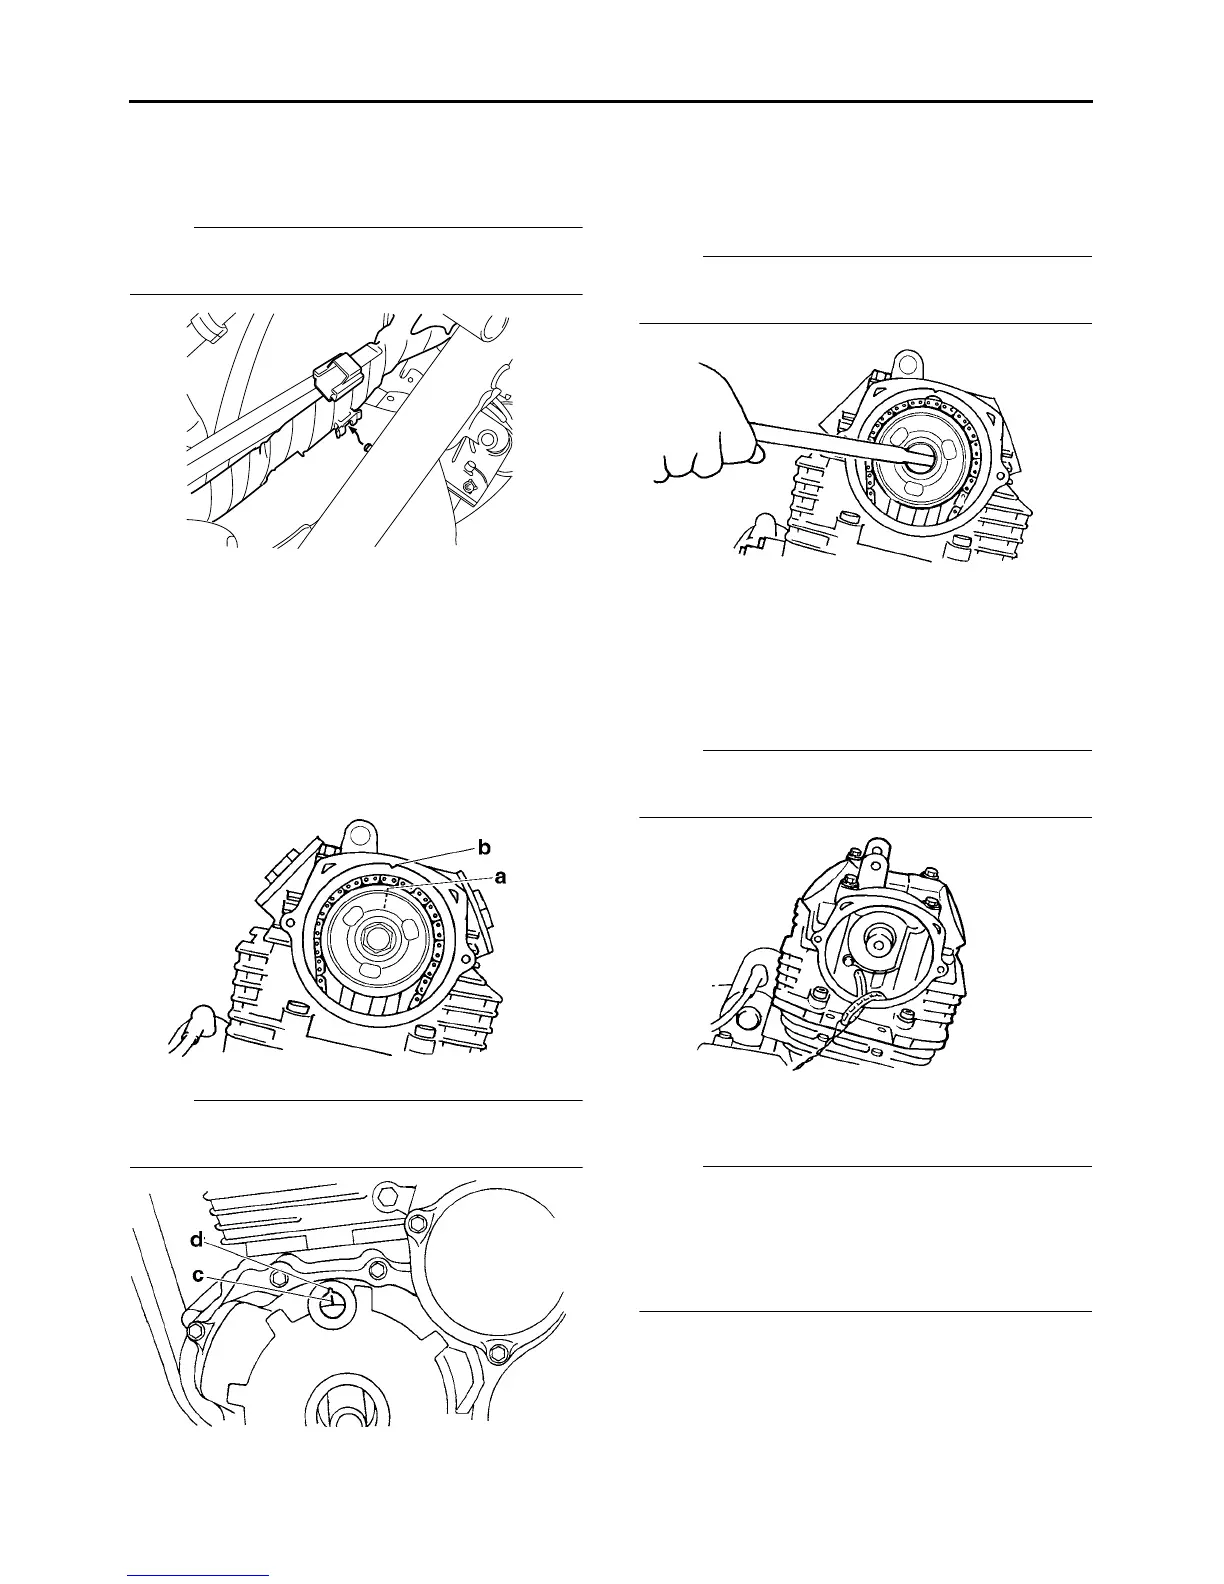
1. Disconnect:
Disconnect the wire harness from the T-stud of
vehicle frame.
2. Align:
● Mark “a” of the camshaft sprocket
(with mark “b” of the cylinder head)
▼▼▼▼▼▼▼▼▼▼▼▼▼▼▼▼▼▼▼▼▼▼▼▼▼▼▼▼▼▼▼▼
a. Turn the crankshaft counterclockwise.
b. When the piston is in the compression stroke,
align camshaft sprocket mark “a” with cylin-
der head mark “b”. (Compression stroke
TDC)
NOTE:
Make sure that generator rotor mark “c” aligns
with generator rotor cover mark “d”.
▲▲▲▲▲▲▲▲▲▲▲▲▲▲▲▲▲▲▲▲▲▲▲▲▲▲▲▲▲▲▲▲
3. Loosen:
● Camshaft sprocket bolt
NOTE:
Tighten the generator rotor bolts but loosen the
camshaft sprocket bolts using a wrench.
4. Remove:
● Timing chain tensioner
(along with the gasket)
●
Camshaft sprocket plate
● Camshaft sprocket
NOTE:
To prevent the timing chain from falling into the
crankcase, fasten it with a wire.
5. Remove:
● Cylinder head
NOTE:
● Loosen the cylinder head bolts in the correct
sequence as shown.
●
Loosen each cylinder head bolt for a half turn
at a time. When all cylinder head bolts are fully
loosened, remove them.