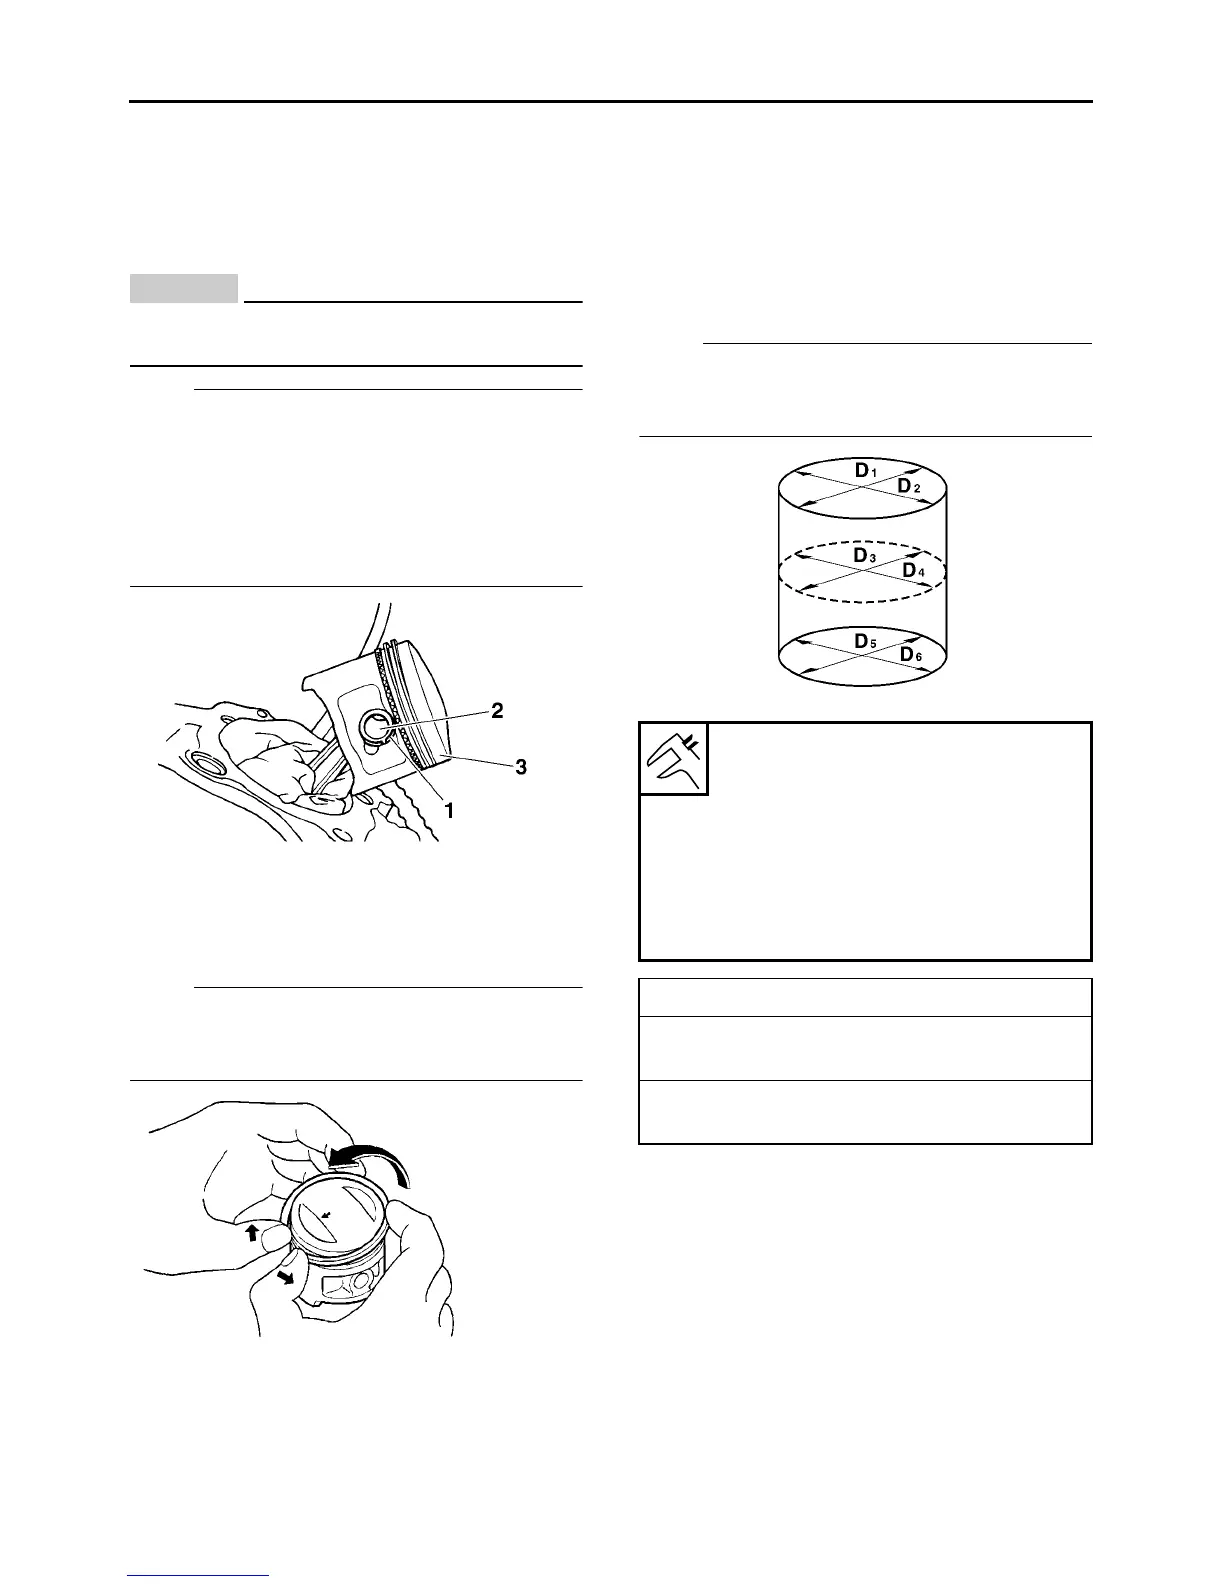
1. Remove:
ECA13810
Do not use a hammer to drive the piston pin
out.
NOTE:
●
Before removing the piston pin clip, cover the
crankcase opening with a clean rag to prevent
the piston pin clip from falling into the crank-
case.
● Before removing the piston pin, deburr the pis-
ton pin clip’s groove and the piston’s pin bore
area.
2. Remove:
● Top ring
● 2nd ring
● Oil ring
NOTE:
When removing a piston ring, open the end gap
with your fingers and lift the other side of the ring
over the piston crown.
EAS24390
CHECKING THE CYLINDER AND PISTON
1. Check:
● Piston wall
● Cylinder wall
Vertical scratches → Rebore or replace the
cylinder, and replace the piston and piston
rings as a set.
2. Measure:
● Piston-to-cylinder clearance
▼▼▼▼▼▼▼▼▼▼▼▼▼▼▼▼▼▼▼▼▼▼▼▼▼▼▼▼▼▼▼▼
a. Measure cylinder bore “C” with the cylinder
bore gauge.
NOTE:
Measure cylinder bore “C” by taking side-to-side
and front-to-back measurements of the cylinder.
Then, find the average of the measurements.
b. If out of specification, rebore or replace the
cylinder, and replace the piston and piston
rings as a set.
c. Measure piston skirt diameter D “a” with the
micrometer.
Bore
74.000–74.0µ16 mm
(2.9134–2.9140 in)
Wear limit
74.100 mm (2.9173 in)
Taper limit
0.050 mm (0.0020 in)
Out of round limit
0.010 mm (0.0004 in)
“C” = maximum of D
1
–D
2
“T” = maximum of D
1
or D
2
- maximum of D
5
or
D
6
“R” = maximum of D
1
, D
3
or D
5
- maximum of
D
2
, D
4
or D
6


 To Next Page