5-8 IM 04L20A01-01E
5.4 Displaying Measured Data Previously Acquired
(Historical Trend)
There are four methods for displaying the historical trend.
• Display from the alarm summary (see section 5.3.)
• Display from the message summary (see section 5.3.)
• Display from the memory summary (see section 5.3.)
• Call from the screen menu
Note
For the procedure related to displaying measured data on the external storage medium, see
section 7.6
.
Historical Trend <Operation Mode>
For details, see section 1.4, “
Display Function
.”
Procedure
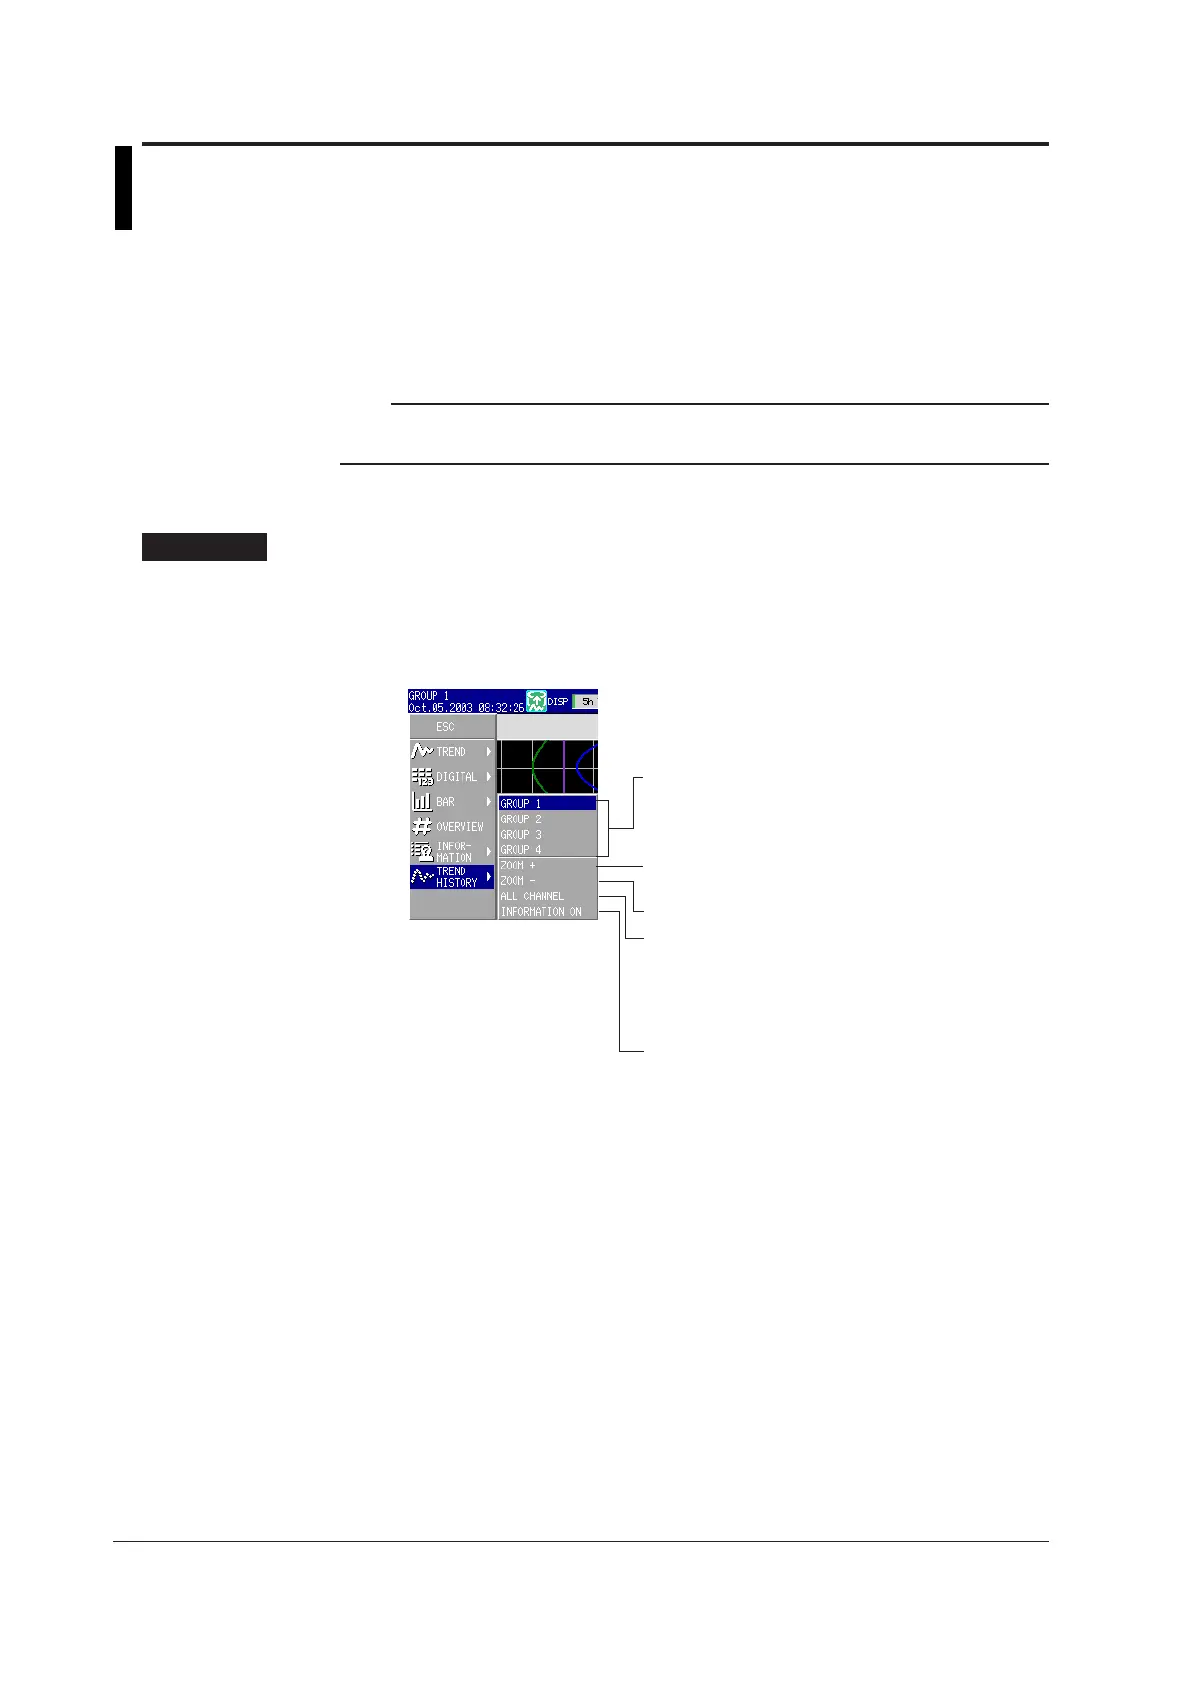
Changing the Display
1. Press the DISP/ENTER key to display the screen menu.
2. Press the right arrow key to display the sub menu.
3. Select the sub menu item using the up and down arrow keys.
ZOOM-: Displays by reducing the time axis.
ZOOM+: Displays by expanding the time axis.
(see "
Explanation
")
ALL CHANNEL:
Displays the waveform of all the channels
(see "
Explanation
" in section 5.1).
GROUP CHANNEL:
Displays the waveforms of the channels
registered to groups.
INFORMATION ON:
Displays the memory information.
CURSOR TIME ON:
Displays the time at the cursor position.
Sub menu of the historical trend screen
GROUP 1 to GROUP 4: Displays group 1 to 4.
The specified group name is displayed
in place of GROUP1 to GROUP4.
4. Press the DISP/ENTER key to execute the display.
To close the menu without switching the screen, press the ESC key.
Scrolling the Waveforms
Pressing the up or down arrow key (vertical display) or the left or right arrow key
(horizontal display) while displaying the historical trend scrolls the waveform by one
dot along the time axis. If you keep pressing the arrow key, the waveform scrolls by
two divisions.
Specifying the Displayed Position Using the Cursor
Enclosed in parentheses are for the horizontal trend display.
1. Press the right (up) arrow key to display the all data display in the right (upper)
section of the screen.
 Loading...