2-3
IM MX100-01E
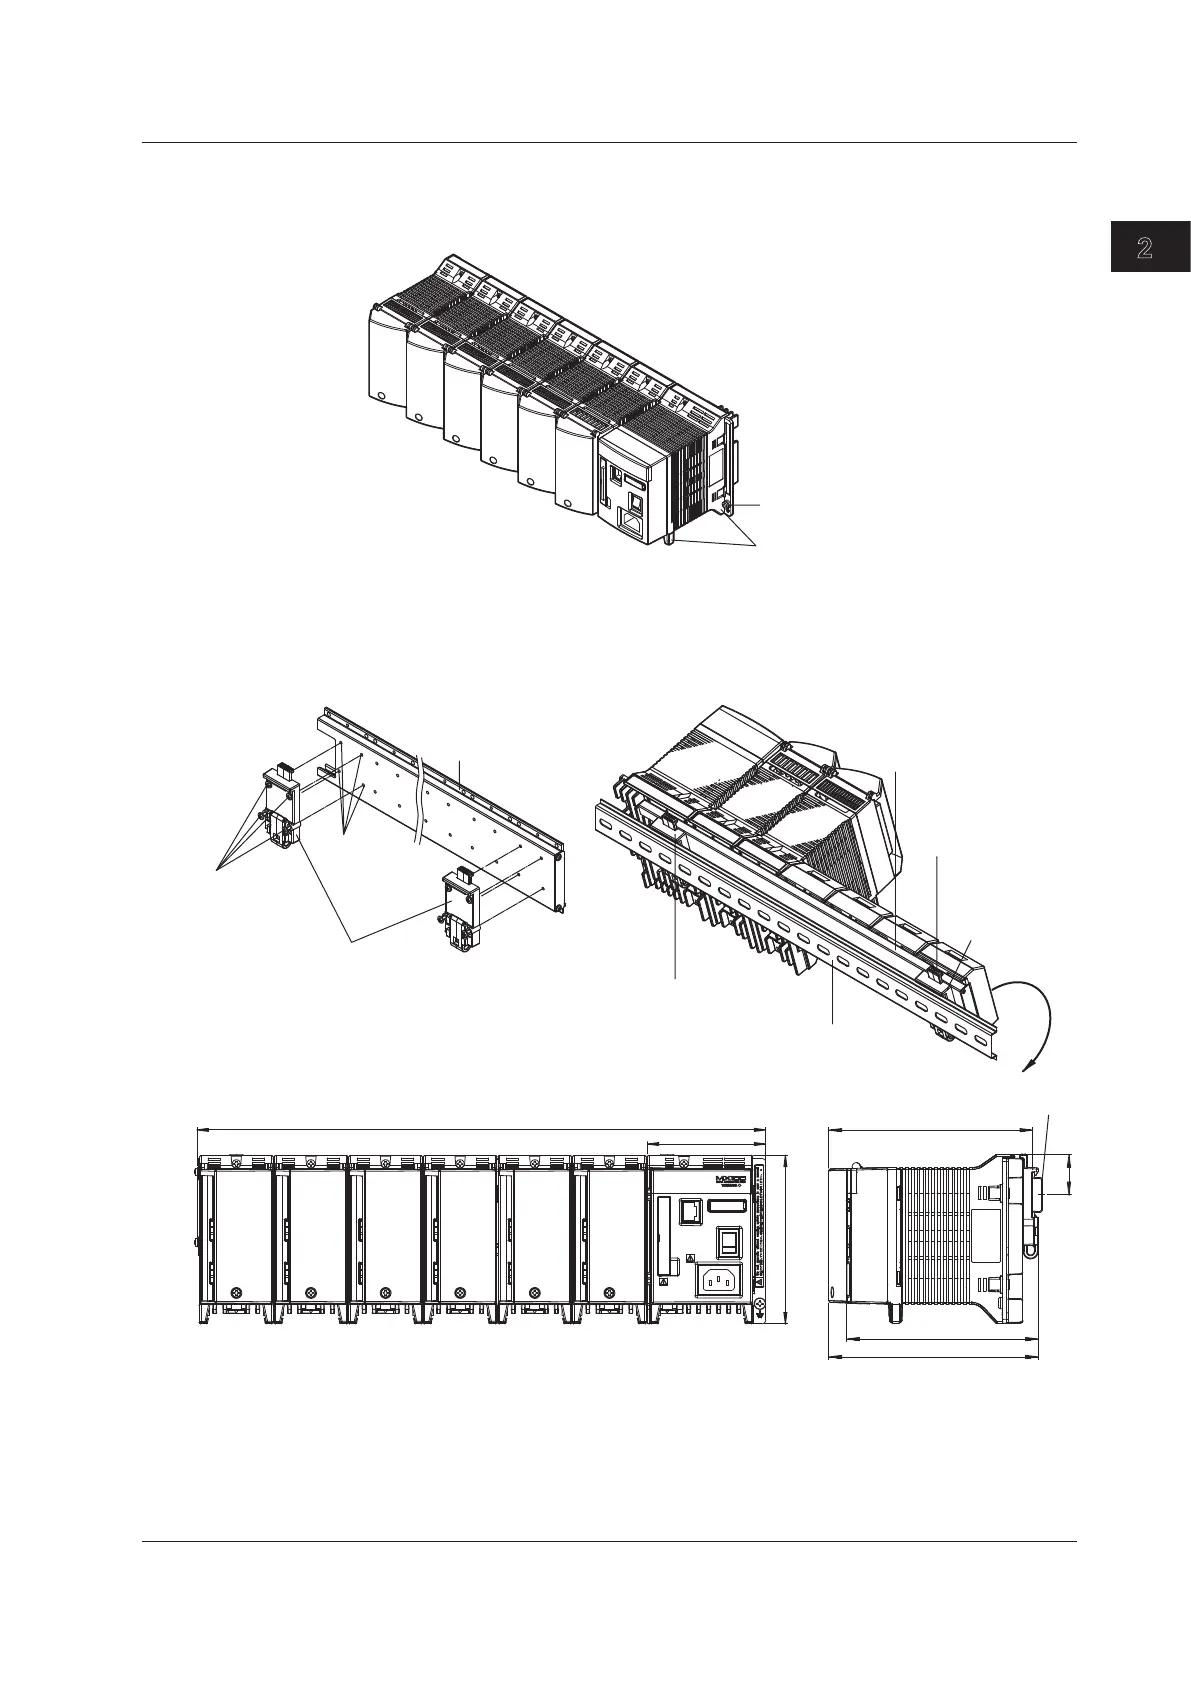
Installation and Wiring
Use on a Desktop or a Floor
Each module has feet that can be attached to the base plate allowing them to be placed
vertically. For the procedure for attaching the modules, see the next page.
Feet
Functional ground terminal screw
Attachment to a DIN Rail
As shown in the figure below, you can rack-mount or panel-mount the MX100 Data
Acquisition Unit by attaching a DIN rail mount bracket to the base plate.
92
163
149.2
158.6
31
131
Base plate
DIN rail mount bracket
Attachment
screws (M3)
Screw
holes
DIN rail*
Base plate
Latch lever
(press to release
from the DIN rail)
• Attachment of the base plate to the DIN rail
• Attachment of the DIN rail mount bracket
to the base plate
DIN rail mount
bracket
DIN rail mount bracket
442 (1 main module, for connecting six input/output modules)
• Dimensions when mounted on a DIN rail
DIN rail
Unit: mm
* To prevent slacks in the DIN rail, fix at
least three locations of the DIN rail.
2.2 Installation