2.6 Connecting the Ethernet Cable
Connection Procedure
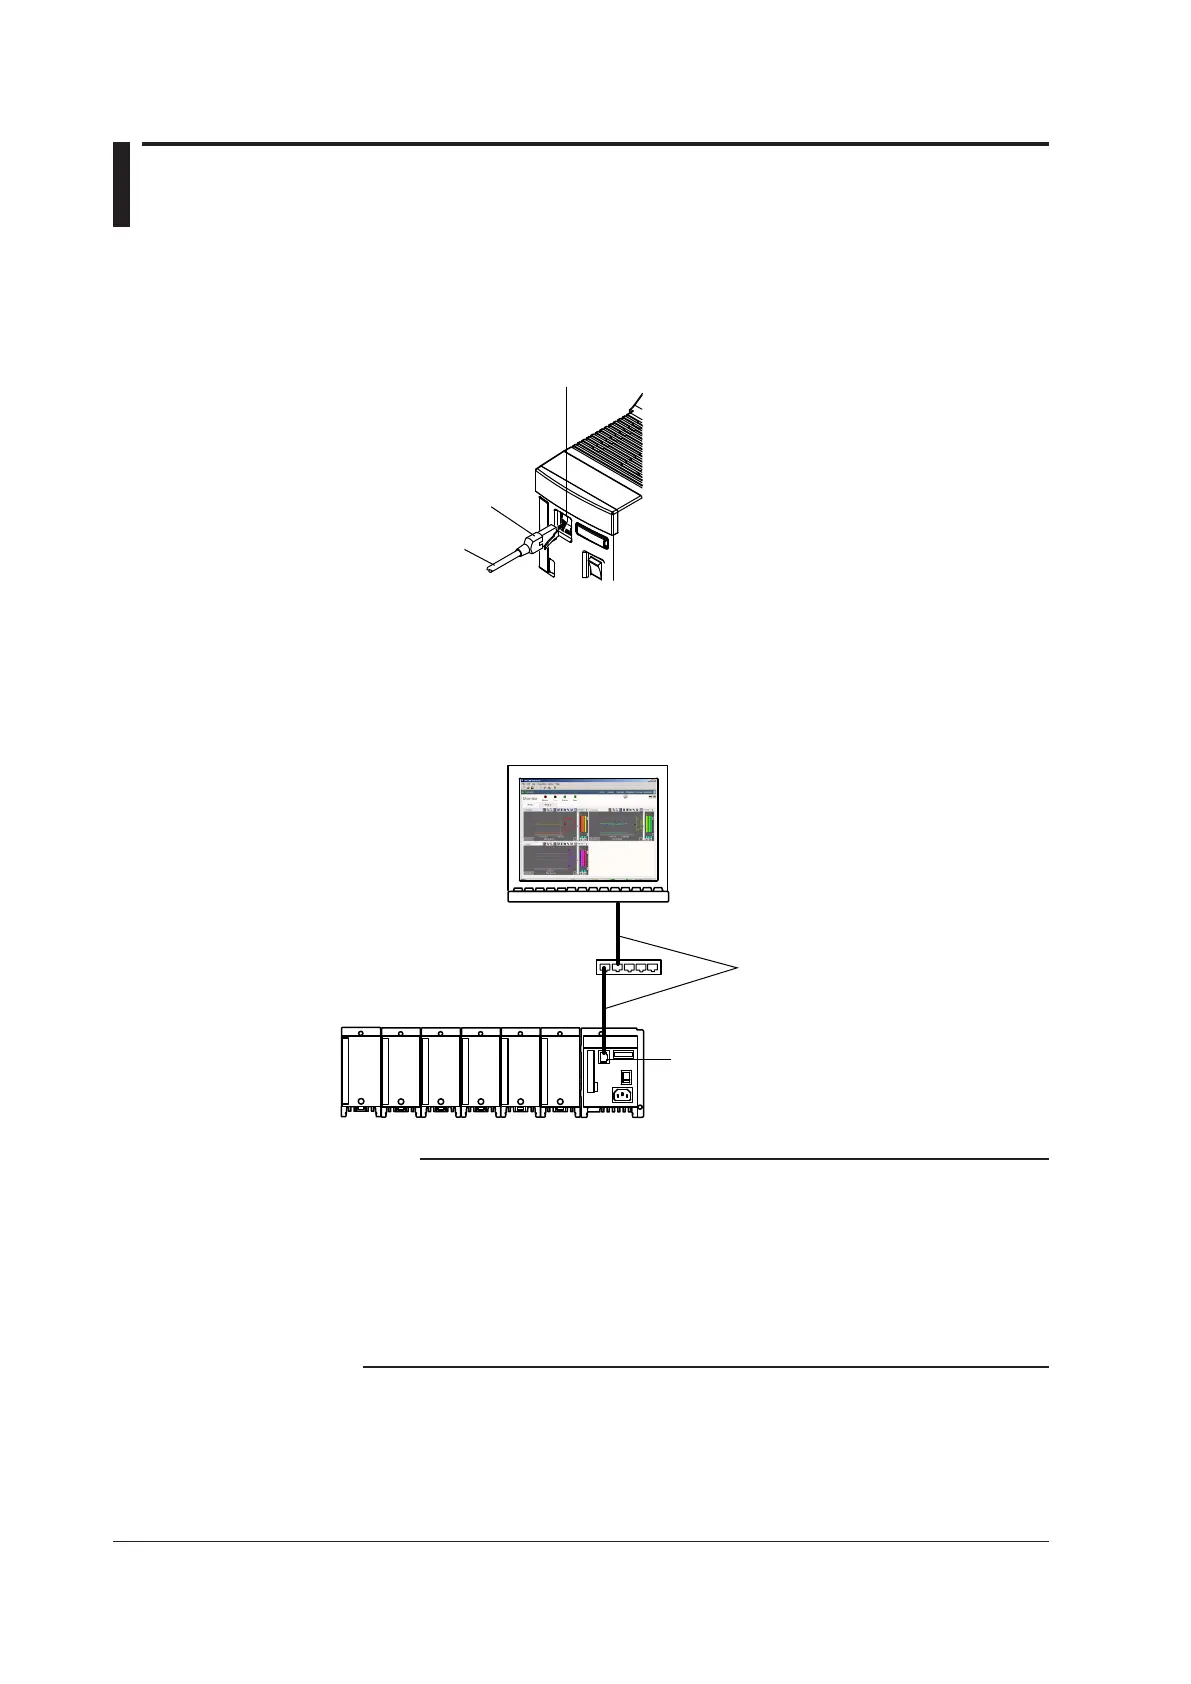
Connectors
Connect the Ethernet cable to the Ethernet port (10BASE-T/100BASE-TX) of the main
module. Use a UTP cable (category 5 or better) or an STP cable for the Ethernet cable.
RJ-45 modular jack
Ethernet port
Ethernet cable
Connection to the PC
Make the connection via a hub. For a one-to-one connection with a PC, make the
connection as shown in the figure below. Likewise, up to 20 MX100 Data Acquisition
Units can be connected to a single PC. However, to control multiple MX100 Data
Acquisition Units, you need MXLOGGER (software sold separately). You cannot control
multiple units using the MX Standard Software.
MX100
Hub
MX100 Data Acquisition Unit
Ethernet port
PC
LAN cable
(straight cable)
Note
•
The NIC on the PC should support 100BASE-TX (recommended) or 10BASE-T.
•
When connected to an external network, the communications within the network other than
those related to the MX100 may hinder the measurement operations on the MX100.
•
The MX100 can be connected to an auto-negotiating hub (between 10BASE-T and
100BASE-TX), but connection may fail on some hubs due to the hub not recognizing the
signal output from the MX100. If this happens, you can turn only dip switch 6 of the main
module OFF to fix the data rate to 10 Mbps. Operate the dip switch only when the power is
turned OFF.