58 Zebra ZXP Series 1 Card Printer Service Manual P1061942-001
2: Installation and Setup
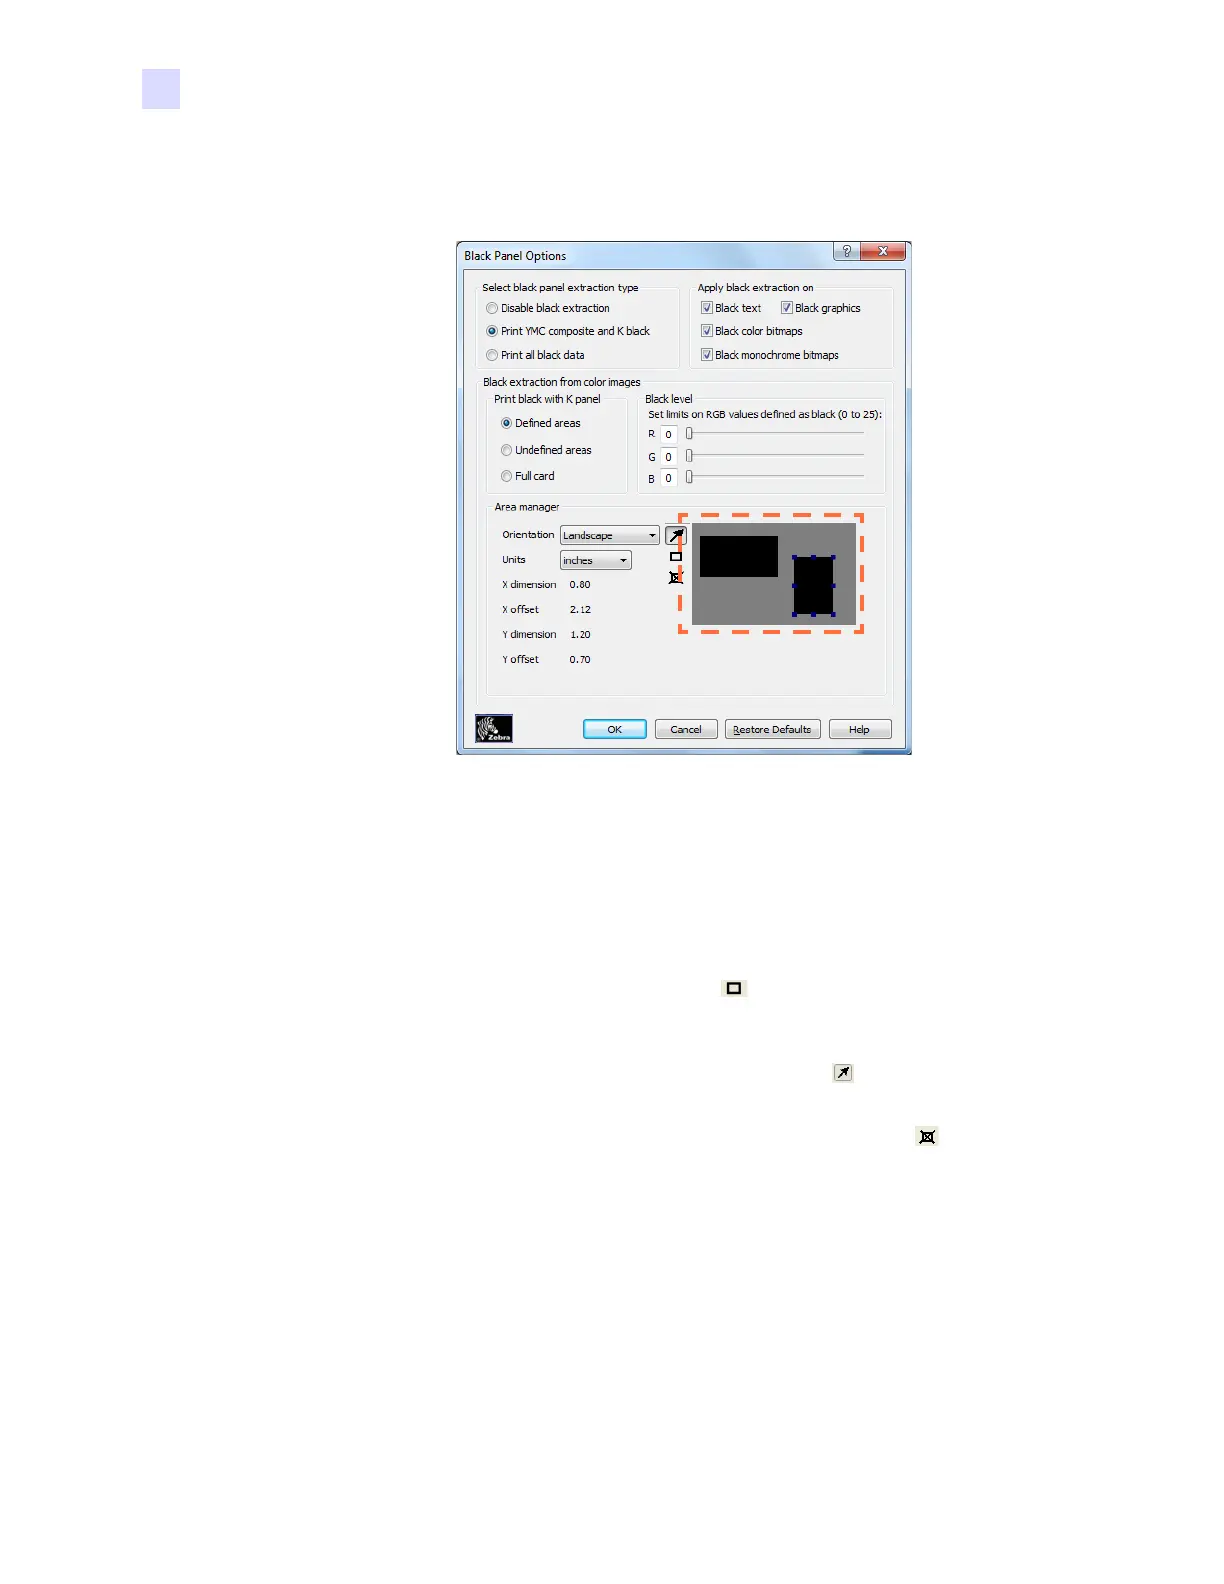
Changing the Printer Driver Options
• Area manager: This option is enabled when either the Defined areas (extract inside the
zone) or the Undefined areas (extract outside the zone) radio button is selected.
• Orientation: The Orientation selection sets the image orientation to either
Portrait or Landscape.
• Units: The Units selection sets the units to either inches or mm (millimeters). The
X-dimension, X-offset, Y-dimension, and Y-offset reflect these units.
To create a zone: Select the rectangle icon , click on an area of the image to
establish the first corner of the zone, drag the cursor until the zone is the desired size
and shape, then release the mouse button. Note that multiple zones can be defined.
To select, move, or resize a zone: Select the arrow icon , click on a zone to select
it, then drag it to move it, or drag on the edges to resize it.
To delete a zone: Select the rectangle icon with an "X" through it , then click on
the zone that you want to delete.
In practice, determine the size of the area the question (e.g., the exclusion zone for the ID
card portrait); then click one of the six radio buttons to activate the dimensioning boxes
(probably button #1 in the first instance). Then set the area size and offsets to match the
portrait; then, if no other exclusion zones are required, check the “confirm settings” box.
This would gray-out everything in the Area Manager box.
If another area is required (e.g., a ghosted smaller portrait), before confirming the settings,
select the next button; then size the area in the same way. To add another area, or to null an
existing area, simply uncheck the “confirm” box. There is no means of zeroing a box
automatically; simply null the settings manually.
 Loading...