Control connections and conguration
Quick Setup for Terminal Cong 4.
Features Forward and reverse operation controlled from pushbuttons. Selection between Local
and Remote by a switch contact closure.
Procedure
STEP 1. Complete the power wiring according to the instructions on pages 9 to 18
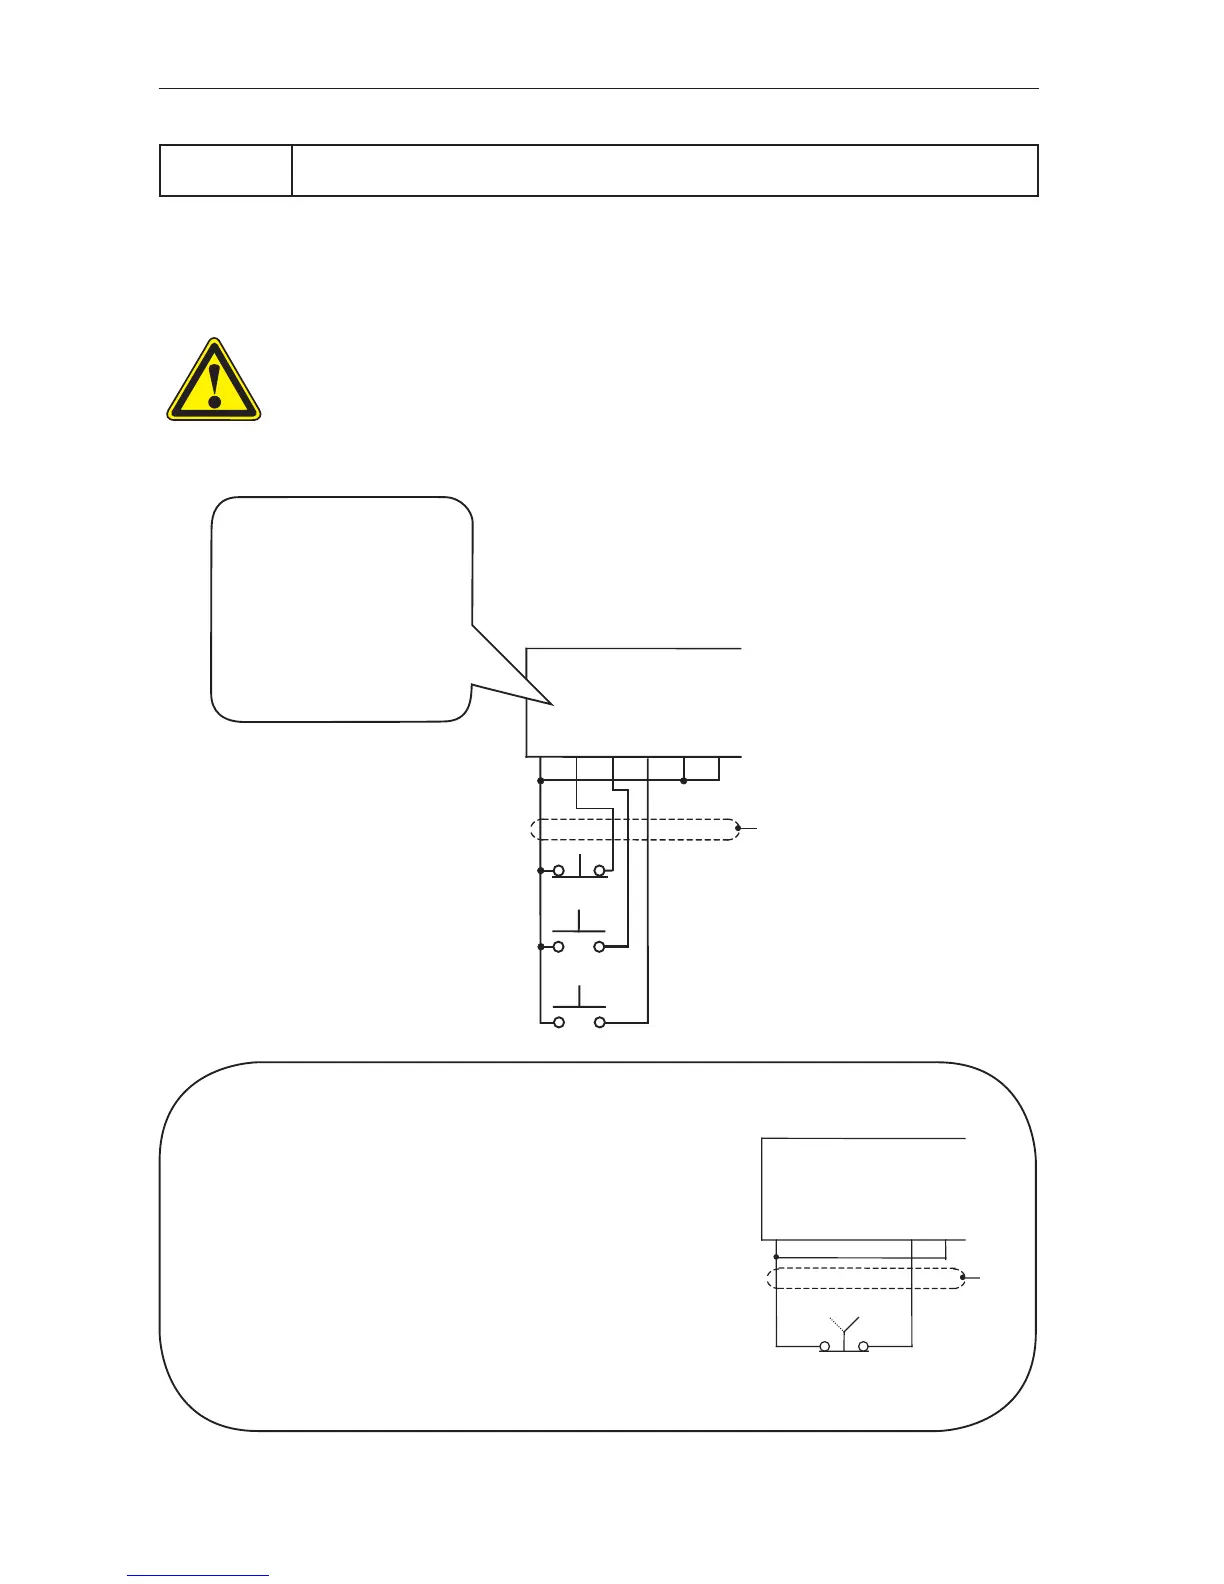
STEP 2. Connect your control wiring as shown.
CAUTION
Do not connect the wire to terminal 6 yet.
The terminal conguration should not be changed while the MSC-3 is enabled.
i
Local / Remote Selection
The Local/Remote Selection can be used in
conjunction with any of the above circuits. Wire
terminals 5 and 6 as shown.
In “local” the MSC-3 is stopped and started from
the front panel console. In “remote”, the MSC-3
stop / start is controlled from the terminal strip.
The source of the speed reference in both modes
may be independently congured to come from
a wide variety of sources including the terminal
strip, console up/down buttons, preset values
and the output of optional features such as the
PID controller and networked communications
i
The function of terminals D1...4
are programmable. In this
conguration (Terminal cong
4), the following functions are
assigned to the terminals:
I02 ~ STOP D1
I00 FWD & LATCH D2
I01 REV & LATCH D3
I11 REMOTE D4