11
a
HOME PAGE Firmware Update
1. To check for firmware updates, connect the 3M™ Attest™ Auto-reader 490M to your PC when all incubation wells are empty. Open your PC’s System Tray,
right click on the 3M™ Attest™ Connect icon
, and click on About. Click on the Check for Updates button. If 3M has released a firmware update, an
Install Update button will appear on the Home page. Click the Install Update button to initiate the firmware update.
Notes:
- Firmware updates are available only to registered users who have installed 3M™ Attest™ Connect. You will be prompted to install the latest version of
3M™ Attest™ Connect software, if an update is available, before installing the firmware update.
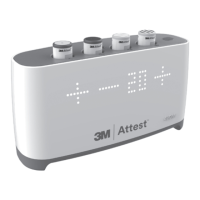
- The 3M™ Attest™ Mini Auto-reader 490M must be empty (i.e., have no incubating BIs) when a firmware update is installed.
HISTORY PAGE
Navigate to the History page by clicking
the History button on the Home page.
The History page provides a summary
of the data for all incubated BIs. While
the 3M™ Attest™ Mini Auto-reader
490M saves only the last 1,250 records,
3M™ Attest™ Connect can save
all records. Records are numbered
sequentially. Any positive (+) results for BIs
which have not been designated a control
BI are highlighted in red (e.g., Record 11 in
screenshot). The data in the History page
can be sorted by clicking on any of the
column headers.
For additional analysis, if desired, click
the Export button to create a .csv file
which will be assigned a unique file name
and stored in C: > 3MAttestConnect. The
exported file includes both the Auto-reader
Values and the User Values for each record.
There are two ways to navigate to a specific BI Details page from the History page:
1. Find the desired record, highlight the row, and click Details.
2. Find the desired record and double click anywhere in the row.
BI DETAILS PAGE
This page is used to document BI type,
BI lot number, control status, and
associate a processed BI with a specific
sterilization cycle. Only one BI Details
Page can be open at a time.
The top five fields (Auto-reader Values)
are populated automatically by the
3M™ Attest™ Mini Auto-reader 490M
and cannot be changed by the user.
The remaining fields (User Values) are
completed by the end-user.
3M™ Attest™ Connect learns entered
values to create a drop-down list of entries
specific to your facility. Selections may
be eliminated from the dropdown list by
right-clicking on the targeted value and
responding Ye s to the Delete message.
The data entered in the User Values
section of the BI Details page may be
edited before or after the data is saved.
IMPORTANT: To create a permanent
record, click Print to generate an individual BI record which can be printed from a
networked printer and saved as a paper file or saved as an electronic record (file is
saved to C: > 3MAttestConnect).*
* Refer to your facility’s record keeping policy and procedure.
 Loading...