5
32
5- Sensors and actuators
5�2 Example
In this example, we have connected a Landis & Gyr Ni1000 room sen-
sor to temperature input 1. To congure the sensor you need to be
logged in as "cong".
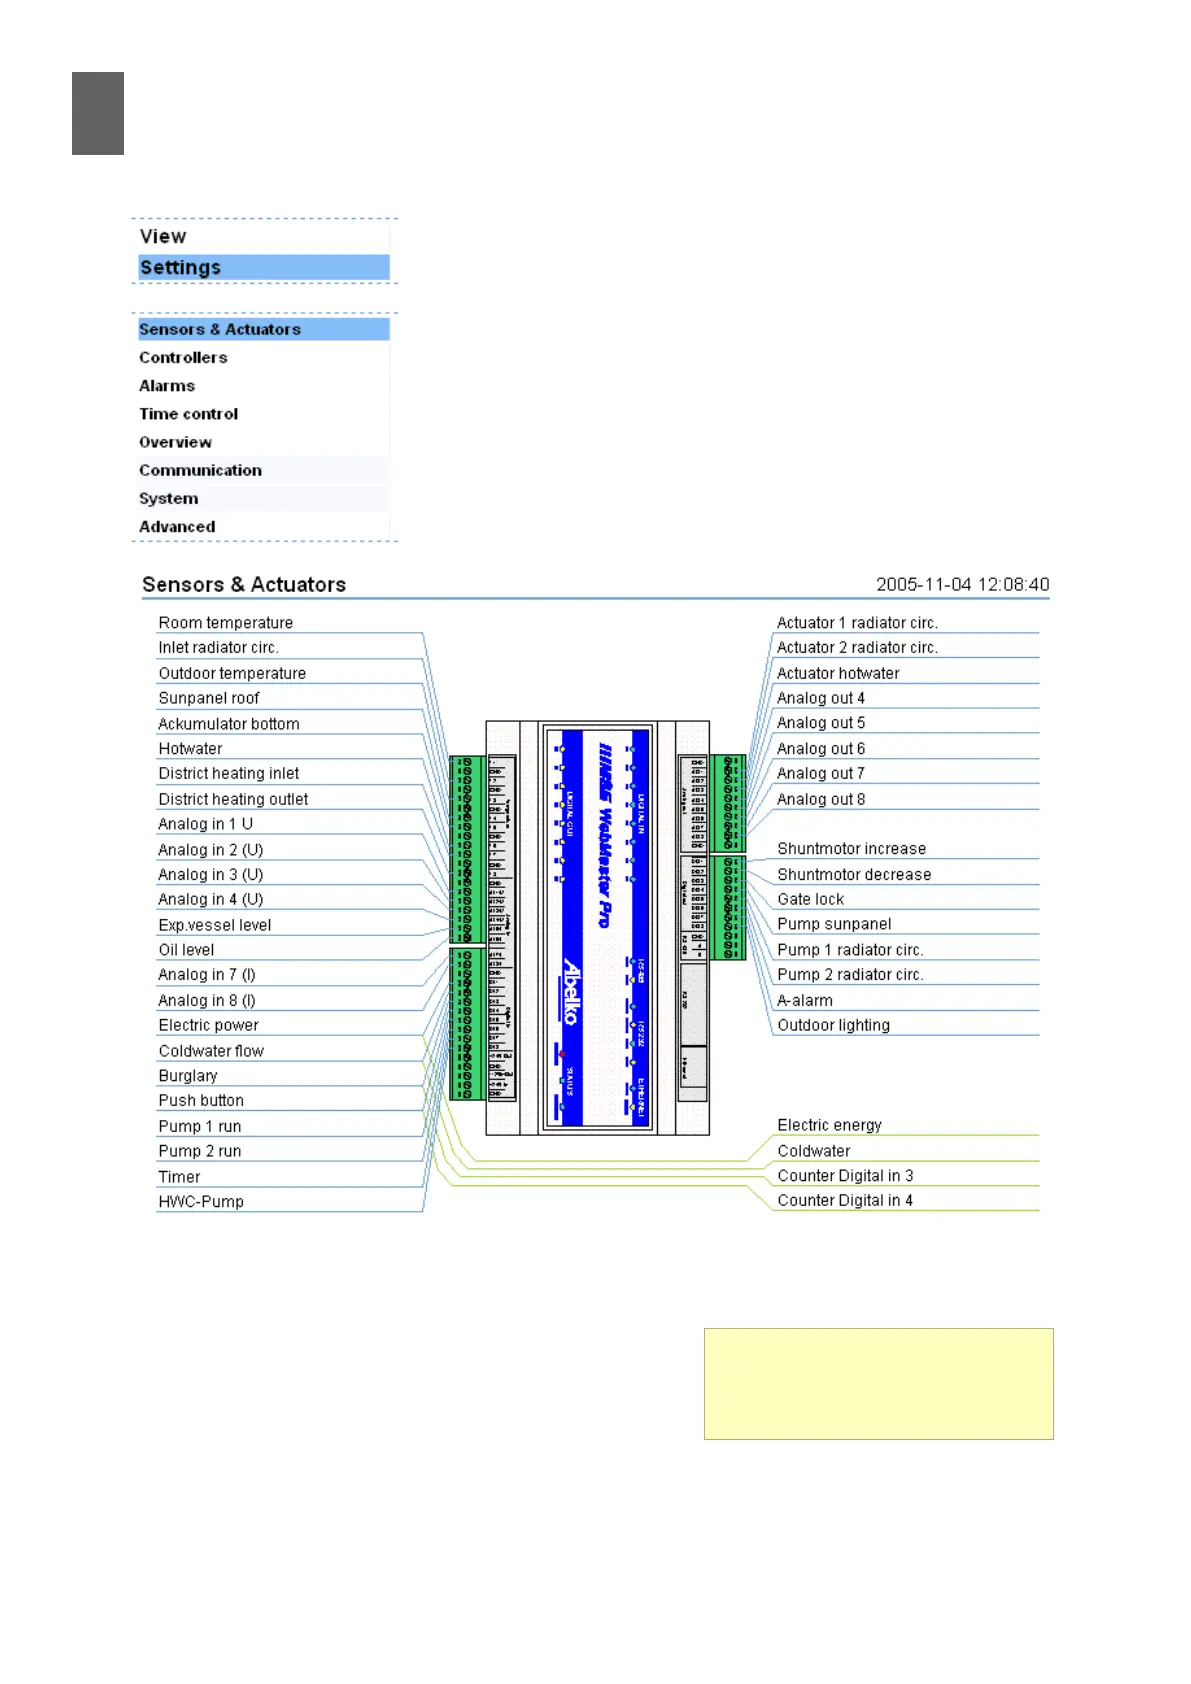
Select Settings/Sensors & Actuators to see how the system as a
whole is congured.
The sensor is connected to T1, so there is already a temperature
reading for this input. The WMPro initially assumes that temperature
sensors are Pt1000 sensors, so the temperature displayed is slightly
higher than the real temperature.
Click on the name to start the conguration tool. Java must be installed on your computer. If you see
a message similar to "Do you want to install and run signed applet distributed by Abelko", answer
Yes.
The top part of the applet is where you change the sensor
settings. Give it a name – Room temperature – and select
the correct type from the drop-down list box. Also select
a scaling value, the number of decimal places you want
to display, and an oset if you want to apply one. Find out
more about the scaling and oset functions in 5.3.
Scaling
For scaling you can choose from
ºCelsius, ºFahrenheit, Kelvin.