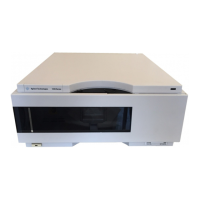
152 1100 Series WS MWS Reference Manual
4 Repairing the Sampler
Power Supply
Removing the power supply
1 In the user interface start the maintenance mode and select the “Change
Needle/Seat” function.
2 Switch off the sampler at the main power switch. Remove the power cable.
3 Remove the top cover, top plate, and foam (see “Top Cover and Foam" on
page 132).
4 Remove the plate tray from the tray base.
5 Remove the transport assembly, (see “Removing the sample transport" on
page 133).
6 Remove the sampling unit, (see “Removing the sampling unit" on page 134).
7 Remove the MTP main board, (see “Removing the MTP main board" on
page 146).
8 Remove the fan, (see “Removing the main fan" on page 144).
9 Remove the bottom foam.
10 Remove the exhaust fan, (see “Removing the exhaust fan" on page 145).
11 Remove the power switch light pipe from the coupler.
12 Remove the two screws which hold the power supply from the rear panel.
13 Lift the power supply out of the module.
14 Remove the coupler from the switch of the power supply.
When required When defective
Tools required 1/4 inch-5/16 inch wrench 8710-0510 (supplied in accessory kit)
4 mm open end wrench 8710-1534 (supplied in accessory kit)
Pozidrive screwdriver
Parts required 0950-2528 (rev. G and higher only) Power supply
CAUTION
The MTP board is sensitive to electrostatic discharge. Always use the ESD strap (see
“Using the ESD Strap" on page 107) when handling electronic boards.
 Loading...