Installing the Sampler 1
1100 Series WS MWS Reference Manual 27
8 Re-install the left side door (take care of the magnet at the back).
9 Place the sampler on top of the thermostat. Make sure that the sampler is
correctly engaged in the thermostat locks.
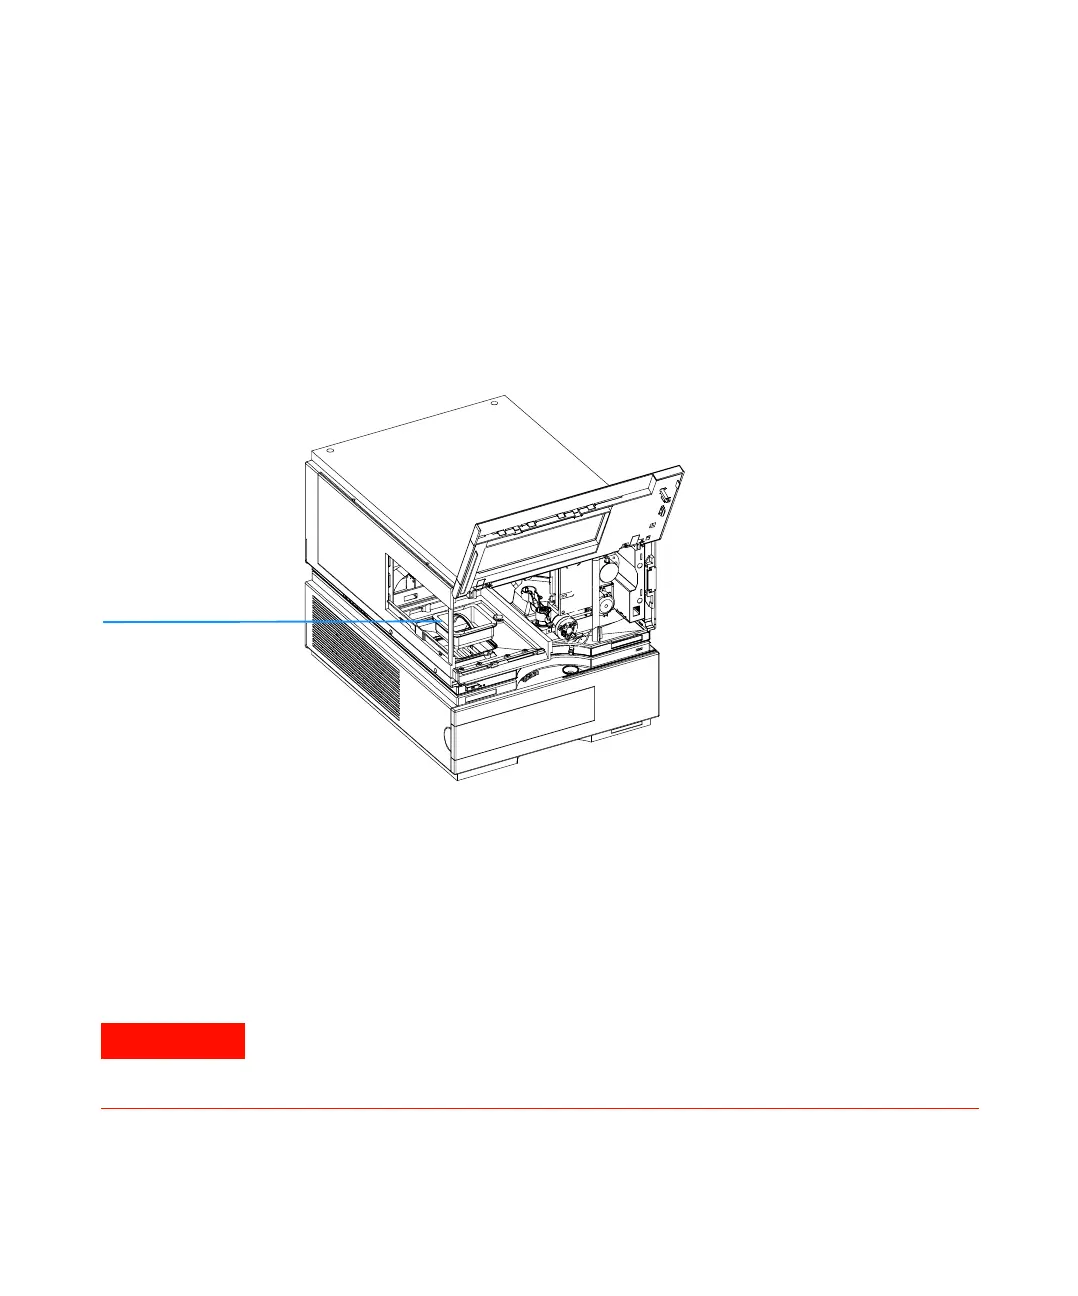
10 Remove the tray and the plastic cover from the tray base, place the air
channel adapter into the sampler tray base. Make sure the adapter is fully
pressed down. This assures that the cold airstream from the thermostat is
correctly guided to the tray area of the well-plate sampler.
11 Re-install the tray.
12 Ensure the power switch on the front of the sampler is 0FF and the power
cables are disconnected.
13 Connect the cable between the well-plate sampler and the thermostat, see
“Connection at the rear of thermostatted Sampler" on page 29.
Figure 7 Installation of Thermostat and Sampler
Air channel adapter
WARNING
Do not disconnect or reconnect the well-plate sampler to thermostat cable when the
power cords are connected to either of the two modules. This will damage the
electronics of the modules.
 Loading...