CHAPTER 5: MAINTENANCE
LW500A/LW600A PULSED Nd:YAG LASER
5-18
990-539
Required items
Ion-exchange replacement tool
Secondary cooling water
PH-10 hand pump
Ion-exchange resin refill
Phillips screwdriver
Latex Gloves (powder free)
Clean container, such as a bucket.
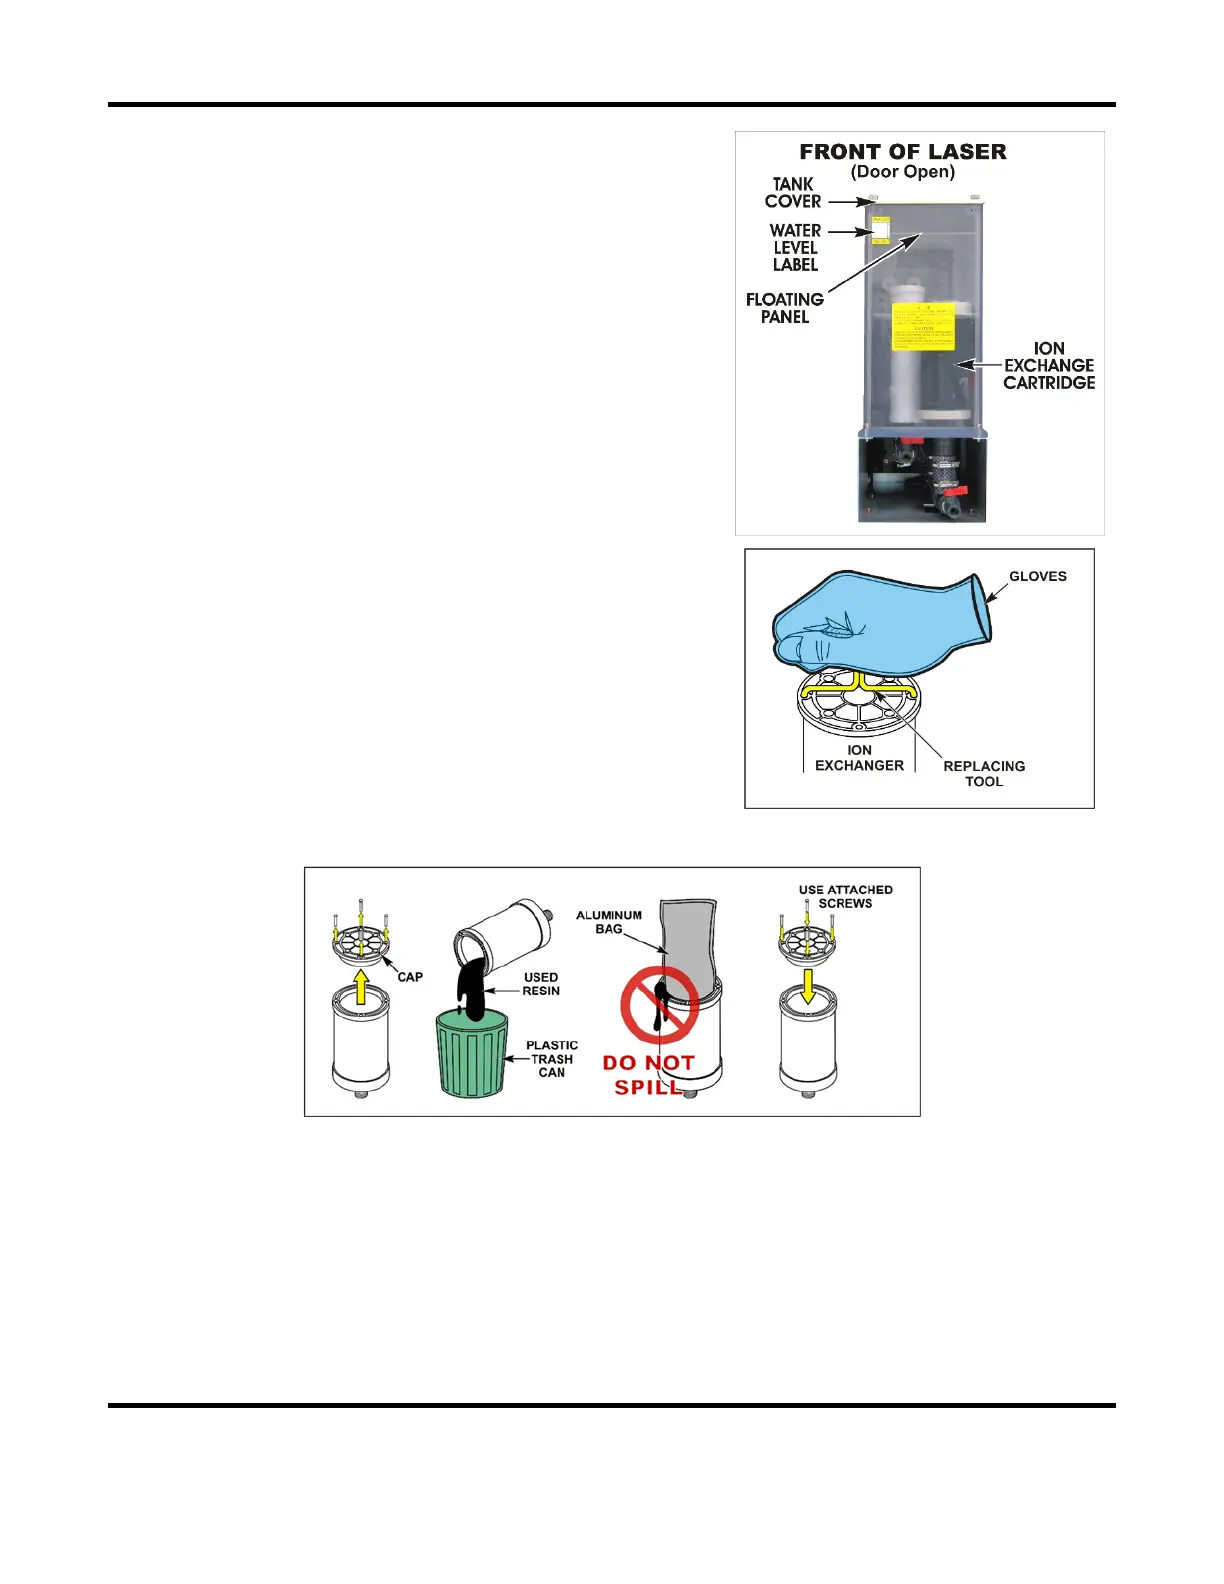
1. Remove the cover of the cooling water tank and take
out the floating panel. (Keep it clean).
2. Use a hand pump to remove water from the cooling
water tank.
3.
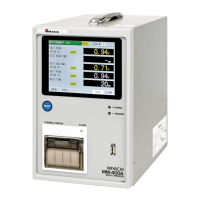
Turn the ion-exchange cartridge in the tank to the left
(CCW) with the replacement tool (AMYA # 451-082)
to remove it. The ion-exchange cartridge screws into
the base of the cooling water tank. Depending on the
date of manufacture, the ion-exchange cartridge may
be in a slightly different location.
4.
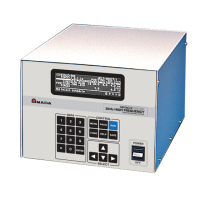
Remove the four screws (M4x16mm, stainless steel)
from the cap of the cartridge and pull up on the cap.
5.
Discard the used resin. Dispose the used resin in a
plastic trash can.
6. Put the resin refill into the cartridge taking care not to spill it.
7. Wipe off the excess resin on the edge of the cartridge. Reinstall the cap, and screw it down.
8. Insert the ion-exchange resin cartridge into the cooling water tank and turn it to the right (CW)
with the replacement tool to tighten. Do not over-tighten.
9. Supply the secondary cooling water, with the hand pump, until it reaches the
HIGH
line on the
water level label.
10. Return the floating panel in the cooling water tank. Return and secure the cooling water tank
cover.


 To Next Page