Local Operation
M370430-01 Rev B 3-5
Navigating the Menu System
The menu system of the XG/XTR follows a select and set model with
the exception of the VOLTS and AMPS modes. See “Setting VOLTS
and AMPS Modes”.
The general procedure for setting up the features in the select and
set model is:
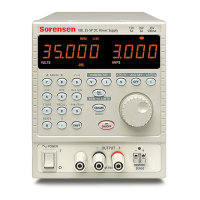
1. To select a mode, rotate the 9-position Mode control to the
desired mode or press the rotary Adjust/Enter control once to
activate the current selection on the mode control knob. See
Figure 3-3.
2. To select the feature or setting, rotate the rotary Adjust/Enter
control to scroll through the different available settings of that
mode.
The settings appear on the output current display.
3. Press the rotary Adjust/Enter control to select the feature or
setting.
4. Set each value using the rotary Adjust/Enter control. When
the value has been selected, press the rotary Adjust/Enter
control to commit the updated value. Additional values may
become available, depending on the setting that is being
configured.
Setting VOLTS and AMPS Modes
The only exceptions to the select and set model are the VOLTS and
AMPS modes which do not allow the selection of tracking and select
and set mode by turning the rotary Adjust/Enter control. In VOLTS and
AMPS modes, the default entry mode setting is automatically selected
as either voltage or current tracking, respectively.
Voltage and current values can be set in tracking mode or select and set
mode using the rotary Adjust/Enter control:
Tracking mode—the new values take effect as the rotary
Adjust/Enter control is rotated.
Select and set mode—the new values do not take effect until the
rotary Adjust/Enter control is pressed. See “Normal Display Mode
and Inactivity Timeout” on page 3-7.

 Loading...