TIP:
• Use the POS. button (located at the bottom of the Web RCS interface) to automatically position the view to the
screen
• Use the VIEW ASPECT button (located at the bottom of the Web RCS interface) to automatically adjust the
view to the screen (SEE: Screen fill templates for more information).
To flip the view:
Front Panel
1. Enter the INPUTS menu on the Front Panel interface.
2. Scroll down and select an input to access the selected input setup menu.
TIP: Double-click on an INPUT SELECTION button to shortcut to the input setup menu directly.
3. Select "View" Settings to access the input's view settings menu.
4. Select Flip and select the flip movement to apply to the live input.
Available flip movements include:
Web RCS
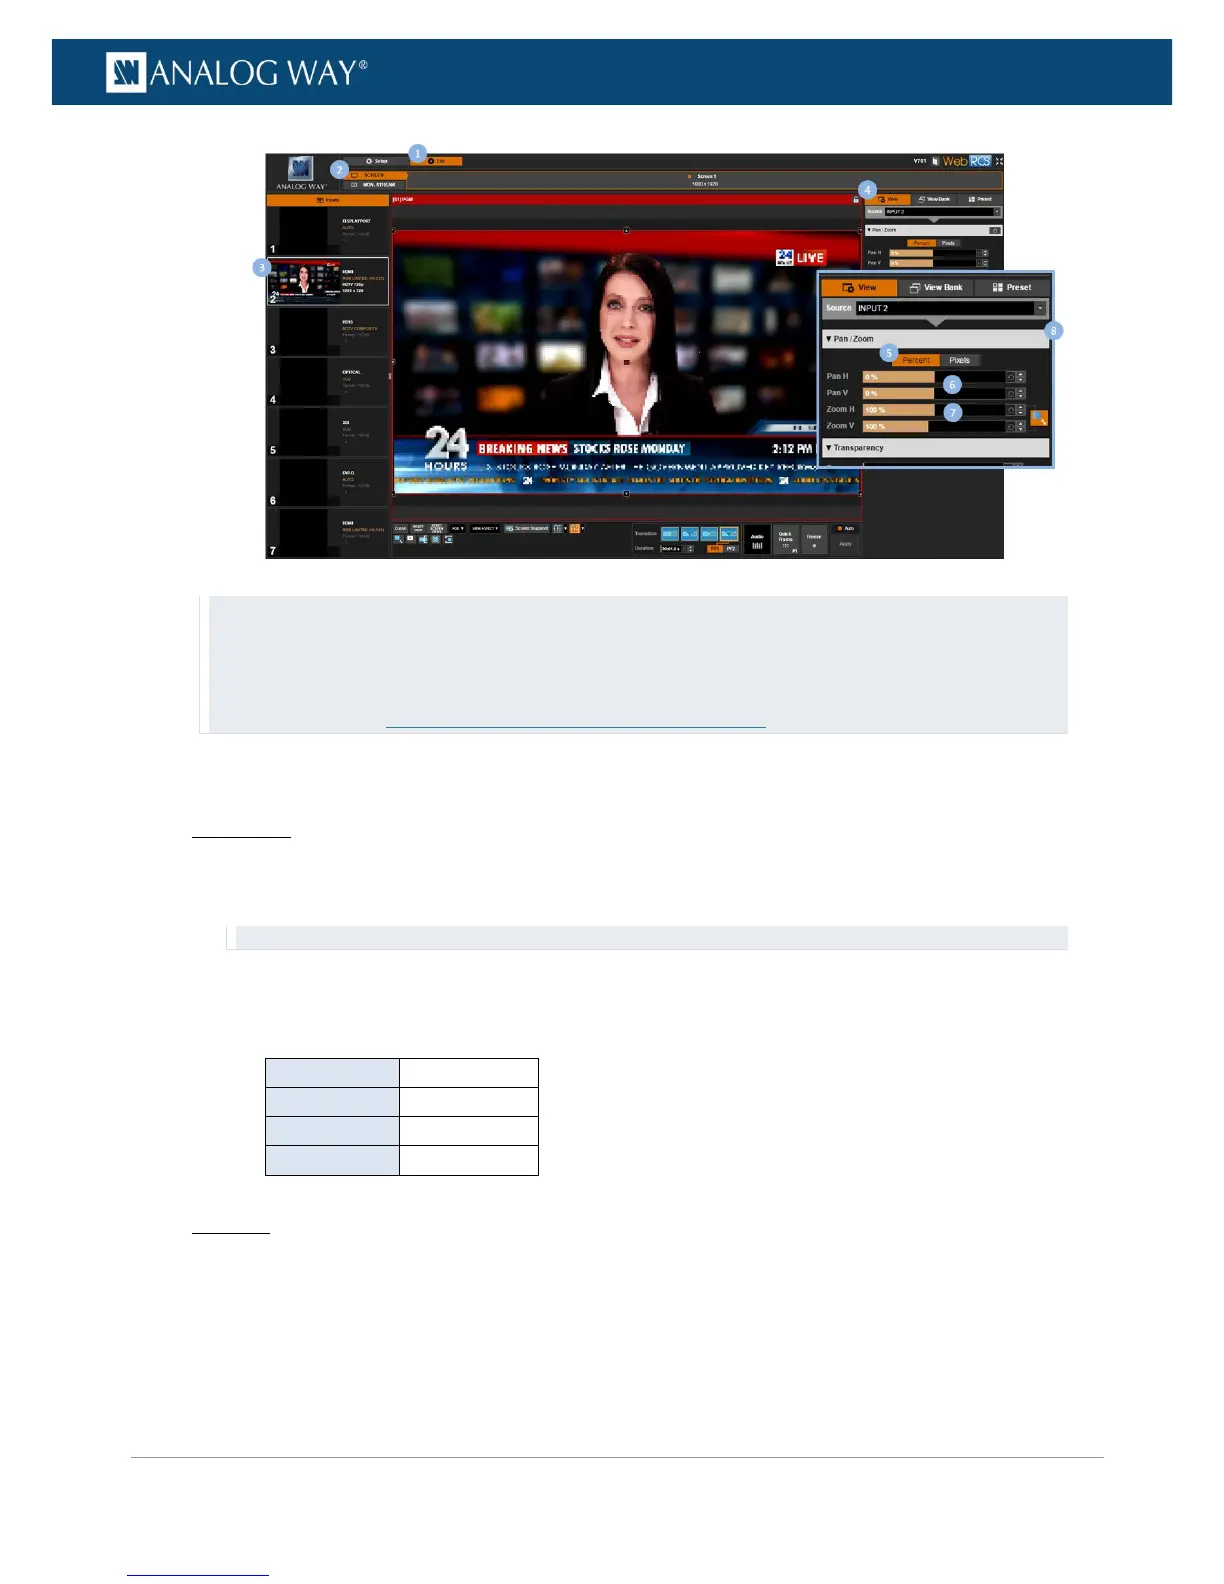
1. Go to the Edit menu on the Web RCS interface.
2. Select the SCREEN tab to access the screen edit page.
3. In the left side toolbar, select an INPUT to load the input view settings.
4. In the right side toolbar, select View to access the input's View settings.
 Loading...
