Warning:
If you are connected to a PoE connection, do not use the AC power adapter.
To use gigabit Ethernet, you must connect to the LAN through CAT-5e (or later) cables.
To connect the AC adapter to the AC adapter jack in the bottom of the IP Deskphone use the
following procedure:
1. Form a small bend in the cable.
2. Thread the adapter cord through the channels in the stand.
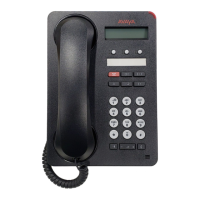
Connecting the handset
Use the following procedure to connect the handset to the IP Deskphone.
1. Connect the end of the handset cable with a short straight section to the handset.
2. Connect the end of the handset cable with the long straight section, into the RJ-9 handset
jack marked with the handset symbol on the back of the IP Deskphone.
The handset symbol is as follows:
3. Form a small bend in the cable.
4. Thread the handset cord through the channels in the stand so that it exits behind the
handset on the right side, using the handset cord exit in the stand base marked with the
handset symbol.
Connecting the headset (optional)
Use the following procedure to connect the optional headset to the IP Deskphone.
1. On the back of the IP Deskphone, plug the headset connector into the RJ-9 headset jack
marked with the headset symbol.
The headset symbol is as follows:
2. Thread the headset cord, along with the handset cord, through the channels in the stand so
that the headset cord exits the channel marked with the headset symbol.
Selecting the headset tuning parameter
Follow this procedure after the 1120E IP Deskphone and headset are installed and you are using
the IP Deskphone for the first time with the headset.
Connecting the components
August 2017 Avaya 1140E IP Deskphone with SIP Software User Guide 49
Comments on this document? infodev@avaya.com

 Loading...