8 Aviat Networks
Chapter 3. Eclipse Edge Installation
To attach the ODU:
Before proceeding first check that the antenna hub, ODU mount plate, and antenna
and ODU feed heads are undamaged, clean, and dry.
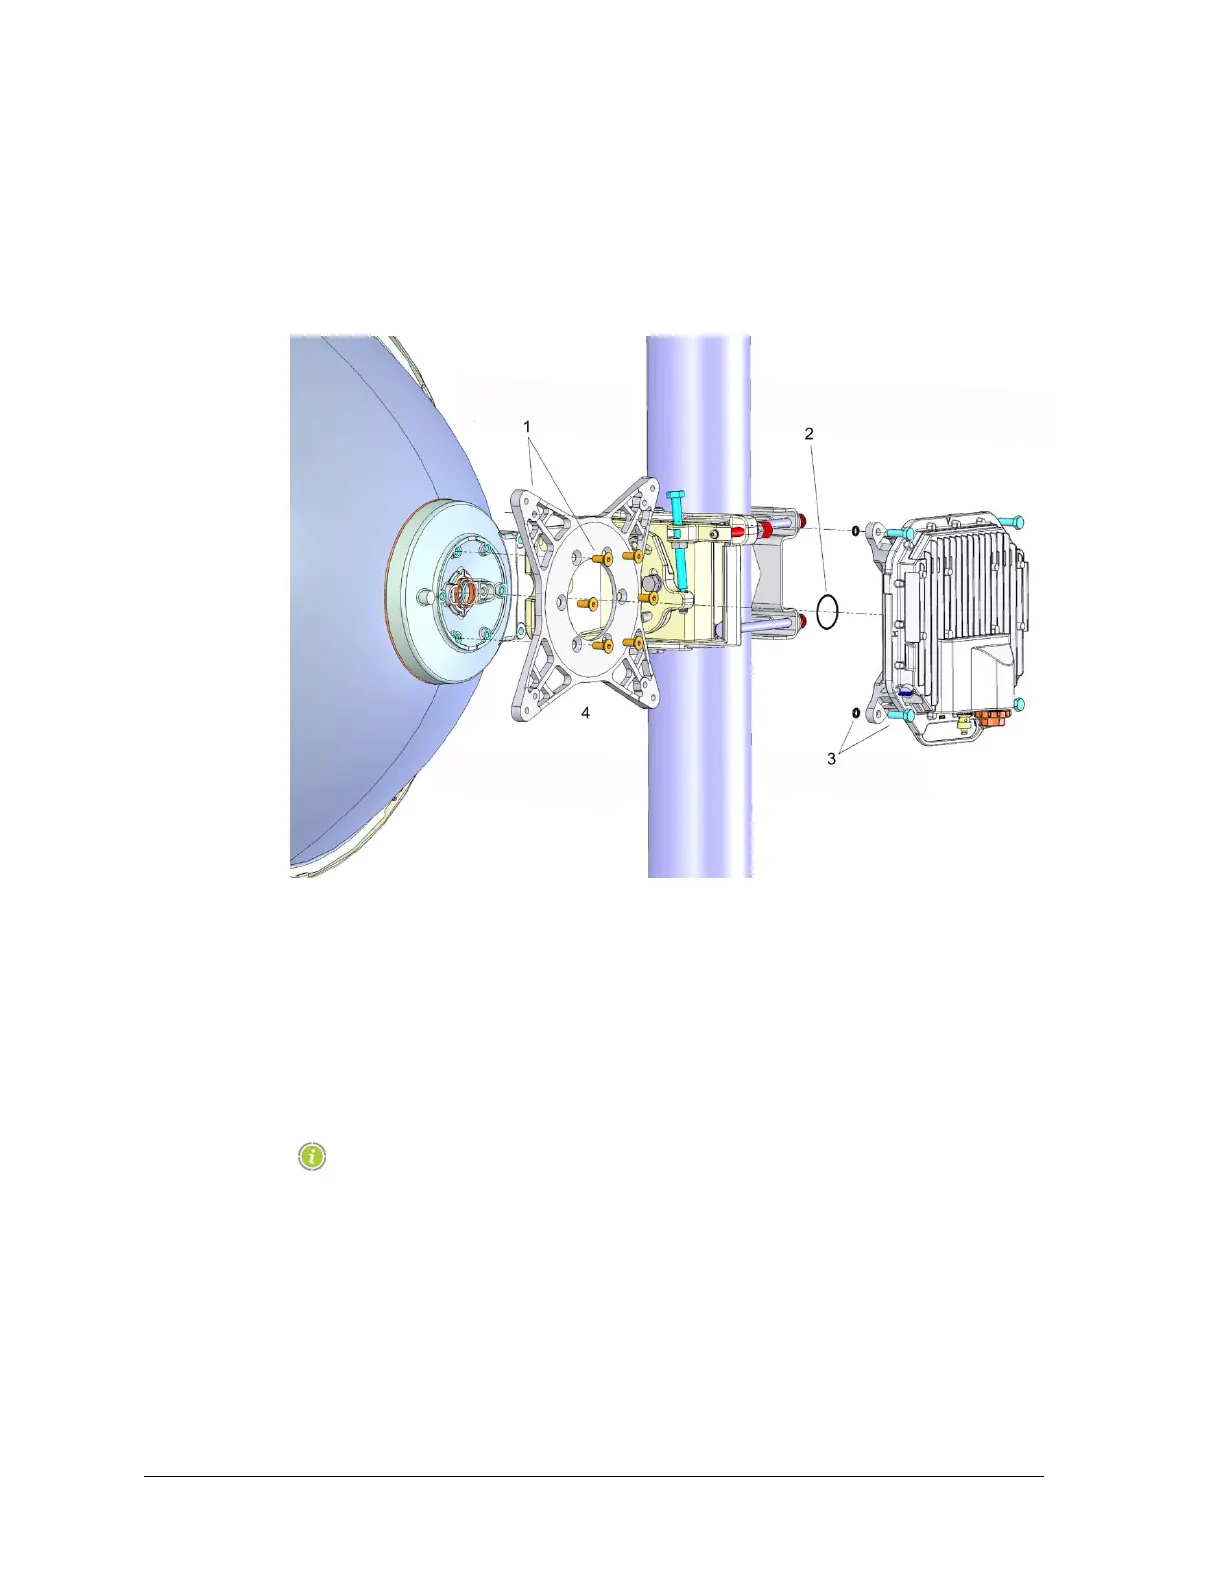
Refer to the numbered steps in Figure 3-5.
Figure 3-5. ODU Attachment
1. Attach the ODU mount plate to the antenna using six M8 x 20 mm bolts. Tighten
bolts to correct torque: 20 Nm.
2. Remove any protective tape from the antenna and ODU feed-heads. Fit the O-ring
seal and apply a thin layer of silicon grease around the O-ring. The grease must be
applied so that it will provide a full surface seal around the ring and to the ODU and
antenna feed mating surfaces.
• For 7 / 8 Ghz, fit the O-ring to the antenna feed head.
• For 13 to 23 GHz, fit the O-ring to the ODU feed head.
A tube of silicon grease is included in the ODU installation kit.
3. Fit the four M8 x 25 mm bolts and small O-rings to the ODU. The O-rings simply
hold the bolts captive so that they will not fall out prior to ODU attachment.
4. Carefully bring the ODU forward to engage the antenna and ODU feed heads, and
its mount plate. Tighten the bolts to correct torque: 20 Nm.
5. To remove an ODU, reverse this procedure.