4. Lenses
4.2 Installing a lens
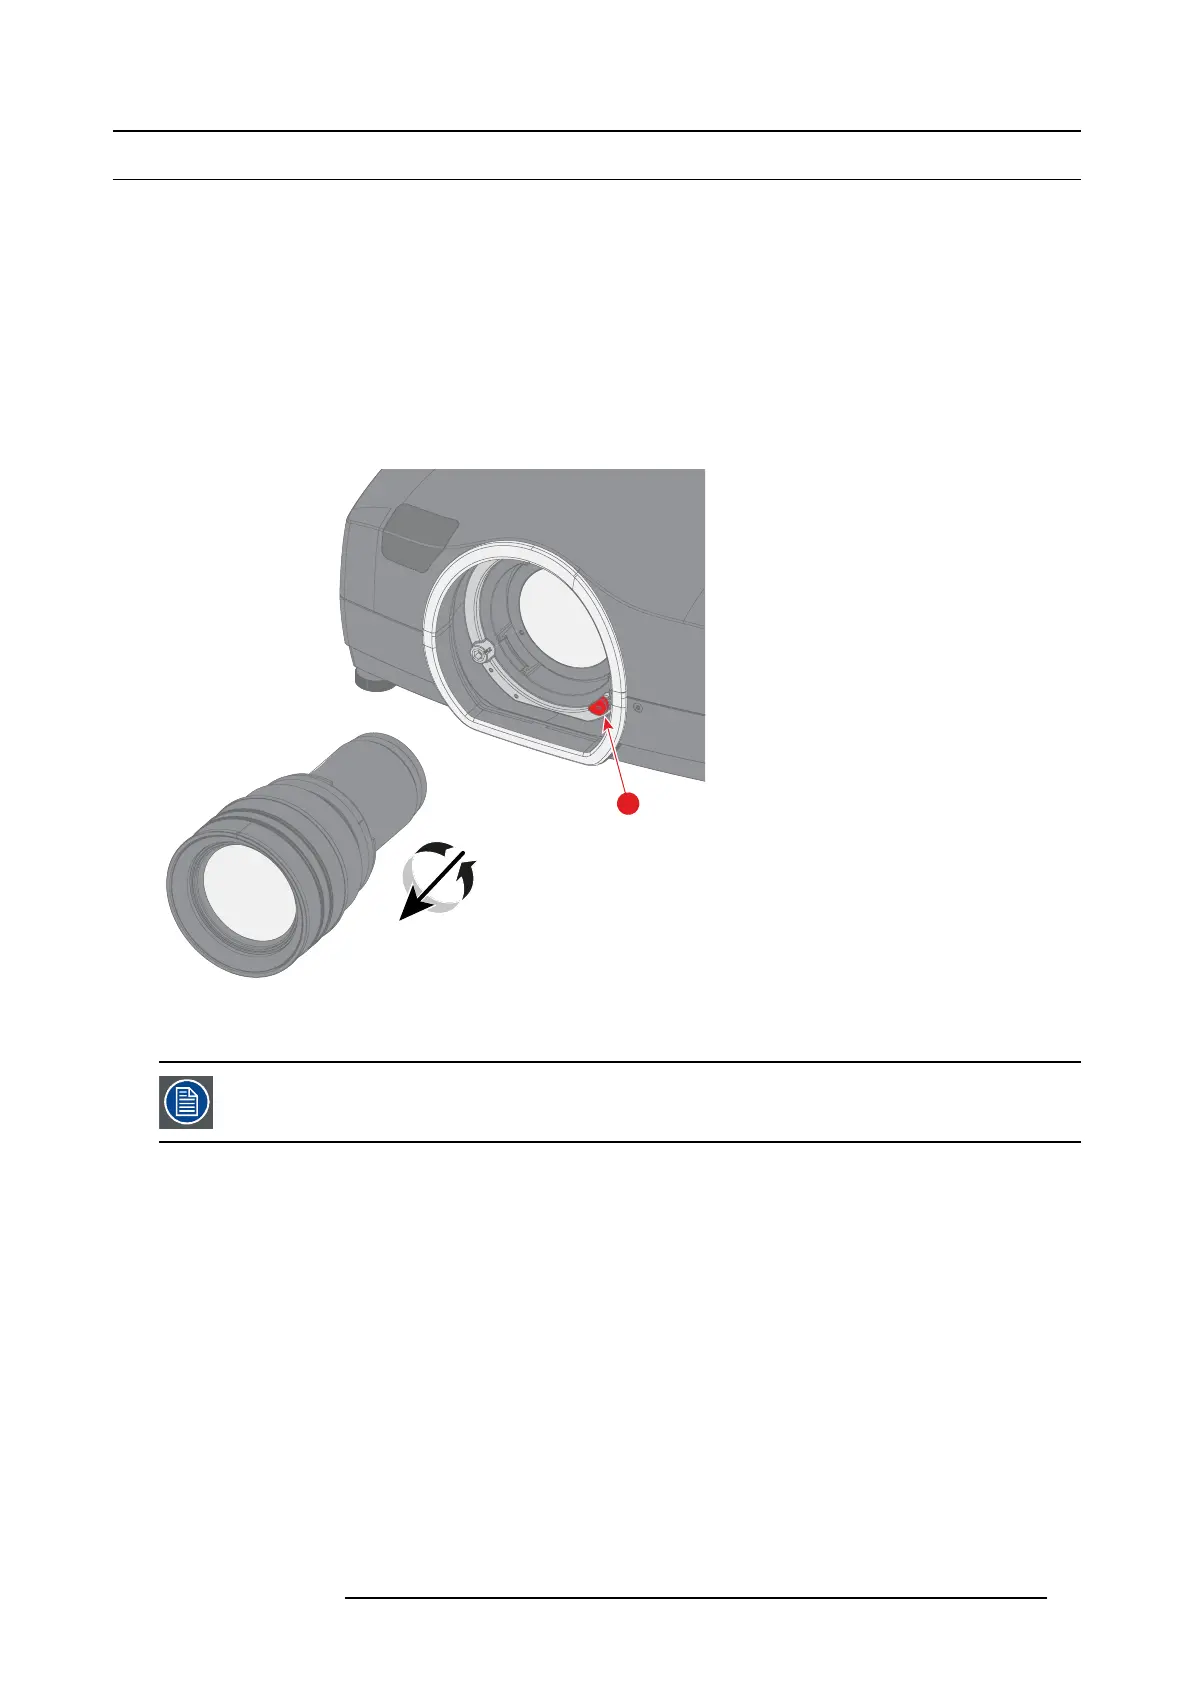
Insert a lens into the lens holder
1. Remove the protection cap on the bayonet side of the lens.
2. Insert the lens, making sure that the red line ( marking) on the bayonet is positioned towards the top of the cabinet. The lens
assembly should enter the projector bo dy fu lly and cleanly.
Caution: The lens is fragile. Do not try to force the lens into position. If there is any re sistance, remove the lens from the
projector and then try again.
3. Screw the lens c lockwis e until it clicks into position.
Remove a lens from the le ns holder
Depress the lens release button (reference 1, imag e 4-2) and then turn the lens anticlockwise until the lens bayonet is c lear of the
projector chassis.
1
Image 4-2
To prevent dust contamination in the projector light processor, always replace the lens bayonet cap, lens cap
and p rojector lens cap (if ap plicable) immediately after removing the lens.
601–0307–00 F50 25/02/2016 25