5. Installation
5.6 Installing the projector to a ceiling mount or frame
Necessary tools
• 3 x M6 screws, us er supplied. S ee procedure below for information on sizing.
• Screwdriver, type dependent on s crew s used.
Necessary parts
Ceiling mount or rig frame
Selection and supply of the ceiling mount and installation screws (3 of.) is the responsibility o f the user.
Suggested procedure
1. Confirm that the physical conditions of the proposed installation area complies w ith the projector installation requirements.
2. In an ideal installation, the projector lens surface is centered with and parallel to the screen. This orientation helps to ensure
optimized lens performance with minimal offset. If this position is not possible (such as when the projector is significantly higher
than the center of the screen), it is better to rely on offset (lens shift) rather than ex tra tilt. If tilt is required, make sur e that it does
not exceed 20 degrees on the side-to-side a xis. See "Positioning the projector", page 34 for more information.
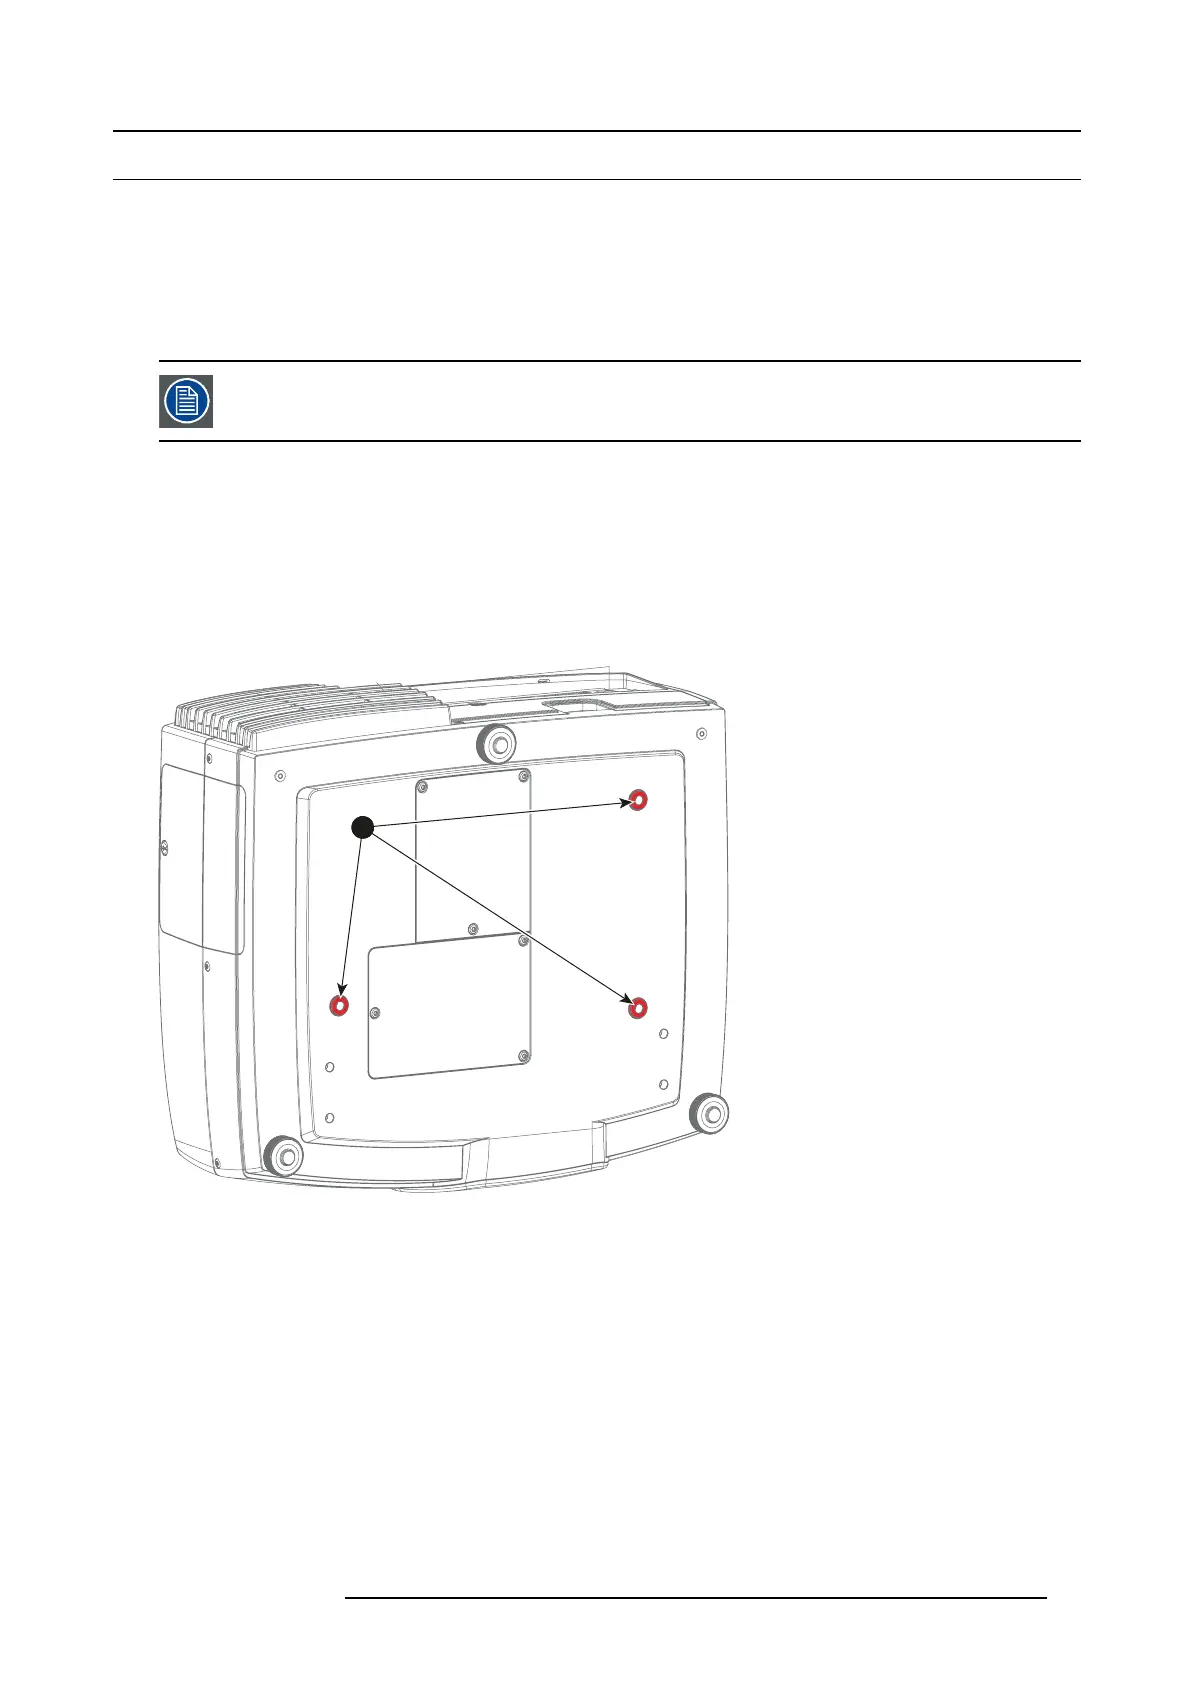
3. There are three (3) projector ceiling mount ho les that are used to install the projector onto a ceiling mount. Reference 1, im-
age 5-6. .
1
Image 5-6
4. Installation s crews are not supplied by the manufacturer. The length of the screw is dependent on the dim ensions of the ceiling
mount or frame you are using. The sc rew s hould not protrude more than 9 mm into the p rojector chassis.
Caution: Correct screw length is e xtremely important. Failing to observe these limitations may cause dam age to your pr ojector.
5. Install all three screws, m aking s ure not to overtighten.
601–0307–00 F50 25/02/2016 37