5. Installation
5.10 Scheimpflug adjustment
CAUTION: A Scheimpflug adjustment should only be carried out by properly qualified and experienced pro -
jection specialists. A poor Scheimpflug adjustment may result in an extremely degraded image and will require
factory—servicing to the projector.
Necessary tools
• Allen key, hex size 3
• Allen key, hex size 5
• Allen key, hex size 1.5
Preparation
1. Prepare the test area. Barco recommends a projector-screen distance of 2 metres be used for all Scheimpflug ad
justments.
Ver ify that the throw ratio of the installed lens matches the requirements of t he installation area (projection distance and screen
size).
2. Check that the lens is correctly ins talled, and lens shift is in centre position. See "Lens shift and offset m atrix", page 40.
3. If the installed lens has Iris control, open the Iris all the way up. Lock the iris position using a 1.5mm Allen Key.
Note: Before locking the iris, confirm that this will only affect the iris position. Do not apply lens lock if iris and zoom function
is interlocked.
4. Open the focus ring all the way up. Lock the focus position using a 1.5mm Allen Ke y.
Note: Before locking the focus ring, c o nfi rm that this will only affect the focus position. Do not app ly lens lock if focus and
zoom function is interlocked.
5. Project the chosen test image on the screen.
Tip: The projector focus test image, Main menu – Installation – Test images – Focus, is onl
y available to Power and Service
users. Input the Power User/Service code before navigating to this menu.
6. Zoom the lens to its widest opening (maximum image size on the screen).
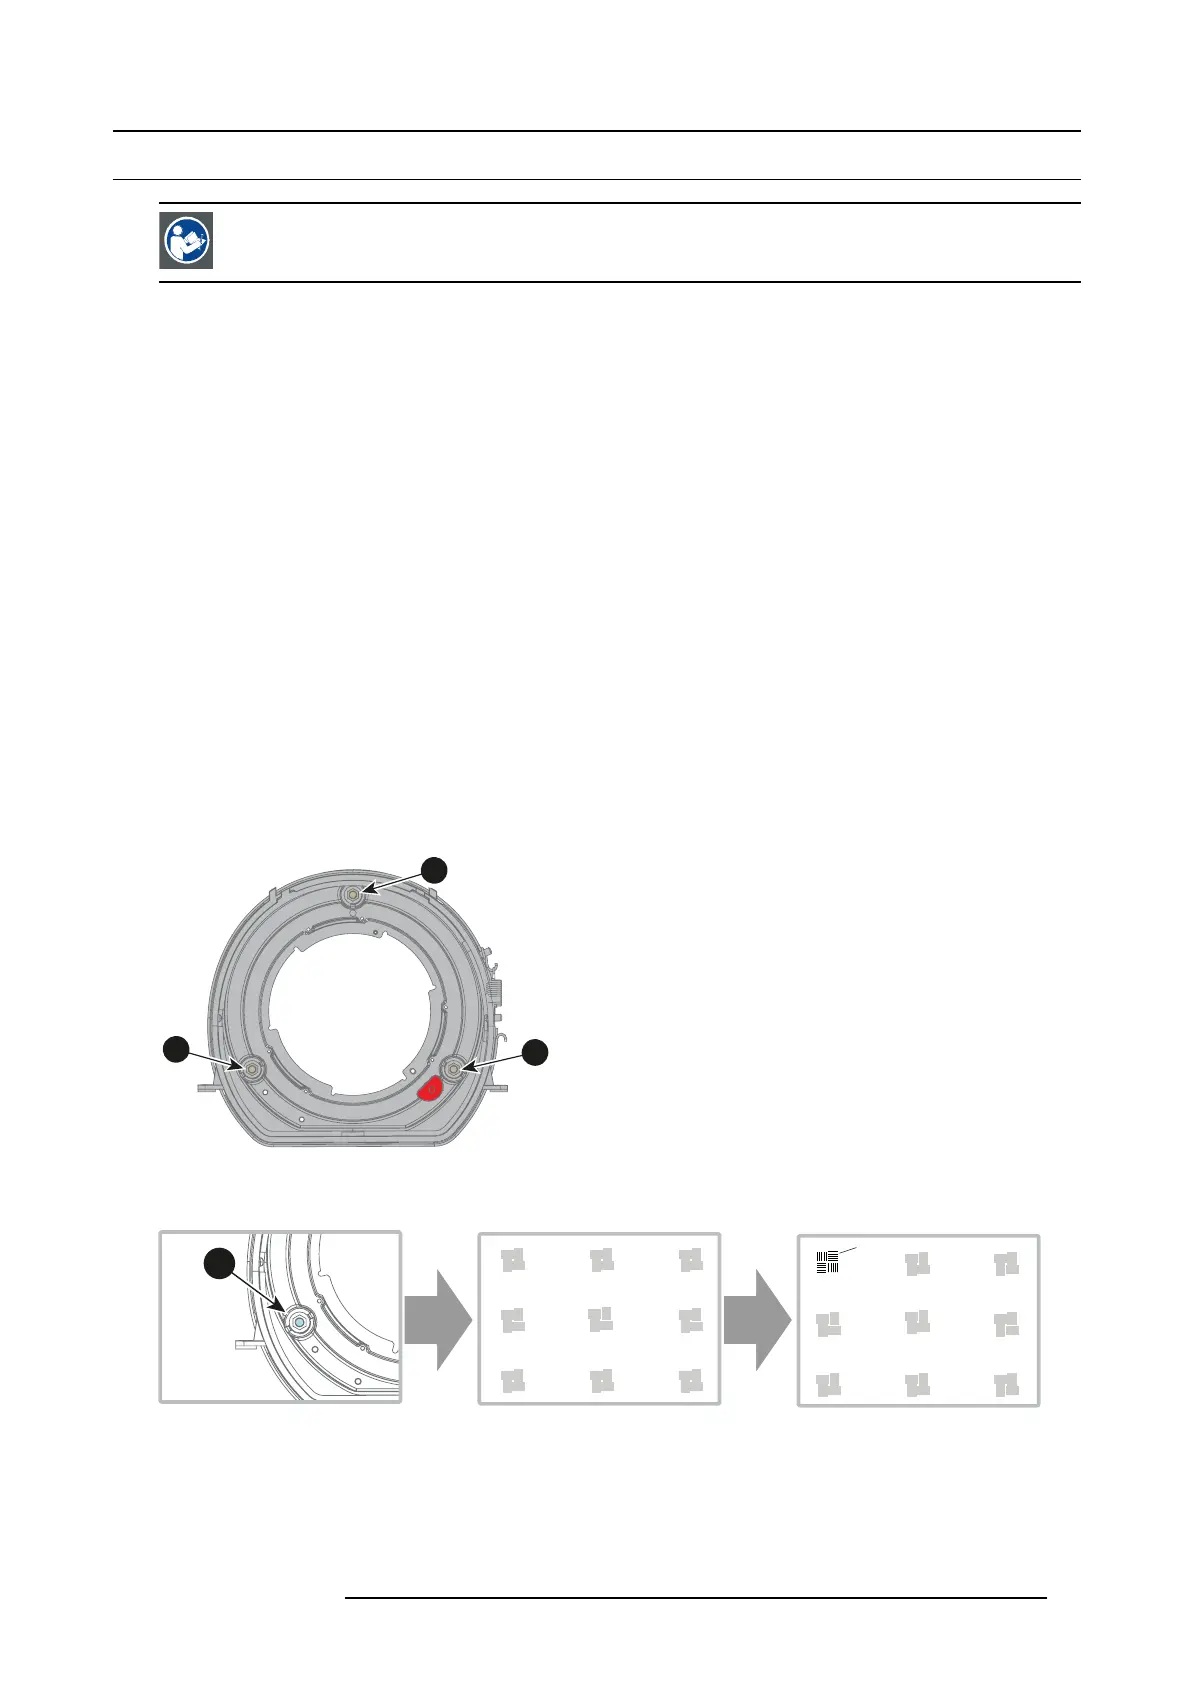
Apply a Scheimpflug correction
1. Loosen the three set screws (reference 1b, 2b, 3b).
1b
2b
3b
Image 5-12
2. Adjust the left side Scheimpflug adjustm ent screw (reference 1) until the test image in the top right side of the screen is in focus.
Useasize3hexkeytodothis.
F
Image 5-13
Note: This process may ca use the o ther areas of the image to slide ou t o f focus . This is totally normal.
3. Adjust the right side Scheimpflug adjustment screw (reference 2) until the test image in the top left side of the screen is in focus.
Useasize3hexkeytodothis.
601–0307–00 F50 25/02/2016
43