5. Installation
F
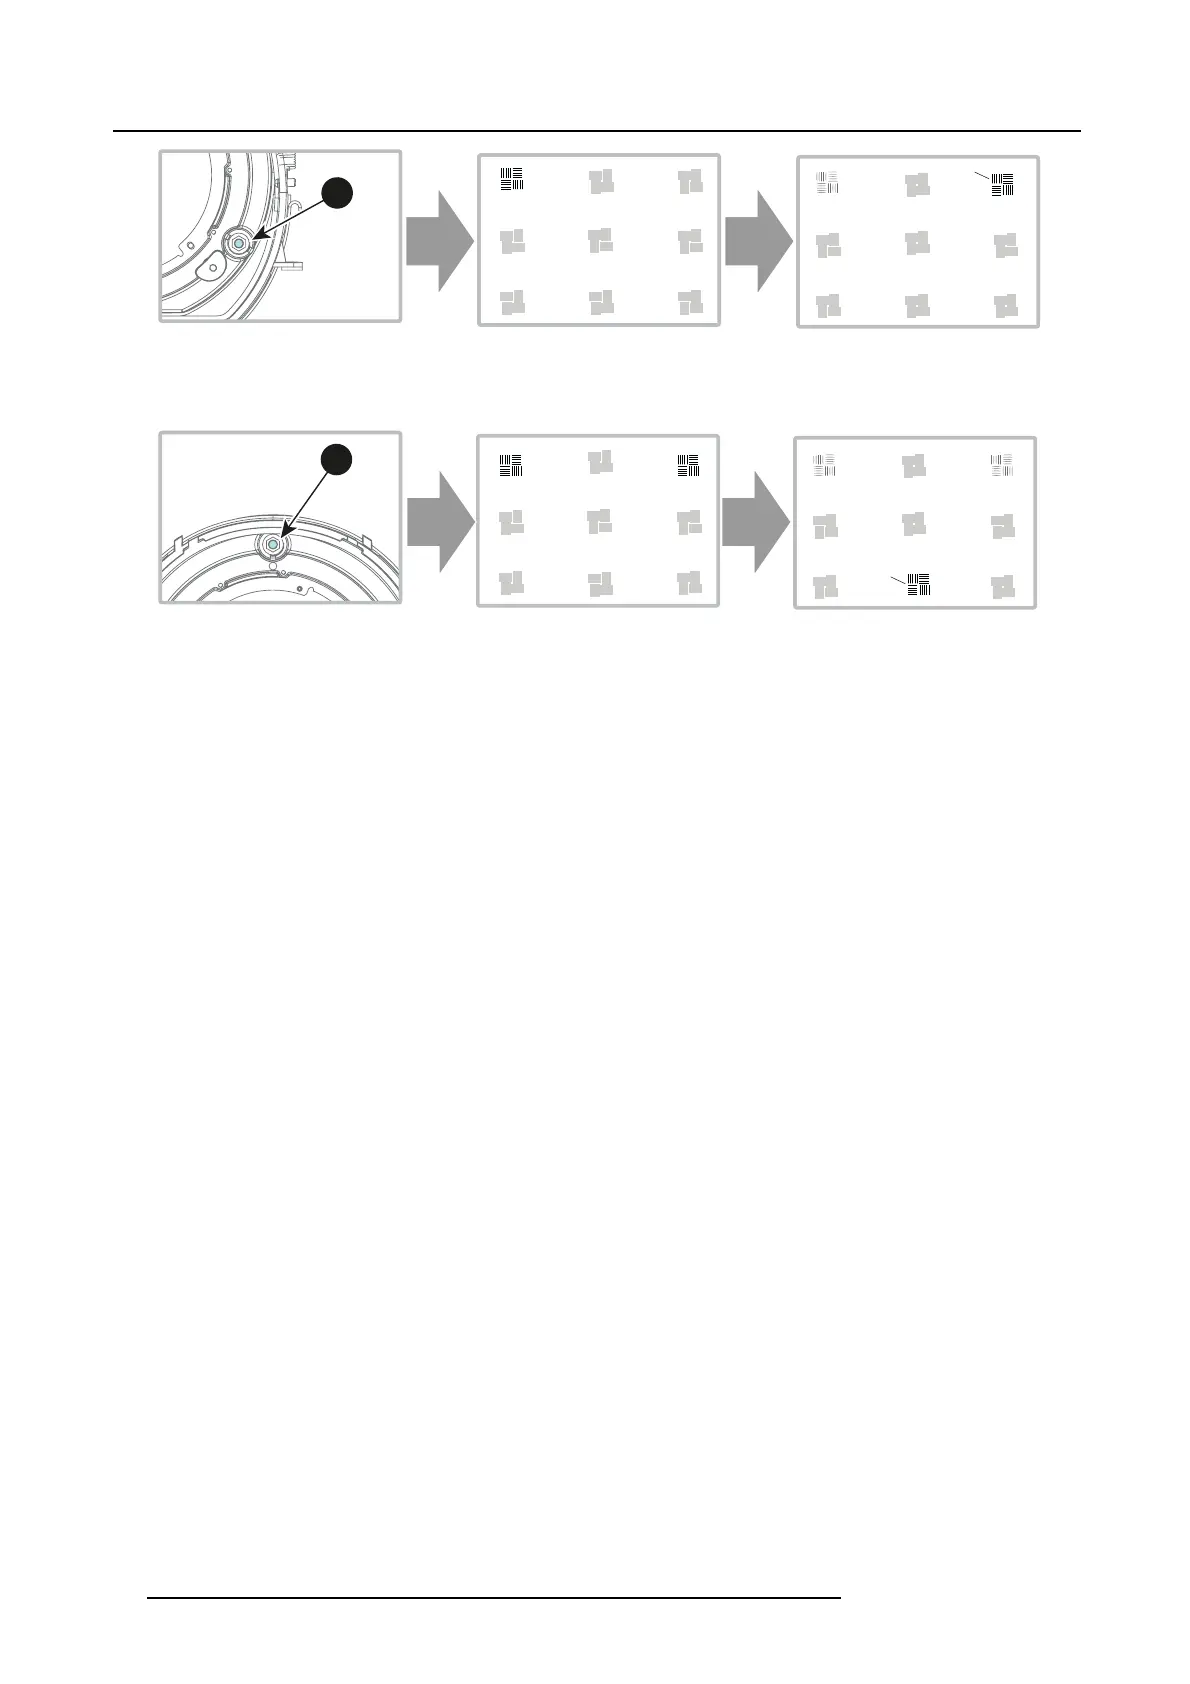
Image 5-14
Note: This process may ca use the o ther areas of the image to slide ou t o f focus . This is totally normal.
4. Adjust the top Scheimpflug adjustment screw (reference 3) until the test image in the bottom h alf of the screen is in focus. Use
asize3hexkeytodothis.
F
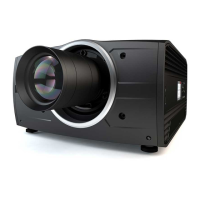
Image 5-15
Note: This process may ca use the o ther areas of the image to slide ou t o f focus . This is totally normal.
5. Continue adjusting the sc rews one at a time until the test image is uniformly sharp across all areas of the display.
6. Test the focus by zooming out ( minimum image size on screen) and then zooming in again. Verify the image is still sharp. If there
are any deviations to sharpness, repeat steps 2 to 6 until the im age is correct.
7. Tighten the three set screws in the following order: left (1b), right (2b) and then top (3b). Use a size 5 hex key to do this.
44
601–0307–00 F50 25/02/2016