Use
44
7990087_030_03 – 2080492 – 2023-01-19
5.6 Connecting the power supply
5.6.1 Ceiling-mounted version
The power supply must be connected by specialized personnel
with the necessary access authorization, knowledge and
documentation to set up internal power supplies.
When there is no separate main switch in the room, the surgical
light is in standby mode when the power supply is switched on. The
indicator next to the [i1] key lights up.
Switch on the main switch if the room has a separate main switch.
The indicator next to the [i1] key lights up. The surgical light is now
in standby mode.
The processing unit in the lamp head needs approximately one
minute to start up. After this, the surgical light system is fully ready
for use and operation. Basic functions such as the surgical light
On/Off and lighting intensity, however, are available immediately.
5.6.2 Mobile version
Electric shock due to damaged electrical equipment
Touching live device parts can result in electrocution.
• The mobile surgical light system (Protection Class I) may only
be connected to a properly earthed power socket.
• Check the plugs and mains power cable for damage before
connecting to the mains power network.
• Do not connect the mobile surgical light to the mains power if
plugs or mains power cable are damaged.
• If the above damage or further damage occurs, the surgical
light is no longer safe to operate.
– Label the surgical light system as defective.
– Notify the Technical Customer Service.
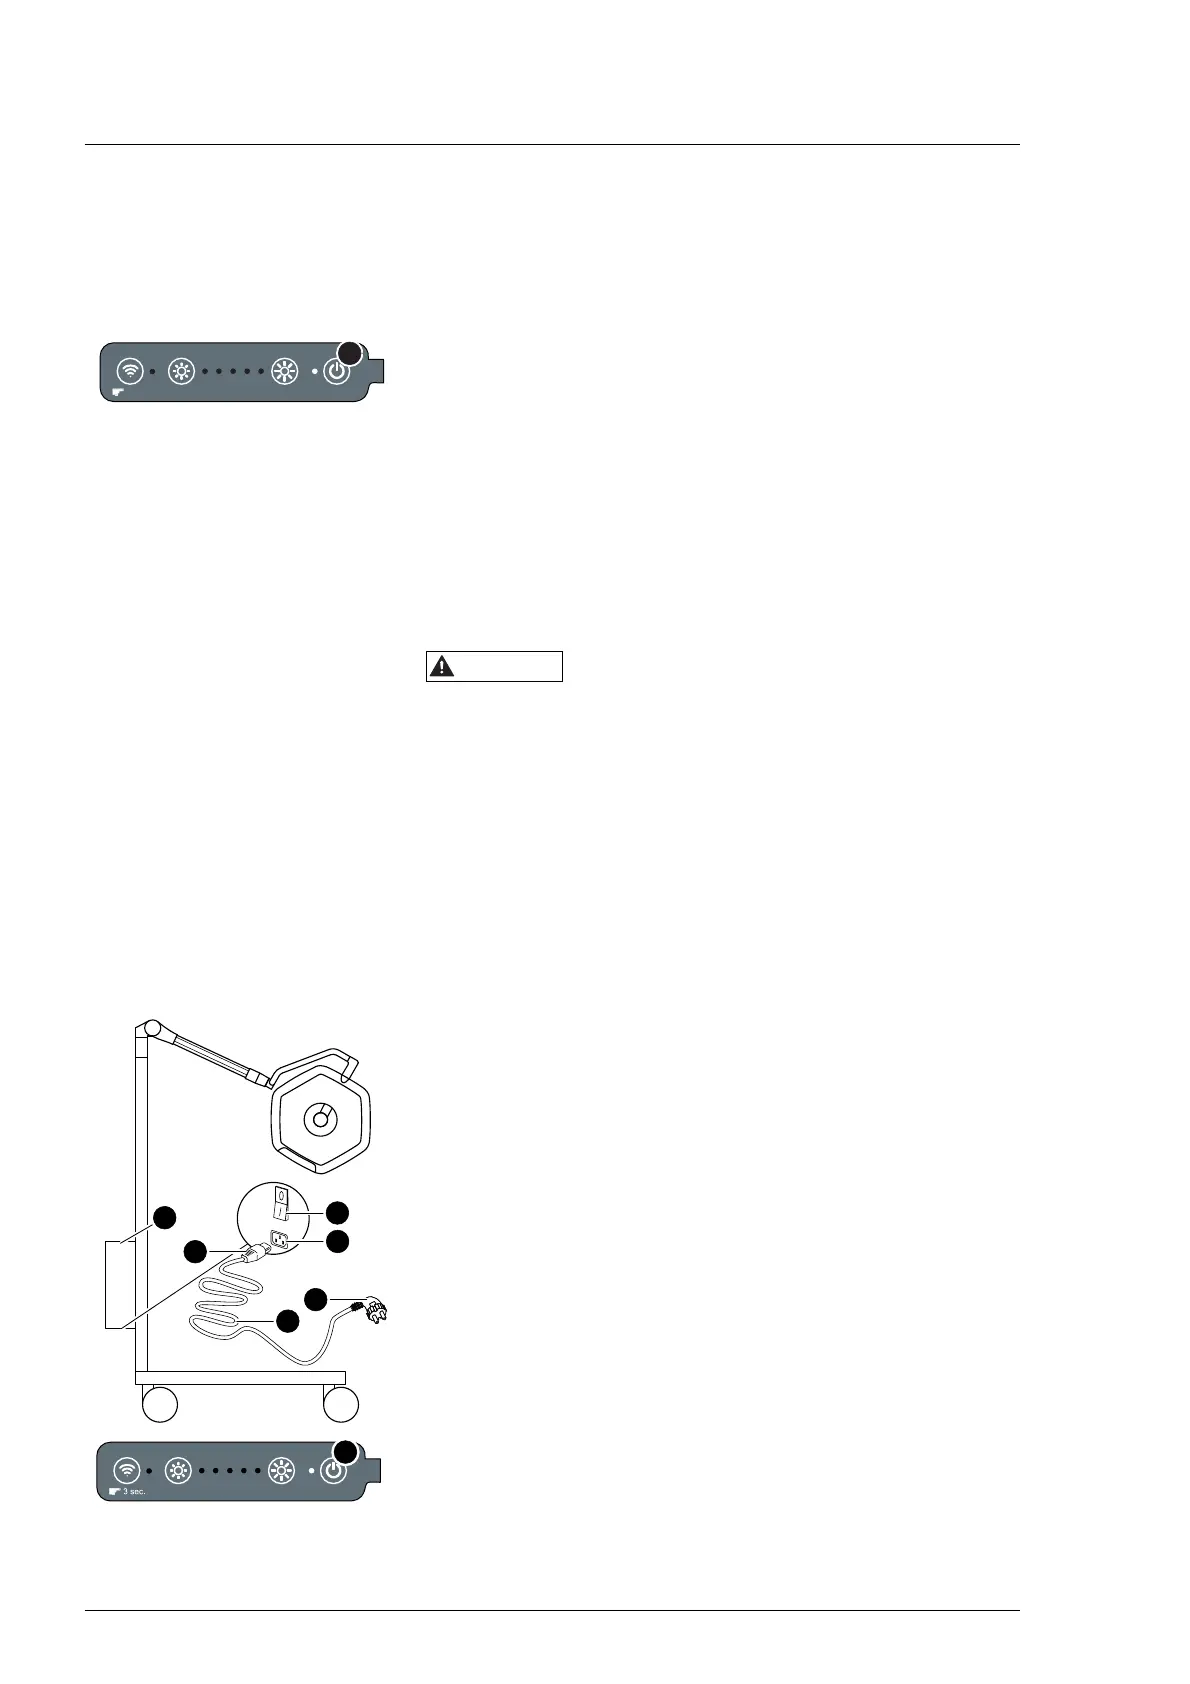
c
1. Check the power supply cable [29] including plug [A] and [B]
for integrity.
2. Plug the connector [A] of the mains power cable [29] into the
power socket [30] of the mains supply [28].
3. Route the cable to the socket so that no one can trip or fall
over it. Do not put the cable under strain.
4. NOTICE! The mains voltage at the shock-proof socket must
correspond with the information on the device label. If in
doubt, ask the responsible power supply company or a
qualified electrician.
Plug the connector [B] of the power supply cable into a
protective contact socket in the room.
5. Switch on the mains power supply [28] at the switch [31]
(Position I).
The indicator next to the [i1] key lights up. The surgical light is
now in standby mode.