EasyManua.ls Logo

baxter Starling - User Manual

baxter Starling
266 pages
Print Icon
To Next Page IconTo Next Page
Loading...
User Guide

Table of Contents

Questions and Answers

  • J
    Jeremy SmithAug 15, 2025
    How to fix sensor, cable, or connectivity errors on Baxter Medical Equipment?
    • J
      John HarperAug 15, 2025
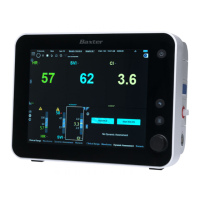
      If you're getting a sensor, cable, or connectivity error on your Baxter Medical Equipment, here’s what to do: * Make sure the Starling Sensors are properly attached to the patient. * Check that the sensor leads are correctly connected to the Starling Patient Cable. * Verify the Starling Patient Cable is securely connected to the patient cable socket on the side of the Monitor. If the problem continues, stop the monitoring session and try replacing any sensors that aren't optimally attached. Start a new monitoring session. If it still doesn't work, replace the Starling Patient Cable, if you have one available. If the issue persists even after these steps, try connecting to another Starling Monitor. If that's not possible, contact Baxter Service Center.
  • T
    Tonya BrownAug 21, 2025
    Why is Baxter Medical Equipment unable to perform Dynamic Assessment due to poor signal quality?
    • N
      Nicholas VaughnAug 22, 2025
      If you're unable to perform a Dynamic Assessment on your Baxter Medical Equipment due to poor signal quality, it could be due to improperly connected Starling Sensors or Patient Cable, or patient movement during the measurement. To resolve this: 1. Ensure Starling Sensors are properly attached to the patient’s body. 2. Remind the patient to remain still during the test. 3. Tap 'Restart' to begin the test again.
  • M
    Mario SandersAug 25, 2025
    How to fix 'Phase Calibration Error' on baxter Starling?
    • C
      Charles GonzalesAug 25, 2025
      If your Baxter Medical Equipment shows a 'Phase Calibration Error' and is unable to calibrate, it means the Starling Sensors may not be correctly applied, may have detached from the patient, or the Starling Patient Cable is disconnected. To fix this: 1. Replace the Starling Sensors if you suspect they aren't optimally applied. 2. Check that the Starling Patient Cable is securely connected to the Starling Monitor.
  • C
    Cheryl RoweAug 27, 2025
    Why are channels not displaying correctly on baxter Starling?
    • C
      Carolyn EllisAug 27, 2025
      If one or more channels aren't displaying correctly on your Baxter Medical Equipment, it might be due to Starling Sensors not being properly connected, or patient movement during measurement. Check the Starling Patient Cable at both ends for loose connections. Make sure it's properly connected to the Starling Sensor leads and the Starling Monitor.
  • M
    Michelle SandersAug 30, 2025
    What to do if Baxter Medical Equipment baseline shows unstable results?
    • K
      Karen HillAug 30, 2025
      If your Baxter Medical Equipment's baseline shows unstable results, it could be because the patient is hemodynamically unstable, being stimulated or moved, or there's slight signal interference. You can: * Tap 'Restart' to restart the Baseline measurement. * Tap 'Cancel' to abort the Test. * Tap 'Next' to continue the Dynamic Assessment Test anyway.
  • J
    jamesthompsonSep 2, 2025
    Why is the display not visible on my baxter Starling Medical Equipment?
    • L
      Linda NortonSep 2, 2025
      If the display on your Baxter Medical Equipment is not visible and you can't read clinical data (like Cardiac Output CO levels), it might be due to irregularities or interference in the electrical power supply. Try these steps: 1. Disconnect the Monitor from the mains power outlet to see if the interference stops. 2. Make sure you're using the AC power cable that came with the Starling Monitor. If not, disconnect the current cable and connect the correct one. 3. If the problem continues, try a different mains power outlet. 4. If it still persists, connect the Ground Cable between the equipotential connector on the Monitor's rear panel and the Ground connector on the wall.
  • G
    Gloria ZimmermanSep 5, 2025
    What to do if Baxter Medical Equipment screen remains black after starting?
    • T
      Troy CastanedaSep 5, 2025
      If the screen on your Baxter Medical Equipment remains black after starting the system, it could be due to a discharged or damaged battery, or a blown fuse. Here’s how to troubleshoot: 1. Connect the Starling Monitor to a mains power wall outlet to recharge the batteries. Then, try the System Startup procedure again. 2. If the problem persists: * Disconnect the Monitor from the mains power. * Open the fuse compartment and check the fuses. Replace any blown fuse. * Reconnect the Monitor to the mains power and try the System Startup procedure again.
  • C
    Crystal RogersSep 8, 2025
    Why does baxter Starling Medical Equipment say 'Battery Low, Please Connect to Main Power Supply'?
    • J
      james16Sep 9, 2025
      If your Baxter Medical Equipment displays a 'Battery Low' message, and prompts you to connect to the main power supply, it means the battery is low (under 10% capacity), likely because the device hasn't been charged for a while. Connect the Starling Monitor to a mains power wall outlet as soon as possible to recharge the batteries.
  • K
    Kristen LaneSep 12, 2025
    What to do if the buzzer fails during monitoring on baxter Starling Medical Equipment?
    • A
      Albert AcostaSep 12, 2025
      If the buzzer fails during monitoring on your Baxter Medical Equipment, it could be because the buzzer is turned off or malfunctioning. Here's what to check: * If the buzzer is turned off: Go to the Main Menu, then Session Controls & Settings, and turn the Audible Alert setting to 'On'. * If the buzzer is malfunctioning: Contact Baxter Service Center.
  • M
    Michael RichardsonNov 17, 2025
    What to do if baxter Starling Medical Equipment shows 'Check Left/Right Sensor, Cable or Connectivity'?
    • S
      sanfordjohnNov 17, 2025
      If your Baxter Medical Equipment displays a 'Check Left Sensor, Cable or Connectivity' or 'Check Right Sensor, Cable or Connectivity' error, it indicates that the Starling Patient Cable or one or more of the Starling Sensors are not properly connected to the monitor or the patient, or there may be a device malfunction. Here's how to troubleshoot: 1. Ensure the indicated (left or right) Starling Sensors are correctly attached to the patient's body. 2. Verify that the Starling Sensor leads are properly connected to the Starling Patient Cable. 3. Confirm that the Starling Patient Cable is securely connected to the patient cable socket on the side of the Monitor. If the problem persists, stop the monitoring session, replace the Starling Sensors, and start a new session. If the issue conti...

Summary

Preface

Copyright Notice and Trademarks

Legal notices regarding copyright and registered trademarks used in the manual.

Preface

Intended Use, Operational Use, and Clinical Decisions

Defines system purpose, operational guidelines, and practitioner responsibility for clinical choices.

Preface

Manufacturers Responsibility and Precautions

Manufacturer's commitment to safety and essential user precautions.

Preface

Conventions, Warnings, and Cautions

Explains symbols and terms used for safety instructions and hazard identification.

Preface

Notes and Procedure Instructions

Details how notes provide clarification and how procedure steps are presented.

Preface

Terms and Abbreviations

Glossary of technical terms and abbreviations used in the document.

Chapter 1 - Safety Information

General Safety Considerations and System Checks

Covers fundamental safety principles and pre-operation system checks.

Chapter 1 - Safety Information

Protection, EMC, and Biocompatibility

Guidelines for liquid ingress, electromagnetic compatibility, and material safety.

Chapter 1 - Safety Information

System Safety Labels and Software

Explains product labels and precautions for software updates.

Chapter 1 - Safety Information

Safe Handling and Environmental Requirements

Instructions for safe device handling and specified operating environmental conditions.

Chapter 1 - Safety Information

Patient Safety, Power, and Battery

Covers infection control, power failure response, and battery status monitoring.

Chapter 1 - Safety Information

Accessory Use and Data Management

Guidelines for using accessories and managing data securely.

Chapter 1 - Safety Information

Data Export, Cybersecurity, and HIPAA

Protocols for exporting data, ensuring cybersecurity, and complying with privacy laws.

Chapter 1 - Safety Information

Data Storage

Explains the monitor's data storage capacity and automatic data saving.

Chapter 2 - Starling Monitoring System

System Overview and Indications for Use

Introduces the system, its functionalities, and intended medical applications.

Chapter 2 - Starling Monitoring System

Limitations, Theory of Operation, and Configuration

Discusses use limitations, operational principles, and system setup components.

Chapter 2 - Starling Monitoring System

Operator Panel and Controls

Details the monitor's display, buttons, and interactive control mechanisms.

Chapter 2 - Starling Monitoring System

Batteries, Power Modes, and Standard Accessories

Information on internal batteries, power modes, and supplied accessories.

Chapter 2 - Starling Monitoring System

Optional Accessories and Operating Modes

Describes optional accessories and the system's various operating modes.

Chapter 2 - Starling Monitoring System

Clinical Workflow Overview

Illustrates the typical sequence of procedures for using the Starling monitor.

Chapter 3 - Starling Monitor Display

Display Introduction and Control Knob

Overview of the touch screen display and the function of the control knob.

Chapter 3 - Starling Monitor Display

Quick Access Menu and Home Screen

Describes the startup menu and the main dashboard display.

Chapter 3 - Starling Monitor Display

Main Menu and Controls Toolbar

Explains access to system functions via the main menu and the persistent toolbar.

Chapter 3 - Starling Monitor Display

Trends Area and Real-time Values

Details how to view and manage trend graphs and current parameter readings.

Chapter 3 - Starling Monitor Display

Display Window Tabs and Dynamic Assessment

Covers display options like Clinical Range, Waveforms, Dynamic Assessment, and Numeric data.

Chapter 3 - Starling Monitor Display

Home Screen Layout and Patient Management

Customizing the display and managing patient records and monitoring sessions.

Chapter 3 - Starling Monitor Display

Session Browser and History Mode

Browsing past sessions and viewing historical data trends.

Chapter 4 - System Preparation, Startup and Shutdown

System Preparation and First-time Use

Steps for preparing the monitor and initial setup procedures.

Chapter 4 - System Preparation, Startup and Shutdown

Monitor Positioning and Cable Connections

Guidelines for placing the monitor and connecting all necessary cables.

Chapter 4 - System Preparation, Startup and Shutdown

System Startup and Shutdown Procedures

Step-by-step instructions for powering on and safely shutting down the monitor.

Chapter 4 - System Preparation, Startup and Shutdown

Cleaning and Storage

Procedures for cleaning the monitor and storing it when not in use.

Chapter 5 - Patient Monitoring

Introduction and Creating Patient Files

Overview of patient monitoring and steps to add new patient data.

Chapter 5 - Patient Monitoring

Patient Preparation and Sensor Attachment

Steps for preparing the patient's skin and applying the monitoring sensors.

Chapter 5 - Patient Monitoring

Starting and Viewing Monitoring Sessions

Guide to initiating and observing an active patient monitoring session.

Chapter 5 - Patient Monitoring

Adjusting Ranges and BP Source Selection

How to set normal parameter ranges and select blood pressure measurement sources.

Chapter 5 - Patient Monitoring

NIBP and SpO2 Measurement Entry

Procedures for manually entering NIBP and SpO2 values.

Chapter 5 - Patient Monitoring

Hgb Measurement and Event Logging

How to enter hemoglobin measurements and log events manually.

Chapter 5 - Patient Monitoring

Pausing Sessions and Setting Alerts

Instructions for pausing monitoring and configuring audible alerts.

Chapter 5 - Patient Monitoring

Responding to Alerts and Dynamic Assessment Tests

Actions for responding to system alerts and performing dynamic assessment tests.

Chapter 5 - Patient Monitoring

Interpreting Dynamic Assessment Results

Explains how to understand the results of PLR and Bolus tests.

Chapter 5 - Patient Monitoring

Viewing Test Results and Data Export

How to view detailed test results and export monitored data.

Chapter 5 - Patient Monitoring

Completing Monitoring and Removing Sensors

Steps to end a monitoring session and safely detach sensors.

Chapter 6 - Care and Maintenance

General Care and Maintenance Guidelines

Recommendations for cleaning, disinfection, and general upkeep of the monitor.

Chapter 6 - Care and Maintenance

Monitor Cleaning and Disinfection

Specific instructions for cleaning and disinfecting the Starling monitor surfaces.

Chapter 6 - Care and Maintenance

LED Display Cleaning and Accessory Care

Guidelines for cleaning the LED screen and caring for system accessories.

Chapter 6 - Care and Maintenance

Storage and Touch Screen Calibration

Procedures for storing the monitor and calibrating the touch screen.

Chapter 6 - Care and Maintenance

Fuse and Battery Replacement

Steps for replacing fuses and information on battery pack replacement.

Chapter 6 - Care and Maintenance

Software Upgrade and Service Information

Instructions for software updates and details on obtaining service assistance.

Appendix A - Troubleshooting Guide

General Troubleshooting and Error Message Categories

Introduces troubleshooting, listing categories of common issues and messages.

Appendix A - Troubleshooting Guide

Error Messages: Sensor, Cable, Connectivity, and Poor Signal

Details error codes for sensor, cable, connectivity issues, and poor signal quality.

Appendix A - Troubleshooting Guide

Sensor;Cable Connectivity and Poor Signal Issues

Troubleshooting for sensor/cable connection problems and poor signal reasons.

Appendix A - Troubleshooting Guide

Movement Issues and NIBP Module Errors

Solutions for results affected by movement and NIBP module recognition problems.

Appendix A - Troubleshooting Guide

Calibration and Other Sensor Errors

Troubleshooting steps for calibration errors and other sensor-related issues.

Appendix A - Troubleshooting Guide

Dynamic Assessment Test Troubleshooting

Specific guidance for resolving errors encountered during dynamic assessment tests.

Appendix A - Troubleshooting Guide

Warning Messages: Pacemaker and Battery Low

Explains system warnings related to pacemakers and low battery status.

Appendix A - Troubleshooting Guide

Miscellaneous Issues: Display and Power Problems

Addresses issues like incorrect channel display and screen failures during startup.

Appendix A - Troubleshooting Guide

Miscellaneous Issues: Buzzer and Screen Freeze

Solutions for buzzer failures and screen freezing problems.

Appendix A - Troubleshooting Guide

Display Malfunctions and Device Errors

Troubleshooting for general display malfunctions and device errors.

Appendix A - Troubleshooting Guide

Electrical Interference and Data Readability

Addresses issues related to electrical interference affecting data visibility.

Appendix B - System Specifications and Technical Data

Monitored Hemodynamic Parameters and Ranges

Lists normal ranges for key hemodynamic parameters monitored by the system.

Appendix B - System Specifications and Technical Data

Calculated and Displayed Measurements

Defines the primary measurements calculated and displayed by the Starling device.

Appendix B - System Specifications and Technical Data

Parameter Descriptions (HR, MAP, BP, SpO2, SV, SVI, SVV)

Describes parameters like Heart Rate, Mean Arterial Pressure, Stroke Volume, etc.

Appendix B - System Specifications and Technical Data

Parameter Descriptions (TFC, TPR, VET, ZO)

Describes parameters like Thoracic Fluid Content, Total Peripheral Resistance, etc.

Appendix B - System Specifications and Technical Data

Monitor Dimensions, Display, and System Specs

Provides physical specs, display details, and basic system specifications.

Appendix B - System Specifications and Technical Data

System Specifications (Fuses, Batteries, Features)

Details system components like fuses, batteries, and features like connectivity and control.

Appendix B - System Specifications and Technical Data

Acquisition Module and Sensor Specifications

Technical details for the acquisition module and Starling sensor components.

Appendix B - System Specifications and Technical Data

Electromagnetic Compatibility (EMC) Precautions

Precautions regarding electromagnetic interference and safe device handling.

Appendix B - System Specifications and Technical Data

Electromagnetic Emissions Declaration

Manufacturer's declaration on electromagnetic emissions compliance.

Appendix B - System Specifications and Technical Data

Electromagnetic Immunity Guidance

Guidance on the monitor's immunity to electromagnetic disturbances.

Appendix B - System Specifications and Technical Data

Immunity for Non-Life-Supporting Environments

Specific immunity test levels for non-life-supporting environments.

Appendix B - System Specifications and Technical Data

Recommended Separation Distances for RF Equipment

Guidelines for maintaining safe distances from RF communication devices.

Appendix B - System Specifications and Technical Data

RF Wireless Communications Immunity Specifications

Test specifications for immunity to RF wireless communications equipment.

Appendix C - Accessories: Specifications & Technical Data

NIBP Module Terminology

Defines terms like Oscillometry, mmHg, and bpm related to NIBP.

Appendix C - Accessories: Specifications & Technical Data

NIBP Module Introduction and Patient Populations

Introduces the NIBP module and identifies patient populations for its use.

Appendix C - Accessories: Specifications & Technical Data

NIBP Warnings, Precautions, and Adverse Reactions

Critical safety warnings, precautions, and potential adverse reactions for NIBP use.

Appendix C - Accessories: Specifications & Technical Data

NIBP Accuracy Factors and Patient Considerations

Discusses factors affecting NIBP accuracy and important patient considerations.

Appendix C - Accessories: Specifications & Technical Data

NIBP Cuff Selection, Placement, and Size

Guidance on NIBP cuff selection, proper placement, and size considerations.

Appendix C - Accessories: Specifications & Technical Data

NIBP Cuff Size Availability Table

Table listing available NIBP cuff sizes and their corresponding specifications.

Appendix C - Accessories: Specifications & Technical Data

NIBP Module Performance and Accuracy Standards

Details performance metrics and clinical accuracy standards for the NIBP module.

Appendix C - Accessories: Specifications & Technical Data

NIBP Module Performance and Safety Standards (Cont.)

Further performance details and relevant safety standards met by the NIBP module.

Appendix C - Accessories: Specifications & Technical Data

NIBP Error Codes and Corrective Actions

Lists NIBP error codes and recommended corrective actions for troubleshooting.

Appendix C - Accessories: Specifications & Technical Data

NIBP Error Codes (Continued)

Continues the list of NIBP error codes and their solutions.

Appendix C - Accessories: Specifications & Technical Data

NIBP Module Errors (ADC, EEPROM, Busy)

Addresses NIBP module errors related to ADC, EEPROM, and device busy states.

Appendix C - Accessories: Specifications & Technical Data

SpO2 Module Introduction and Patient Populations

Introduces pulse oximetry and identifies patient populations for SpO2 monitoring.

Appendix C - Accessories: Specifications & Technical Data

SpO2 Sensors and Accuracy Specifications

Lists NELLCOR SpO2 sensors and their accuracy specifications.

Appendix C - Accessories: Specifications & Technical Data

NELL-1 SpO2 Module Specifications

Details operating and storage conditions for the NELL-1 SpO2 module.

Appendix C - Accessories: Specifications & Technical Data

SpO2 Warnings and Precautions

Critical warnings and precautions for using the SpO2 module and sensors.

Appendix C - Accessories: Specifications & Technical Data

SpO2 Error Codes and Solutions

Lists SpO2 error codes and recommended corrective actions for troubleshooting.

Appendix C - Accessories: Specifications & Technical Data

External Patient Monitor Connection

Instructions for connecting external patient monitors to the Starling system.

baxter Starling Specifications

General IconGeneral
Brandbaxter
ModelStarling
CategoryMedical Equipment
LanguageEnglish

Related product manuals