©2020 Baxter International Inc. 5- 7
Patient Preparation
4. Open the Starling Sensor Set outer foil pouch and carefully remove the contents.
5. Using the finger-shaped Skin Abrasive Paper provided, and with the abrasive side
facing
downwards
, gently rub on the skin in each of the prepared areas to roughen the
skin.
Note
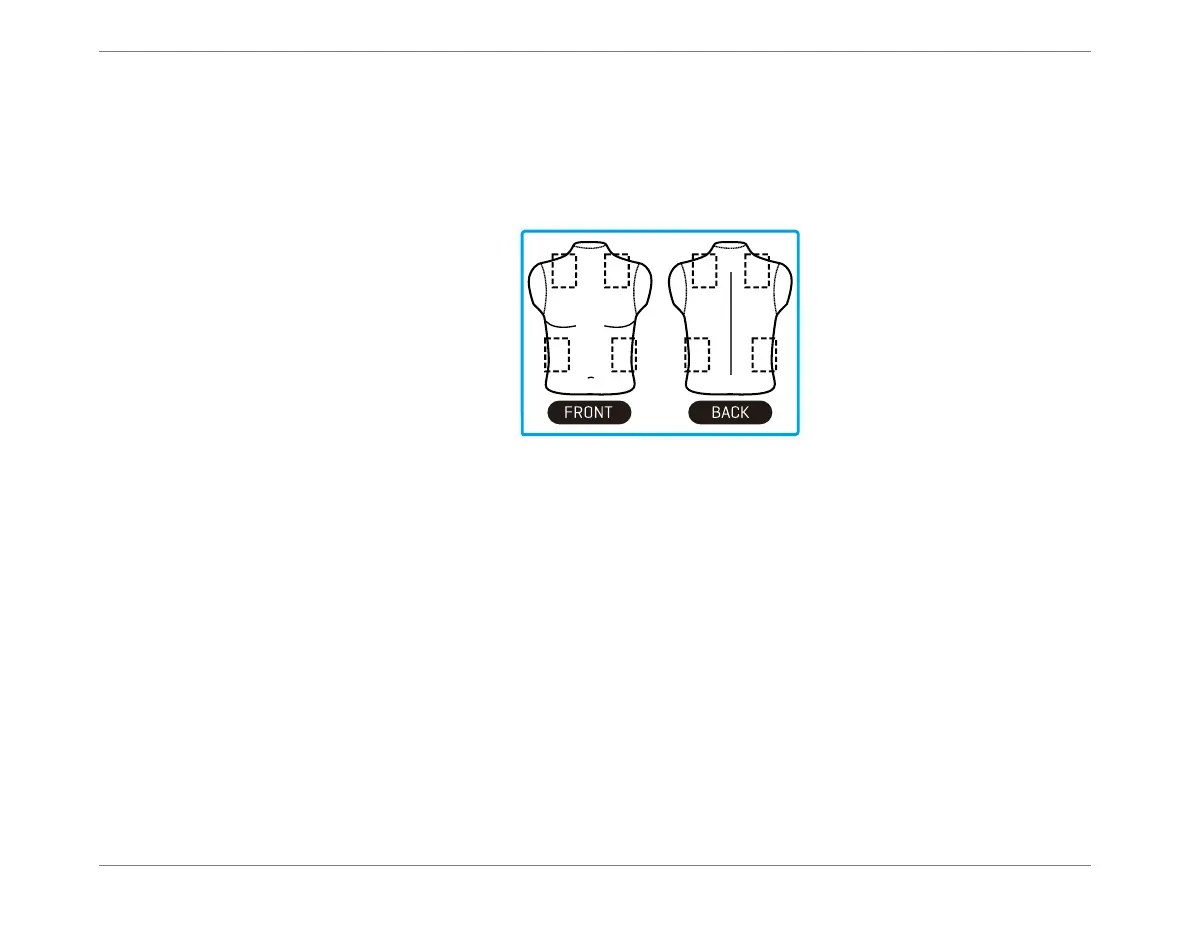
Figure 5-4 shows the four area positions suitable on either the front or the back of the patient.
6. Observe the orientation mark on each of the four Starling Sensor pairs (shown in
Figure 5-5) and carefully proceed as follows:
a. Take one Sensor pair and peel off the protective film covering the underside to
expose the adhesive surface.
b. With the adhesive side facing
downwards
, carefully position the Sensor over the
appropriate area (in accordance with its orientation mark - see Figure 5-5) and
press it down on all sides to secure it firmly on the patient’s skin.
c. Repeat Step a and Step b above for each of the other Sensors (placing them in the
appropriate orientation) until all four Sensor pairs are correctly adhered to the
patient.
Note
Figure 5-5 shows an example of correct placement.
7. Proceed to the instructions for Connecting the Sensors to the Starling Patient Cable.
Figure 5-4 Four Areas for Positioning of Starling Sensors