©2020 Baxter International Inc. xxv
List of Tables
Table 1-1 Compliance with International Standards . . . . . . . . . . . . . . . . . . . . . . . . . . . . . . . . . . . 1-2
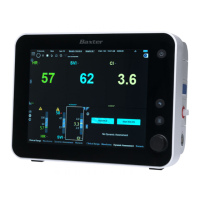
Table 1-2 Starling System - Safety Rating and Manufacturer Label . . . . . . . . . . . . . . . . . . . . . 1-7
Table 1-3 Disposable Starling Sensors - Symbol Descriptions . . . . . . . . . . . . . . . . . . . . . . . . . 1-12
Table 1-4 Recommended Environmental Conditions - Starling Monitor. . . . . . . . . . . . . . . . . 1-15
Table 1-5 Recommended Temperature Conditions - Starling Sensors . . . . . . . . . . . . . . . . . . 1-15
Table 2-1 Power On Button - Power Status Indicators . . . . . . . . . . . . . . . . . . . . . . . . . . . . . . . . 2-15
Table 2-2 Battery Status Indicators . . . . . . . . . . . . . . . . . . . . . . . . . . . . . . . . . . . . . . . . . . . . . . . . 2-16
Table 3-1 Main Menu . . . . . . . . . . . . . . . . . . . . . . . . . . . . . . . . . . . . . . . . . . . . . . . . . . . . . . . . . . . . . . 3-6
Table 3-2 Patient Management Window - Button Functions. . . . . . . . . . . . . . . . . . . . . . . . . . . 3-29
Table 5-1 Predefined Events - Available Options Listed Per Category . . . . . . . . . . . . . . . . . . 5-31
Table A-1 Starling System Troubleshooting - Error Messages . . . . . . . . . . . . . . . . . . . . . . . . . . A-2
Table A-2 Performing a PLR or Fluid Bolus Dynamic Assessment Test - Troubleshooting. . A-7
Table A-3 Starling System Troubleshooting - Warning Messages . . . . . . . . . . . . . . . . . . . . . . . A-8
Table A-4 Starling System Troubleshooting - Miscellaneous Issues . . . . . . . . . . . . . . . . . . . . . A-9
Table B-1 Normal Hemodynamic Parameters . . . . . . . . . . . . . . . . . . . . . . . . . . . . . . . . . . . . . . . . . B-1
Table B-2 Primary Measurements Calculated and Displayed . . . . . . . . . . . . . . . . . . . . . . . . . . . B-2
Table B-3 Starling Monitor - Dimensions and Weight . . . . . . . . . . . . . . . . . . . . . . . . . . . . . . . . . . B-5
Table B-4 Starling Monitor - LED Display . . . . . . . . . . . . . . . . . . . . . . . . . . . . . . . . . . . . . . . . . . . . .B-5
Table B-5 Starling Monitoring System Specifications . . . . . . . . . . . . . . . . . . . . . . . . . . . . . . . . . . B-5
Table B-6 Starling Sensors - Specifications . . . . . . . . . . . . . . . . . . . . . . . . . . . . . . . . . . . . . . . . . . B-7