©2020 Baxter International Inc. xxi
List of Figures
Figure 3-24 Patient Management Window - Selected Patient File. . . . . . . . . . . . . . . . . . . . . . 3-30
Figure 3-25 Warning Message - Patient File and All Sessions in File will be Deleted . . . . . 3-31
Figure 3-26 Session Browser Window - Default Display. . . . . . . . . . . . . . . . . . . . . . . . . . . . . . . 3-32
Figure 3-27 Trends Area - Full Screen View showing Sessions Indicator . . . . . . . . . . . . . . . . 3-35
Figure 3-28 Viewing Multiple Dynamic Assessment Test Results in History Mode . . . . . . . . 3-36
Figure 3-29 Viewing Numeric Data in History Mode. . . . . . . . . . . . . . . . . . . . . . . . . . . . . . . . . . . 3-38
Figure 4-1 Mounting the Monitor on the Roll Stand. . . . . . . . . . . . . . . . . . . . . . . . . . . . . . . . . . . 4-3
Figure 4-2 Starling Monitor Secured on the Roll Stand . . . . . . . . . . . . . . . . . . . . . . . . . . . . . . . 4-4
Figure 4-3 Starling IV Pole Mount Connector Attached to Monitor . . . . . . . . . . . . . . . . . . . . . 4-5
Figure 4-4 Connecting the AC Power Cable to the Monitor . . . . . . . . . . . . . . . . . . . . . . . . . . . . 4-7
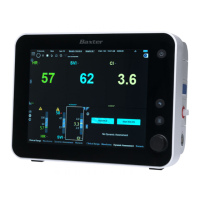
Figure 4-5 System Startup Screen . . . . . . . . . . . . . . . . . . . . . . . . . . . . . . . . . . . . . . . . . . . . . . . . . 4-8
Figure 4-6 Quick Access Menu . . . . . . . . . . . . . . . . . . . . . . . . . . . . . . . . . . . . . . . . . . . . . . . . . . . . . 4-9
Figure 4-7 Connecting the Starling Patient Cable . . . . . . . . . . . . . . . . . . . . . . . . . . . . . . . . . . . 4-10
Figure 4-8 Connecting the NIBP Air Hose . . . . . . . . . . . . . . . . . . . . . . . . . . . . . . . . . . . . . . . . . . 4-11
Figure 4-9 Connecting the SpO
2
Cable . . . . . . . . . . . . . . . . . . . . . . . . . . . . . . . . . . . . . . . . . . . . . 4-12
Figure 4-10 Shut Down Dialog Box . . . . . . . . . . . . . . . . . . . . . . . . . . . . . . . . . . . . . . . . . . . . . . . . .4-13
Figure 5-1 Add a New Patient . . . . . . . . . . . . . . . . . . . . . . . . . . . . . . . . . . . . . . . . . . . . . . . . . . . . . . 5-2
Figure 5-2 Enter New Patient Details . . . . . . . . . . . . . . . . . . . . . . . . . . . . . . . . . . . . . . . . . . . . . . . 5-3
Figure 5-3 Adding Patient Details . . . . . . . . . . . . . . . . . . . . . . . . . . . . . . . . . . . . . . . . . . . . . . . . . . 5-4
Figure 5-4 Four Areas for Positioning of Starling Sensors. . . . . . . . . . . . . . . . . . . . . . . . . . . . . 5-7
Figure 5-5 CORRECT Orientation of Sensors . . . . . . . . . . . . . . . . . . . . . . . . . . . . . . . . . . . . . . . . . 5-8
Figure 5-6 INCORRECT Orientation of Sensors . . . . . . . . . . . . . . . . . . . . . . . . . . . . . . . . . . . . . . . 5-8
Figure 5-7 Sensor Placement Window - Calibration in Progress . . . . . . . . . . . . . . . . . . . . . . 5-10
Figure 5-8 Sensor Placement - Error Display . . . . . . . . . . . . . . . . . . . . . . . . . . . . . . . . . . . . . . . 5-11