7-10
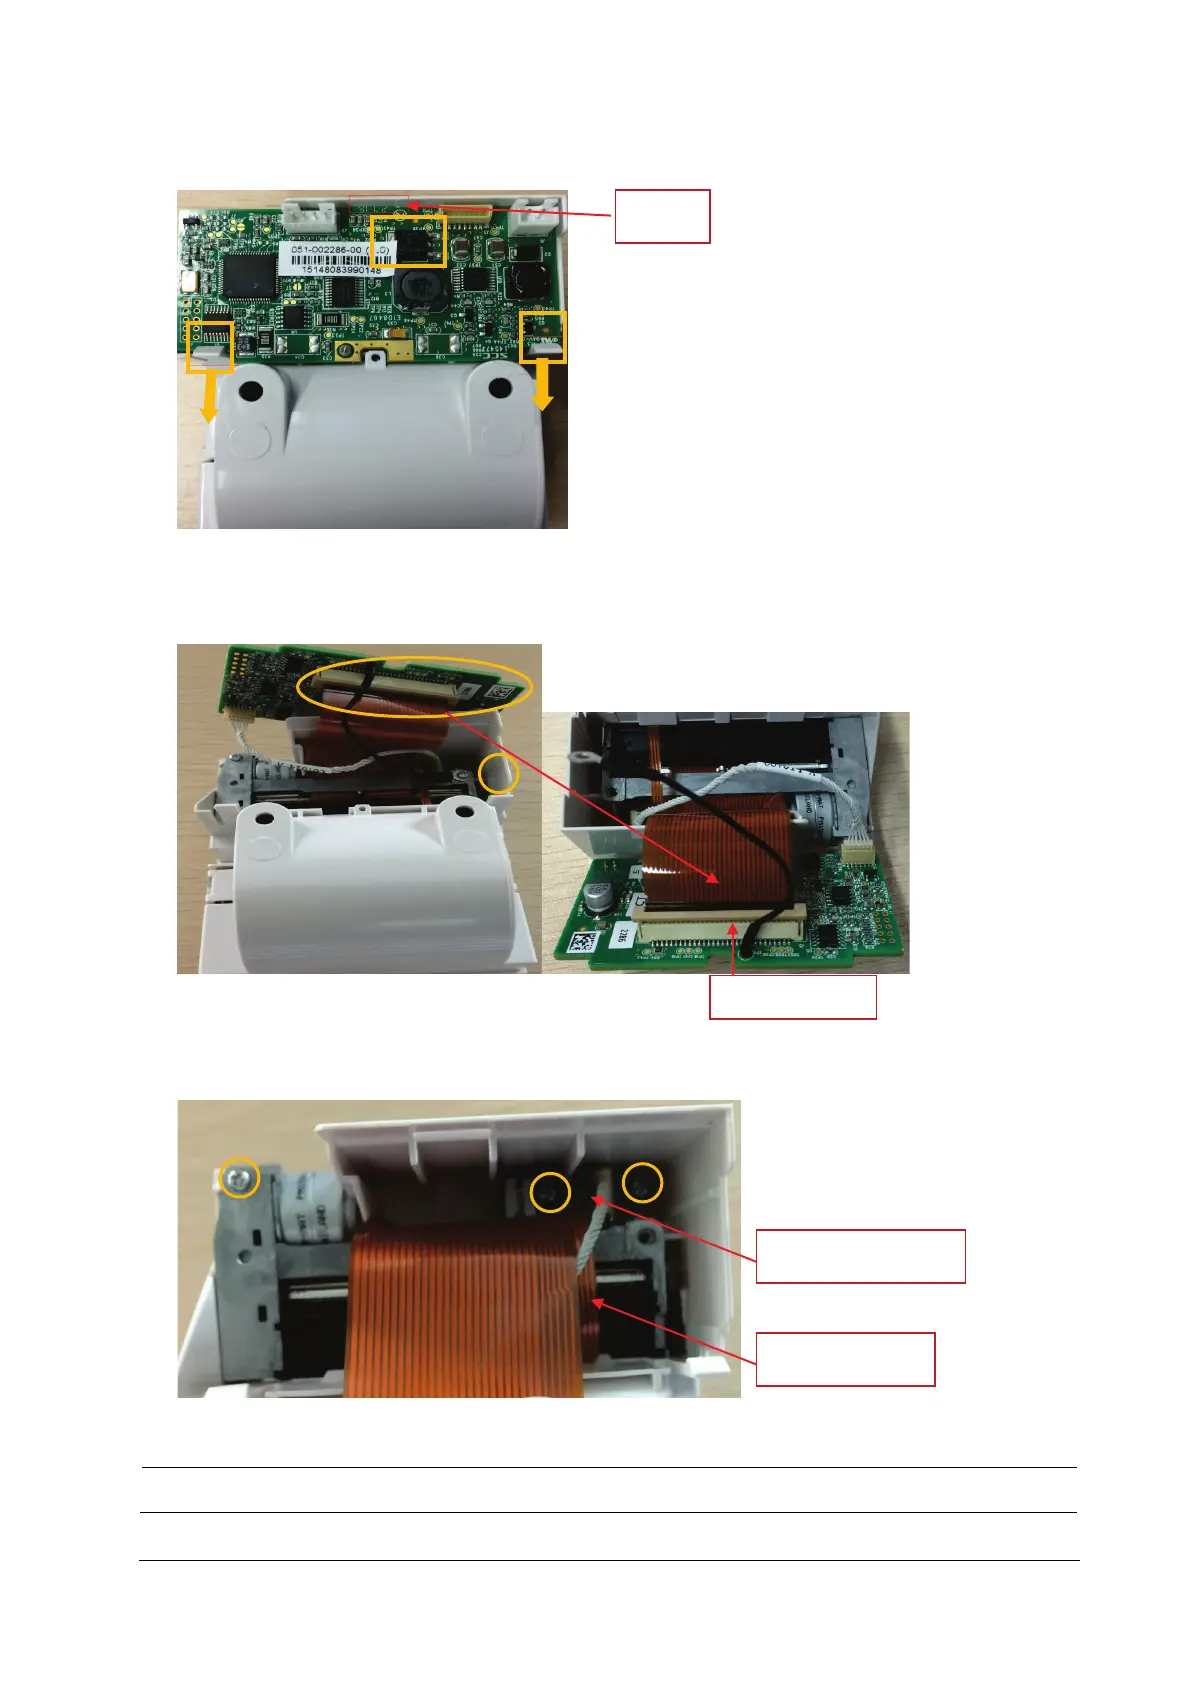
2. Release the two clips backward and take out the recorder drive board. Pay attention to the snap in the front.
3. First pull up the pressing buckle by about 1 mm to remove the flexible cable; remove the connection line from the
drive board to the button board; unscrew one PT2×6 screw, and remove the ground cable of the drive board.
Remove the recorder drive board.
4. Remove the other PT2×6 screw and take out the thermal printhead.
5. Loosen and remove the two PT2×6 screws and remove the button board of recorder.
Use proper force to remove the cable carefully lest it would be broken.
Snap
Recorder button board
Thermal print head