BERNINA International AG Seestrasse 161 CH-8266 Steckborn Schweiz Seite 68 von 172
DRAFT – VERSION
4.3.6 Crank shaft and stitch length stepping motor
See ESD-related note
Disassembly:
• Remove the covers (see 4.1
)
• Remove PCBA-Base (siee 4.2.4)
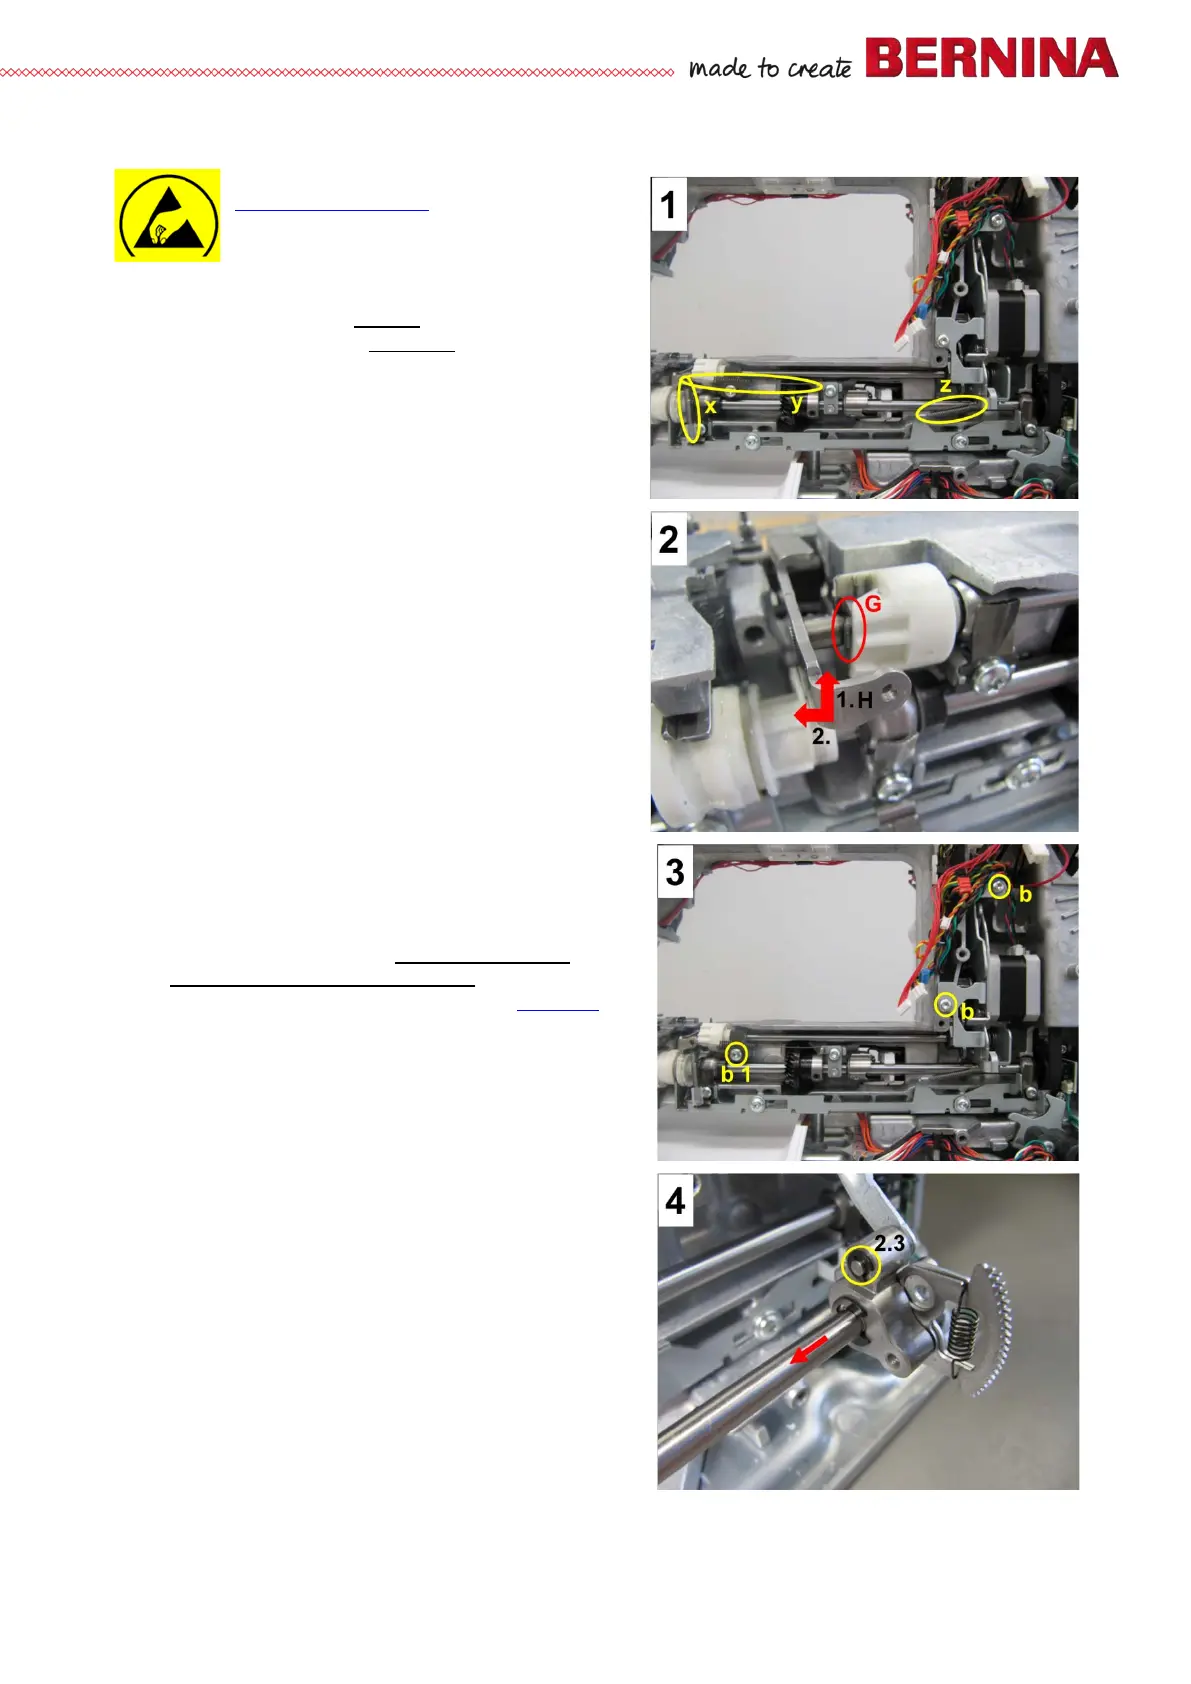
• Picture 1 – Unhook tension springs x, y and z. Put
aside.
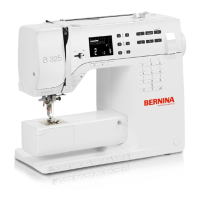
• Picture 2 – Slide lift-/advance link H up, and
remove shoe G.
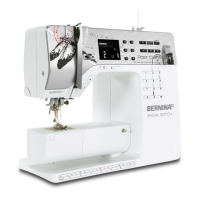
• Picture 3 – First, remove screw b1 T20 (M4X10)
and clamp. Then remove the other screws b T20
(M4X10).
• Picture 3 – Remove the entire crankshaft-/SL
stepping motor unit. Then remove crankshaft from
SL stepping motor.
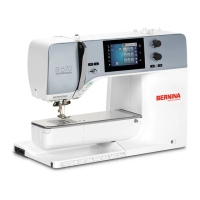
• Picture 4 – Remove 2.3mm circlip. Then slide
crankshaft out of upper-feed crank link.
Assembly:
• Picture 4 – Slide crankshaft into upper-feed crank
link. Refit circlip with 2.3mm circlip mounting tool
(033958.50.01).
• Picture 3 – Refit crankshaft to stitch-length
stepping motor. Then refit entire unit. Retighten
screws b and b1 T20 to fasten unit.
• Picture 2 – Slide lift-/advance link H up. Refit shoe
G and bring into correct position.
• Picture 1 – Rehook tension springs x, y and z.
• Adjusting the crankshaft
see 5.6.4 Main feed
mechanical balance - basic setting.
• Refit PCBA-Base. Refit all connectors (see 4.2.4).
• Refit all covers (if appropriate).