BERNINA International AG Seestrasse 161 CH-8266 Steckborn Schweiz Seite 84 von 172
DRAFT – VERSION
4.3.22 Stitch-width stepping motor
See ESD-related note
Note:
The stitch-width stepping motor can only initialize with the
needle out of the stitch hole. This does NOT apply for
the Pinning Position in Servie Program 5e.
• Remove the covers (see 4.1
)
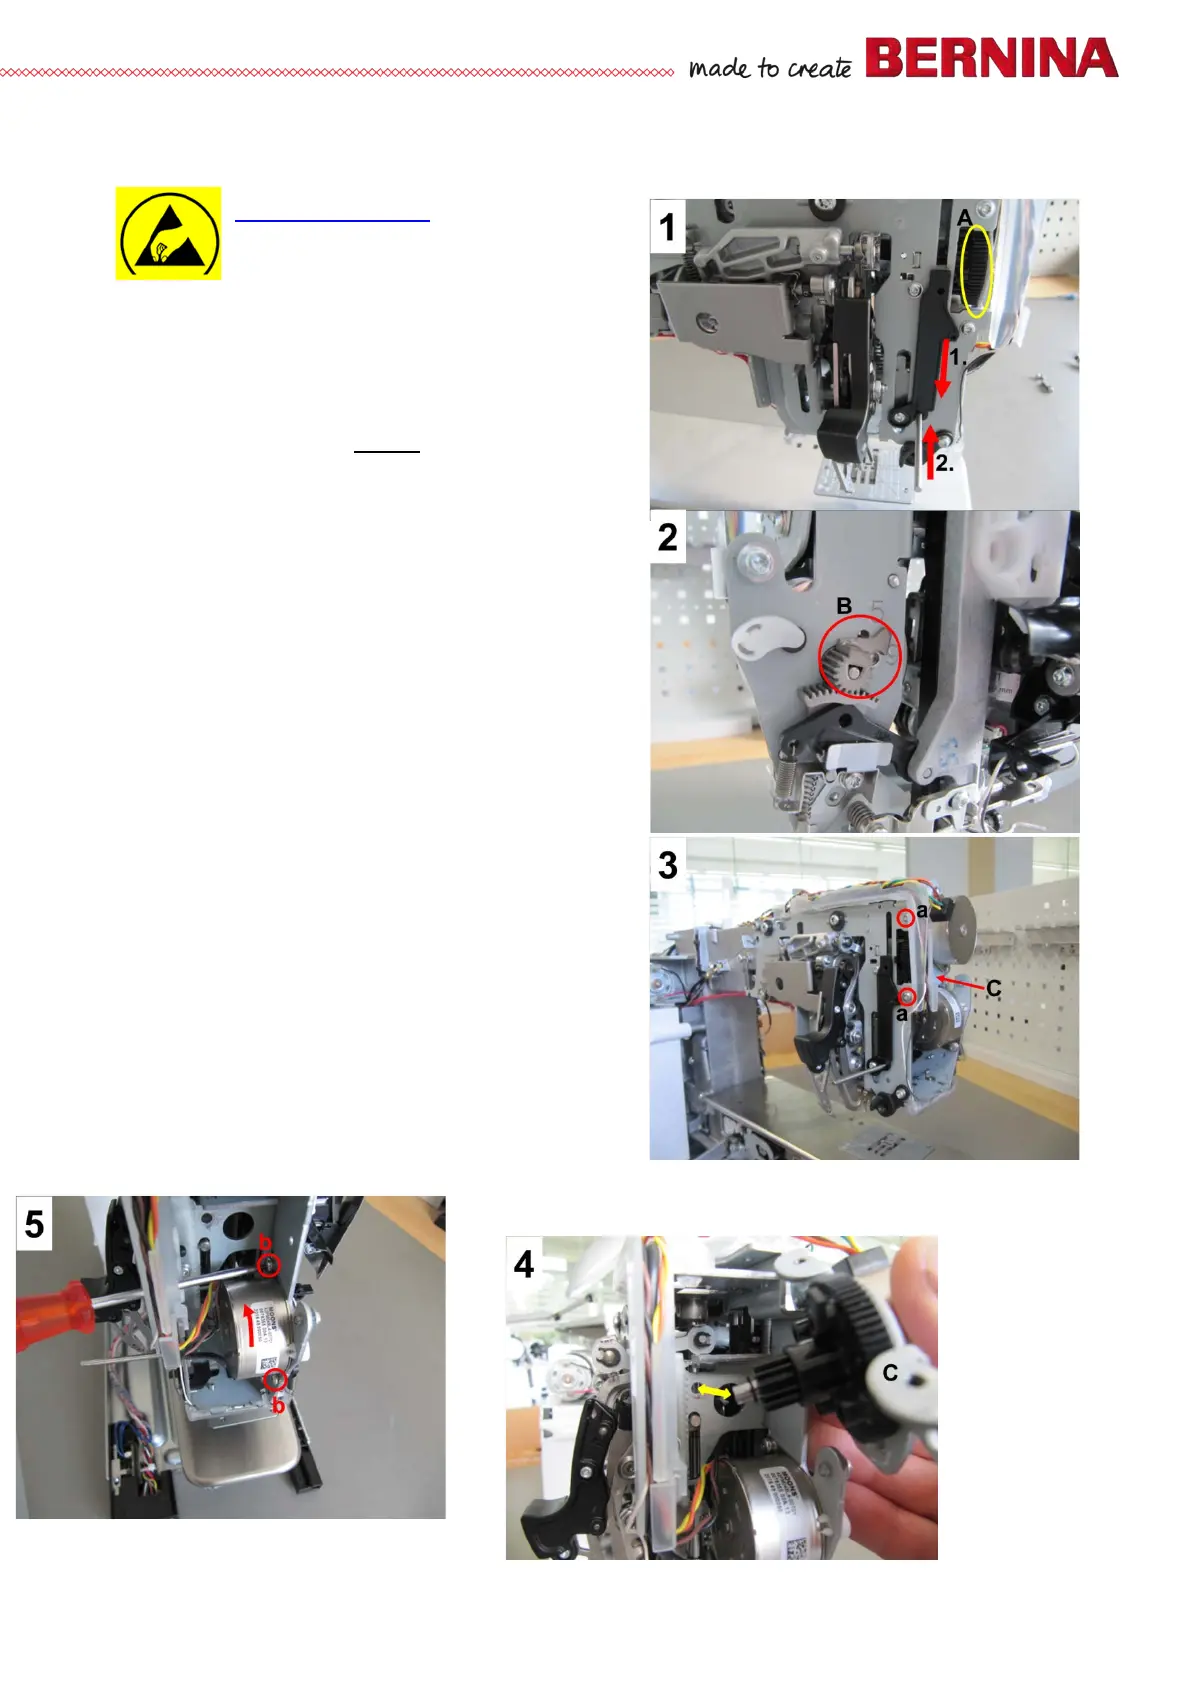
• Picture 1 - Turn gearwheel A of presser-foot
pressure and height stepping motor down until
black guide of toothed rack is lockable with 3.0mm
pinning tool (007937.50.00).
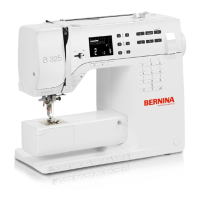
• Picture 2 - With the aid of a T8 screwdriver,
remove gear pinion B from stitch-width stepping
motor.
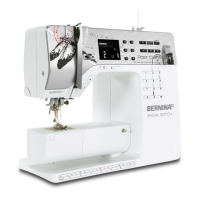
• Picture 3 - Remove the two screws a T10 (M3x6
including washer). Remove carrier plate including
presser-foot pressure and height stepping motor.
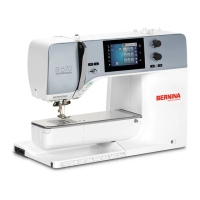
• Picture 4 - Remove carrier plate C including
presser-foot pressure and height stepping motor.
• Picture 5 - Remove two screws b T10 (M3x4) from
stitch-width stepping motor. Slightly turn stepping
motor to rear and out of sewing head.
Assembly:
• Picture 5 - Reinsert stitch-width stepping motor to
sewing head, and fasten it with screws b.
• Picture 4 - For easier fitting of shaft on carrier
plate C, apply a drop of oil on the shaft before
carefully sliding it into bore (marked in yellow).
• Picture 3 - Retighten two scews a T10 on presser-
foot pressure and height stetpping motor carrier
plate to fasten it.
• Picture 2 - Refit stitch-width stepping motor gear
pinion B in such way that each side has the same
amount of teeth when pinning it at 9.0mm left and
right.
• Picture 1 - Remove 3.0mm pinning tool.