BERNINA International AG Seestrasse 161 CH-8266 Steckborn Schweiz Seite 72 von 172
DRAFT – VERSION
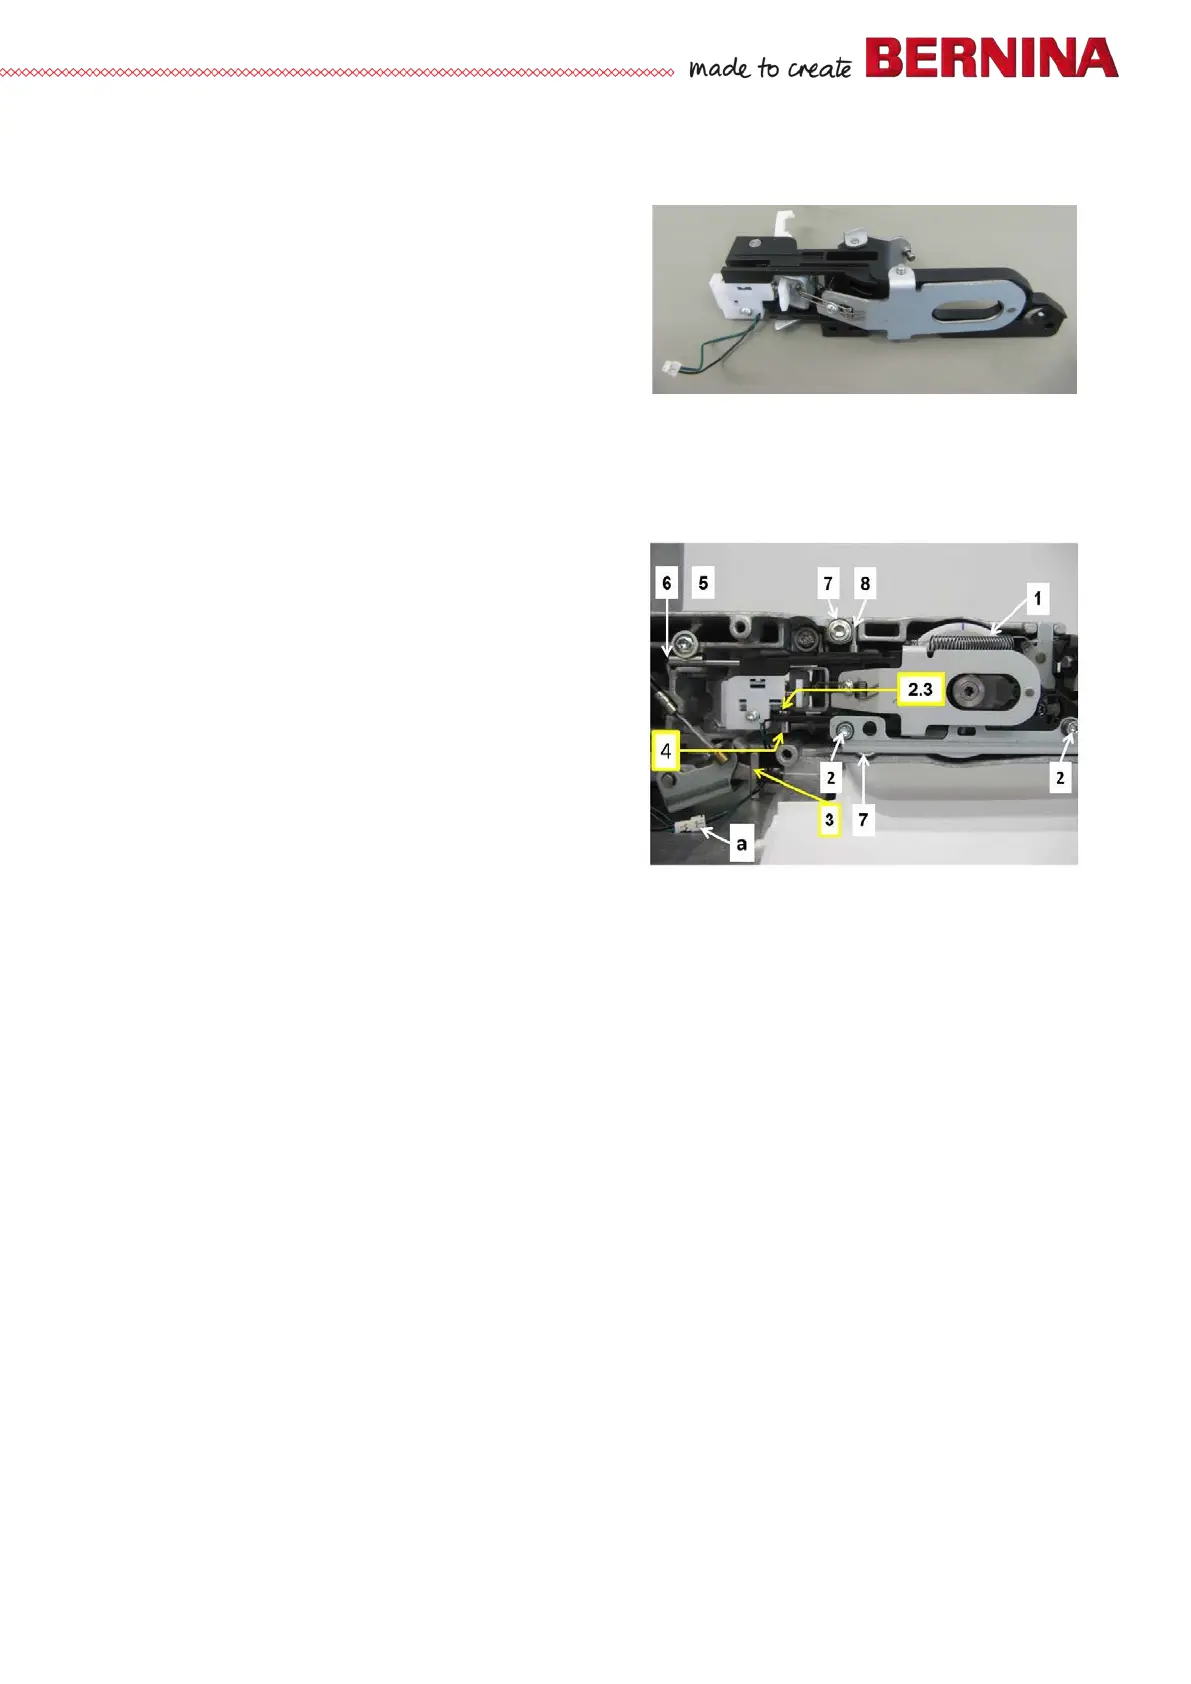
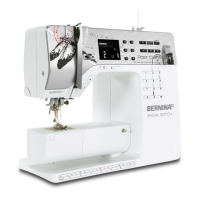
4.3.11 Clutch carriage
Disassembly:
• Remove tension spring 1.
• Untighten screws 2 (2 x T10) to remove connecting
strap between clutch carriage and thread-cutter
release lever.
• Remove bracket 3 and unplug pull soleoid
connector a.
• Remove size 2.3 circlip from stop pin 4. Then
remove stop pin.
• Remove fillisterhead stop screw 5 (1 x T20) and
horizontal eccentric guiding pin 6.
• Untighten 1 lower fillisterhead stop screw 7 (1x T20). Remove 1 upper fillisterhead stop screw 7 (1 x
T20). Remove vertical guiding pin 8.
• Remove clutch carriage, taking care not to interfere with the pull solenoid wire.
Assembly:
• Refit clutch carriage, taking care not to interfere
with the pull solenoid wire.
• Refit vertical guiding pin 8. Slide it on lower stop.
Then secure with lower fillisterhead stop screw 7 (1
x T20). Refit and retighten upper fillisterhead stop
screw 7 (1 x T20).
• Refit horizontal, eccentric guiding pin 6, securing it
by tightening fillisterhead stop screw 5. Don't
tighten completely - eccentric pin must still be
turnable.
• Turn eccentric guiding pin until clutch carriage
won't move when tightening fillisterhead stop screw
6.
• Refit stop pin 4 to clutch carriage. Then secure with size 2.3 circlip.
• Refit pull solenoid wire properly. Replug connector a, and refit bracket 3.
• Refit connecting strap between clutch carriage and thread-cutter release lever, and retighten screws 2
(2 x T10) just slightly.
• Use 3.0mm pinnning tool a (007937.50.00) to pin thread-cutter unit thread catcher.
• Use 3.0mm pinning tool b (007937.50.00) to pin link between clutch carriage and thread-cutter release
lever. Ensure that screws 2 (2xT10) are untightened.
• Use eccentric key (001361.70.00) to position the clutch lever in such way that the clutch lever fork
won't touch the base shaft in any position and that it can easily be brought into home position by the
pull solenoid pressure spring.
• In this position, retighten connecting strap screws 2 (2 X T10).
• Rehook tension spring 1.
• Check and adjust base shaft synchronization (see 5.5.1)
• Function-check solenoid (see Service Program test 6d).