BERNINA International AG Seestrasse 161 CH-8266 Steckborn Schweiz Seite 41 von 172
DRAFT – VERSION
4.1.3 Rear Cover
Note:
Before removing the rear cover, it is better to remove the base-plate cover first (see 4.1.5
).
Disassembly:
• Remove base plate cover (see 4.1.5
).
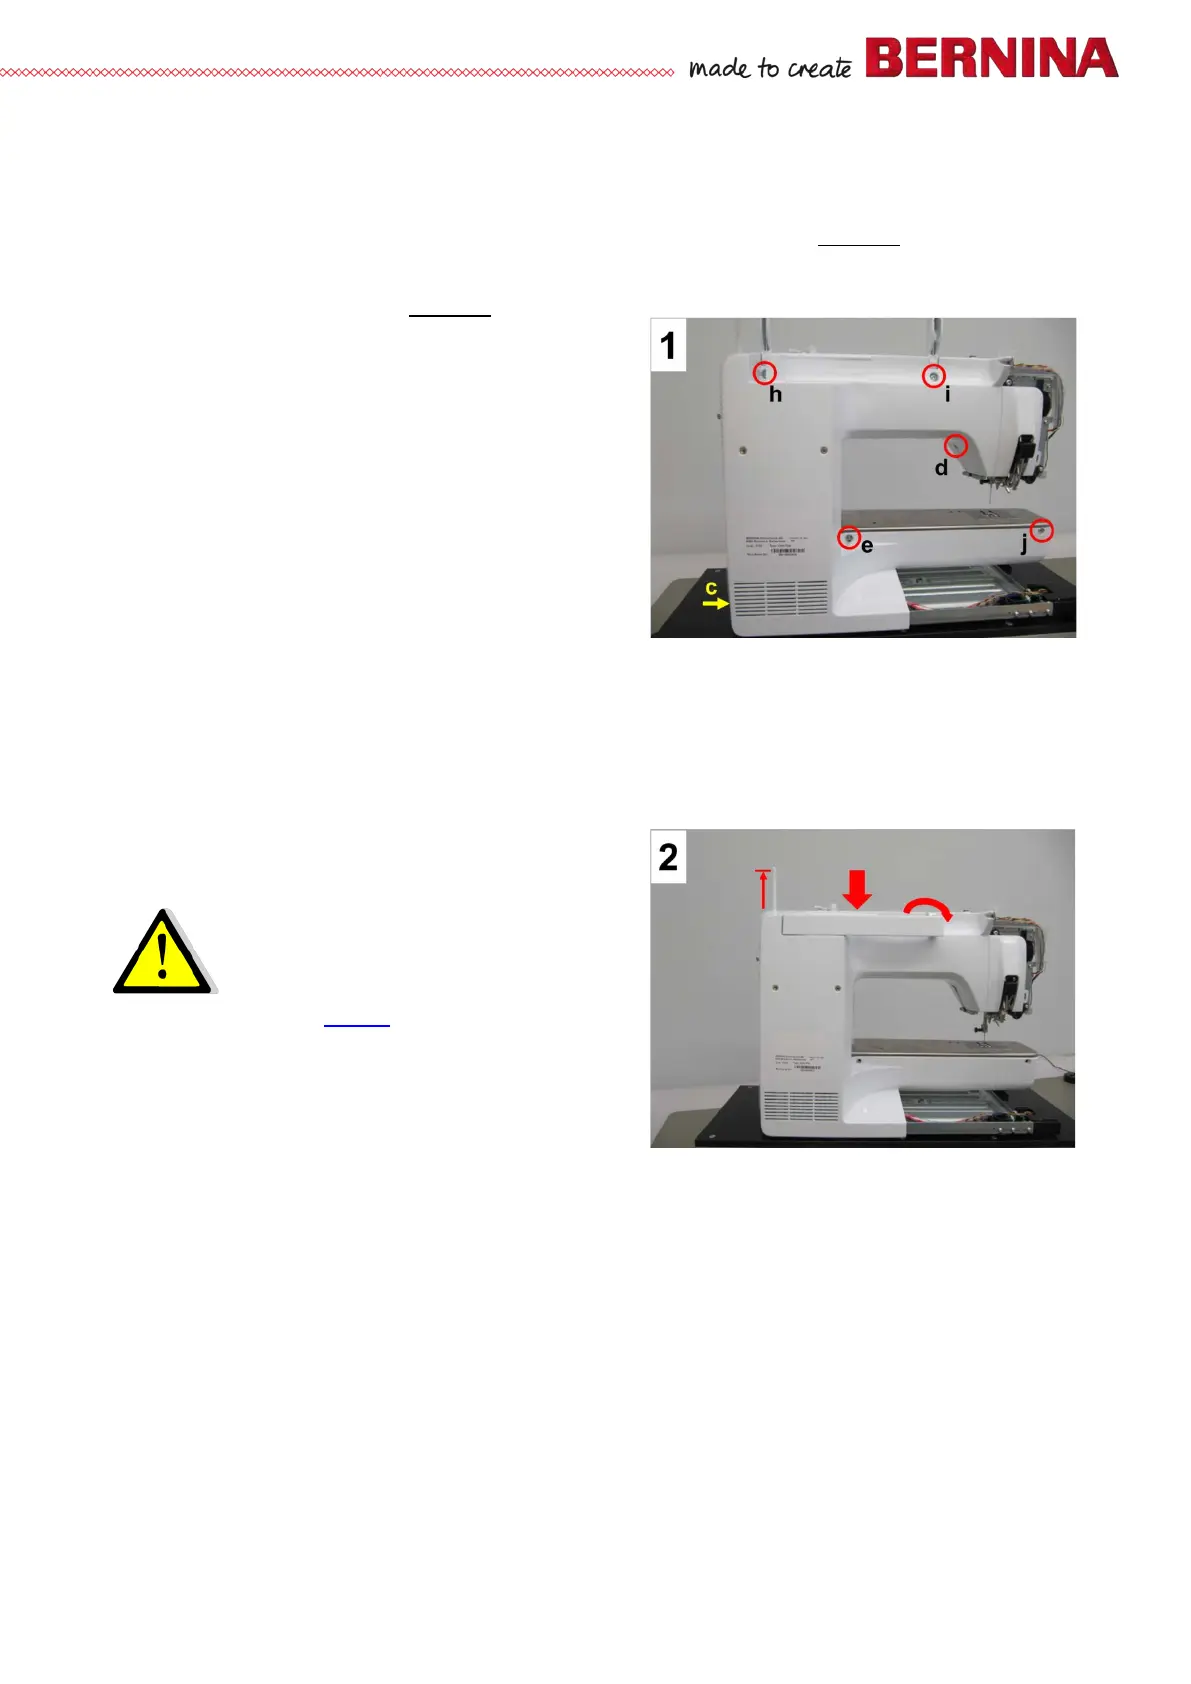
• Picture 1 - Remove fastening screw and washer c
(T10 M3 X 10) at the very bottom of the machine -
the one that holds the front cover and rear cover
together.
• Picture 1 - Using a Allen key T20, slightly
untighten fastening screw d on stitching head - the
screw that holds the front cover and rear cover
together.
• Picture 1 - Remove rear slide-on table anchoring
screw (T15) e.
•
Picture 1 - Remove fastening screws h, i and j
(T20 M4 X 10).
Note:
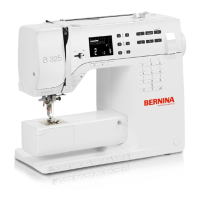
There are washers under screws h and i. Remember to pull up the retractable spool pin in order to be
able to remove the rear cover (pict 2).
• Picture 2 - Pull rear cover into your direction to remove it.
Assembly:
• Picture 2 - Refit rear cover.
Important!
The rear cover lugs for fastening screws c
and d must be under the front cover
lugs.
Take care not to pinch the ABC sensors’
harness (see 2.9
).
• Picture 1 - Refit and retighten screws j, i, and h
(T20).
•
Picture 1 - Refit and retighten rear slide-
on table anchoring screw (T15) e.
• Picture 1 - Retighten screw d.
• Picture 1 - Refit and retighten screw c incl. washer.