BERNINA International AG Seestrasse 161 CH-8266 Steckborn Schweiz Seite 74 von 172
DRAFT – VERSION
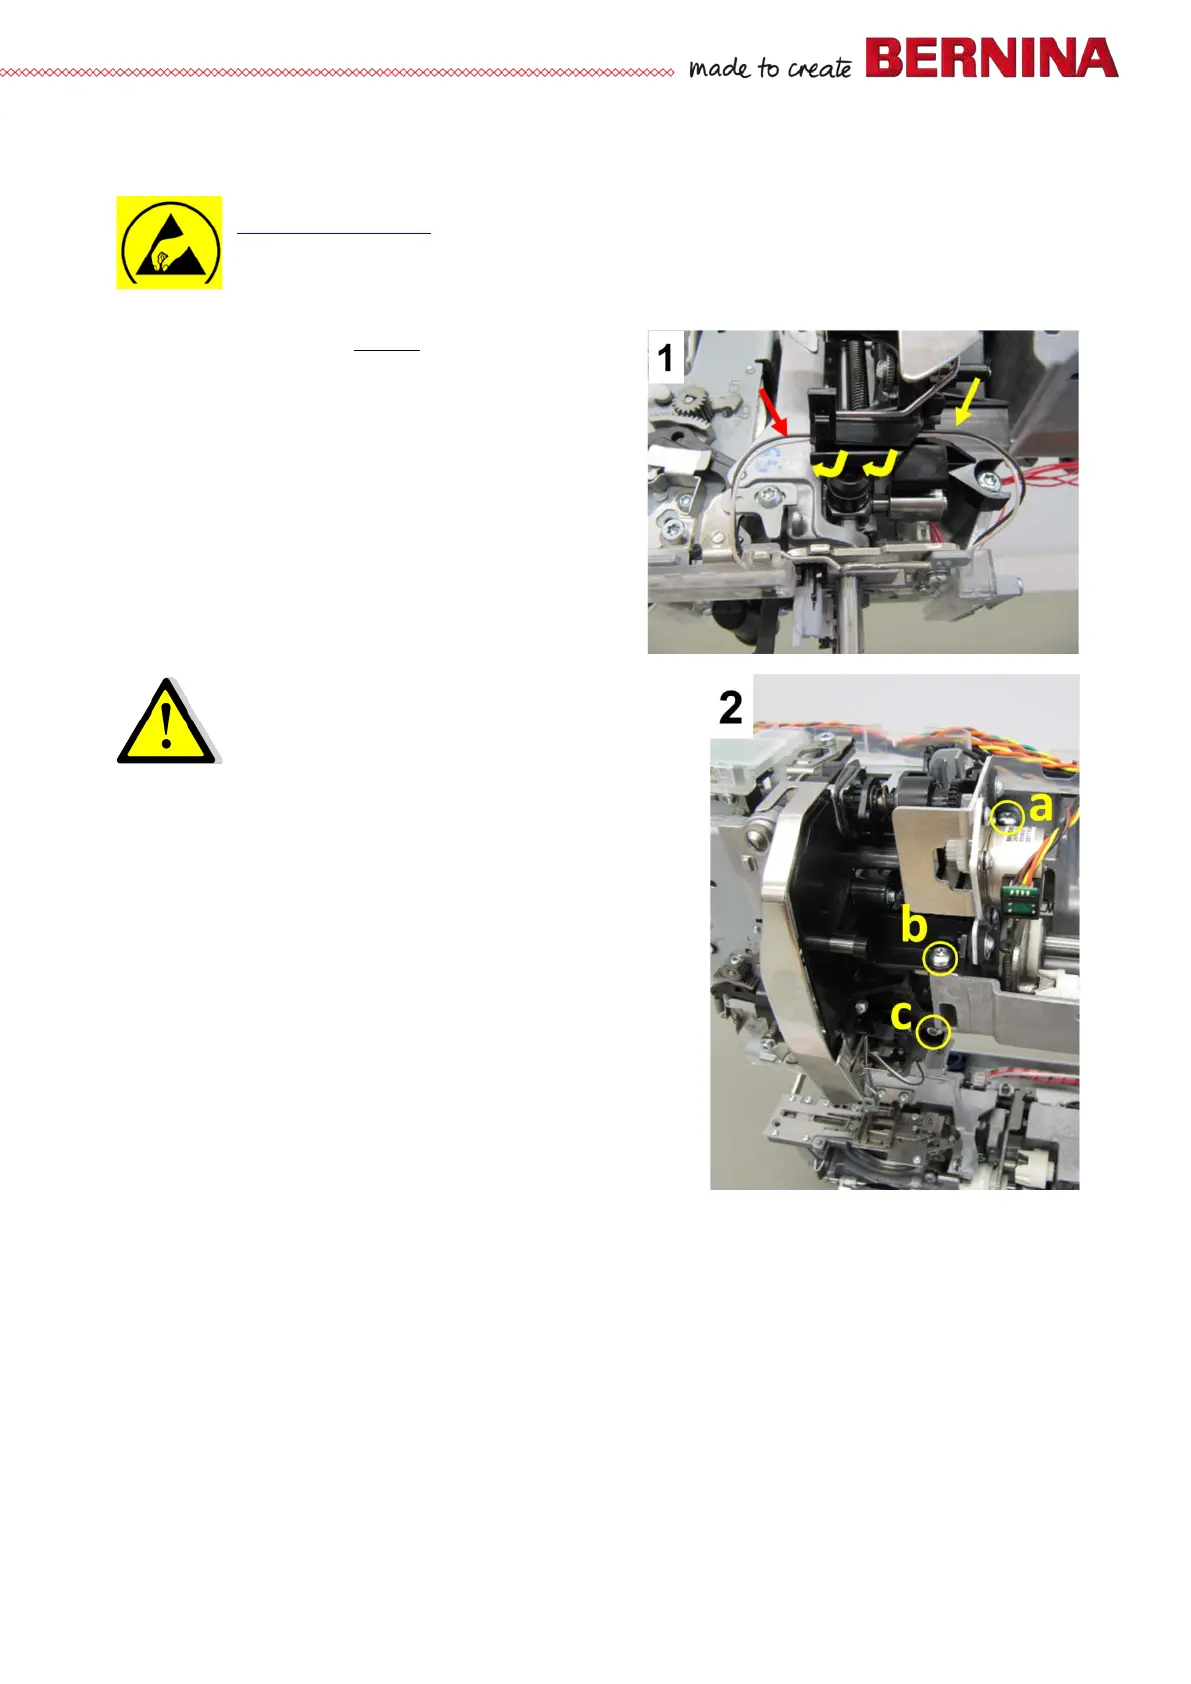
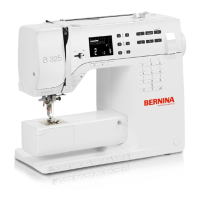
4.3.12 Thread take-up cover with automatic upper-thread tensioning unit
See ESD-related note
Disassembly:
• Remove the covers (see 4.1
).
• Picture 1 - Carefully remove the two stranded
wires (black/white) from the small cable duct.
• Picture 2 - Remove screws a, b, and c (T20)
including washers.
Note:
The screw holes are slotted, but in different
directions. Therefore we recommend to remove
the screws entirely.
Take care not to damage the very thin stranded
wires of the lighting when removing parts.
The unit can be put down in the frame arm.
Warning!
The electric connection on the thread-
tensioning stepping motor is NOT protected.
Take care not to produce short-circuiting.
Assembly:
• Bring the thread take-up cover with automatic thread
tensioner into position, taking care not to damage the fine
stranded lighting wires.
• Tighten fastening screws a, b, and c (T20 M4X10) to
attach the unit.
• Carefully reinsert the two stranded wires (black/white)
into the small cable duct.
• If nothing else has to be taken care of, refit the covers
(see 4.1)