6-25 Confidential
Scanner cover sensor actuator, ink cartridge cover sensor actuator, and cover sensor PCB
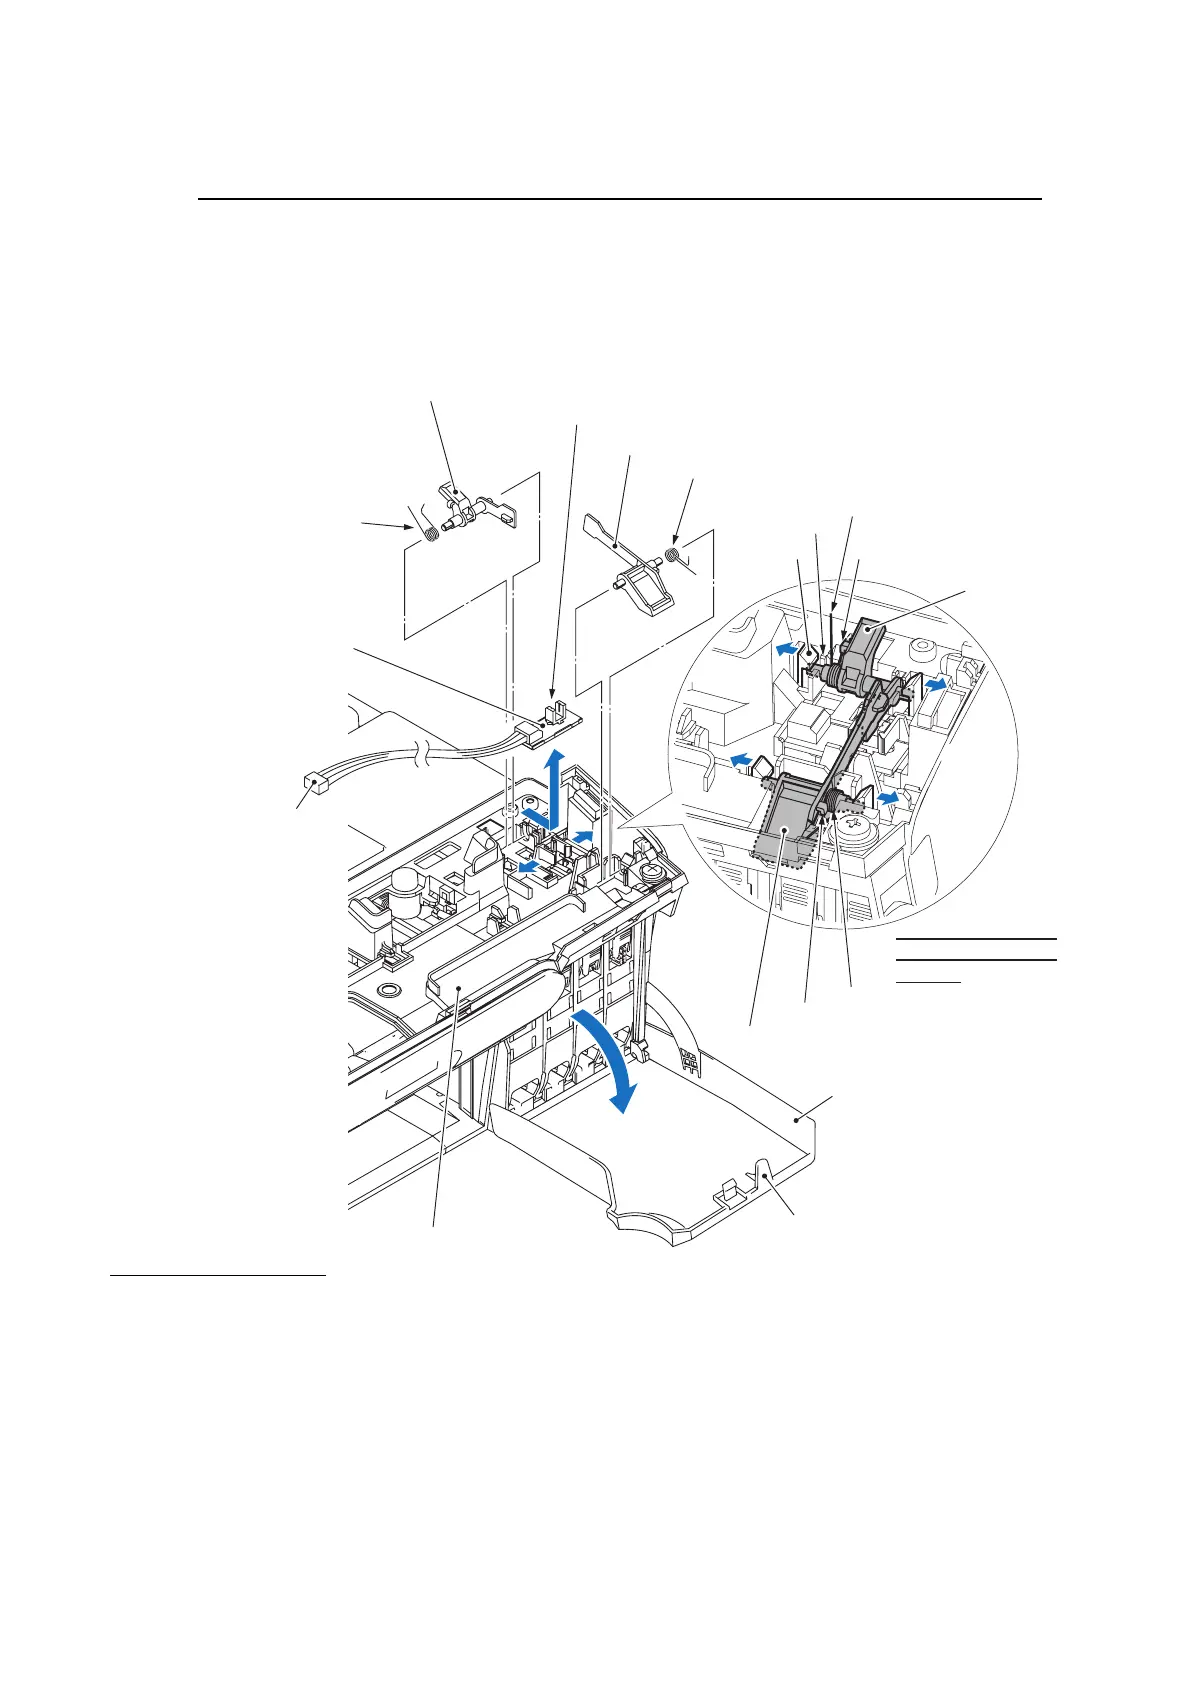
(4) Remove the scanner cover sensor actuator from the upper cover, pulling the lock arms
outwards. The actuator spring also comes off.
(5) Open the ink cartridge cover. Remove the ink cartridge cover sensor actuator, pulling the lock
arms outwards. The actuator spring also comes off.
(6) Remove the cover sensor PCB by pulling the two lock arms outwards that hold the
photosensor.
Scanner/ink cartridge cover sensor
(6_25)
Scanner cover sensor actuator
Actuator spring
Cover sensor PCB
Cover sensor harness
Upper cover
Ink cartridge cover
Ink cartridge cover sensor actuator
Scanner cover
sensor actuato
Actuator spring
Ink cartridge cover sensor actuator
Actuator lever
Lock arm
Hook
Rib
Removing the actuators
by pulling the lock arms
outwards
Actuator spring
Hook
Actuator spring
Assembling Notes
• Mount the ink cartridge cover sensor actuator with the ink cartridge cover being opened. When
setting its spring, fit the bent end under the hook on the actuator, and the straight end on the
upper cover as shown above. After closing the cover, check that the cover's actuator lever pushes
down the sensor actuator.
• When mounting the scanner cover sensor actuator, fit the bent end under the hook on the actuator,
and the straight end between the rib and boss on the upper cover.
• When securing the control panel ASSY to the upper cover, tighten the three screws in the order
of to as shown on the previous page. After mounting the control panel ASSY, check that
there is no gap between the front end of the control panel ASSY and that of the upper cover.
 Loading...