EasyManuals Logo

Brother P-touch QL-710W User Manual

Brother P-touch QL-710W
123 pages
To Next Page IconTo Next Page
To Previous Page IconTo Previous Page
Page #35 background imageLoading...
Page #35 background image
III - 16
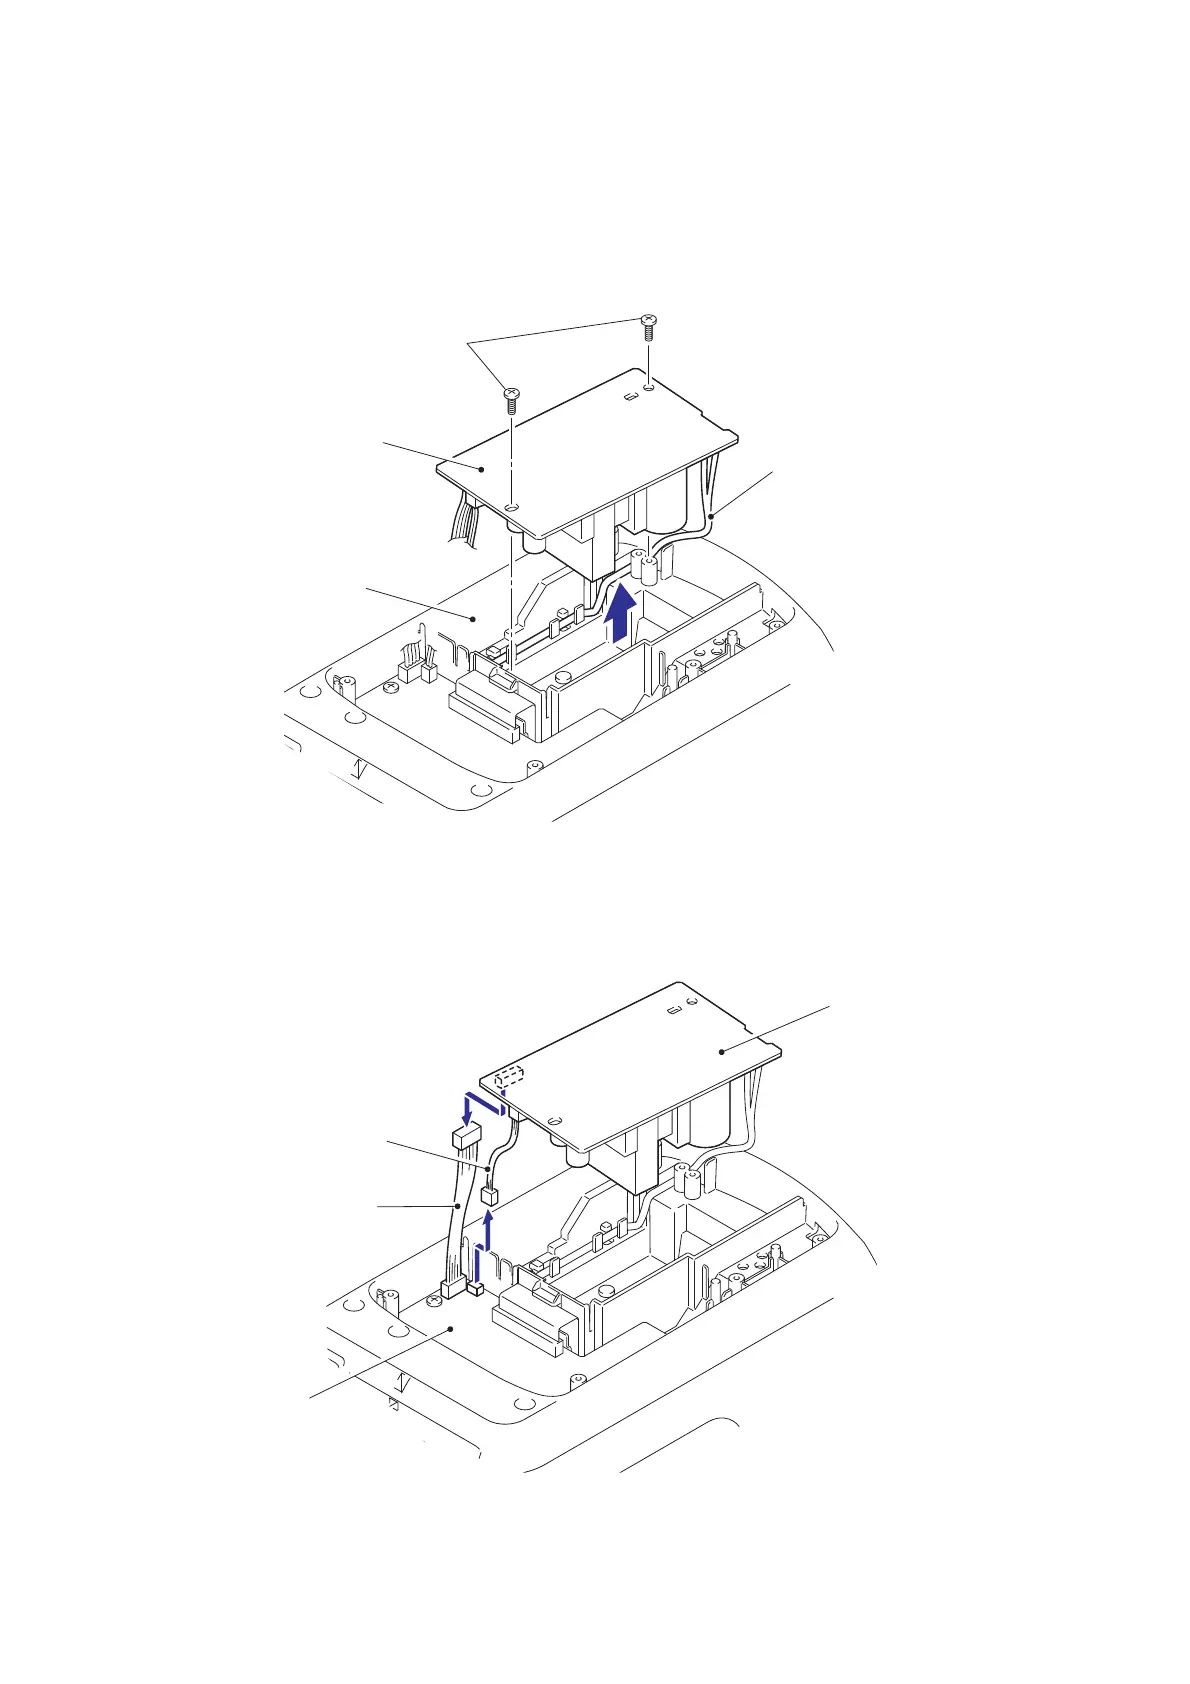
[6] Removing the Power Supply ASSY and the Main PCB ASSY
(1) Remove the two screws, and then remove the power supply ASSY from the
under cover.
NOTE: At this point, the sub ASSY inlet harness is still attached, and therefore
the power supply ASSY cannot be removed yet.
Fig. 3.4-18 Removing the Power Supply ASSY and the Main PCB ASSY (1)
(2) Disconnect the main PCB harness from the power supply ASSY.
(3) Disconnect the power8 harness ASSY (CN2) from the main PCB ASSY.
Fig. 3.4-19 Removing the Power Supply ASSY and the Main PCB ASSY (2)
Sub ASSY inlet harness
Screws
Power supply ASSY
Under cover
Power supply ASSY
Power8 harness ASSY
Main PCB ASSY
Main PCB harness

Table of Contents

Questions and Answers:

Question and Answer IconNeed help?

Do you have a question about the Brother P-touch QL-710W and is the answer not in the manual?

Brother P-touch QL-710W Specifications

General IconGeneral
Maximum Label Width62 mm
Resolution300 dpi
CutterAutomatic
Device CategoryLabel Maker
Power SourceAC adapter
Printing TechnologyThermal
ConnectivityUSB, Wi-Fi
Media TypeDie-cut labels, Continuous labels
Supported OSWindows, Mac

Related product manuals