EasyManuals Logo

Brother P-touch QL-710W User Manual

Brother P-touch QL-710W
123 pages
To Next Page IconTo Next Page
To Previous Page IconTo Previous Page
Page #59 background imageLoading...
Page #59 background image
III - 40
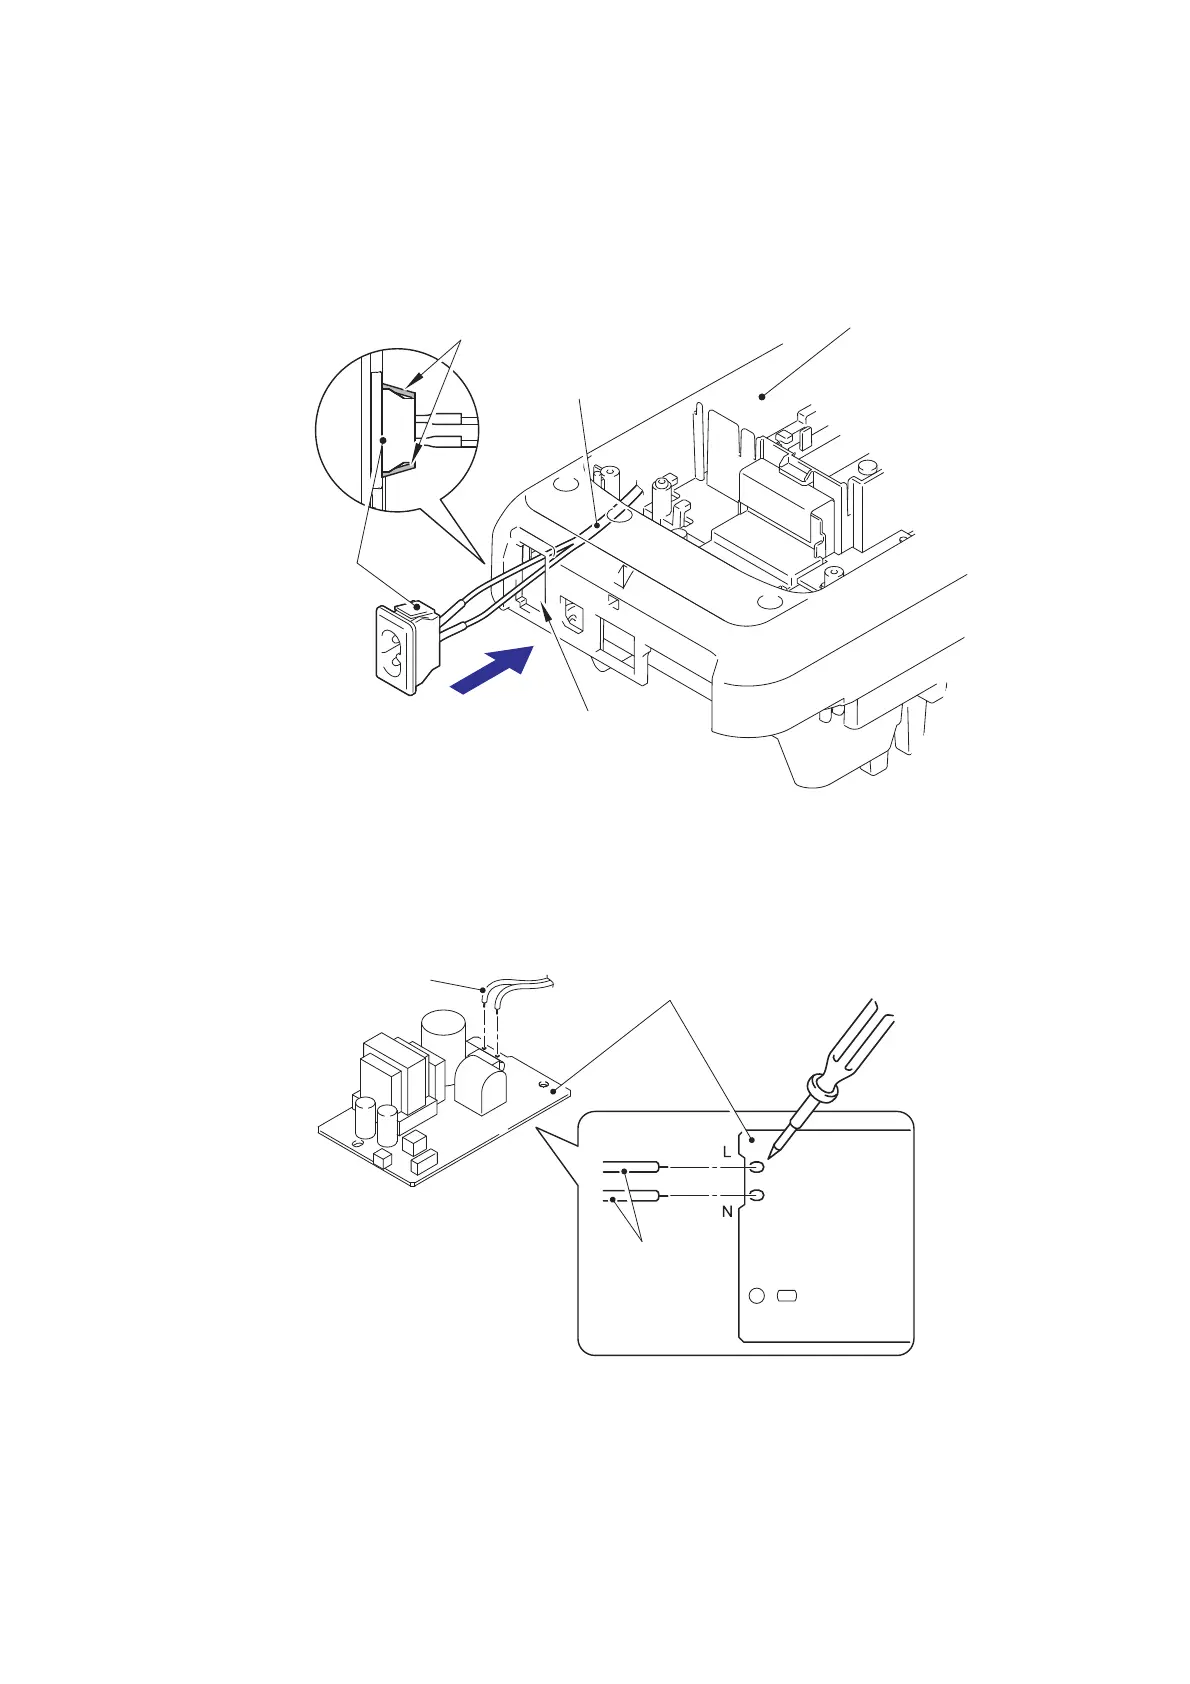
[6] Reassembling the Sub ASSY Inlet
(1) Pass the harnesses of the sub ASSY inlet through the hole on the under cover.
(2) Insert the sub ASSY inlet into the hole of the under cover and put it until its hooks
are properly hooked.
Fig. 3.5-17 Reassembling the Sub ASSY Inlet (1)
(3) Solder the harnesses of the sub ASSY inlet to the power supply ASSY as shown
in the figure below.
Fig. 3.5-18 Reassembling the Sub ASSY Inlet (2)
Under cover
Sub ASSY inlet
Hooks
Hole
Harnesses of
the sub ASSY inlet
Power supply ASSY
Harnesses of
the sub ASSY inlet
<Bottom side view>
Harnesses of
the sub ASSY inlet

Table of Contents

Questions and Answers:

Question and Answer IconNeed help?

Do you have a question about the Brother P-touch QL-710W and is the answer not in the manual?

Brother P-touch QL-710W Specifications

General IconGeneral
Maximum Label Width62 mm
Resolution300 dpi
CutterAutomatic
Device CategoryLabel Maker
Power SourceAC adapter
Printing TechnologyThermal
ConnectivityUSB, Wi-Fi
Media TypeDie-cut labels, Continuous labels
Supported OSWindows, Mac

Related product manuals