III - 37
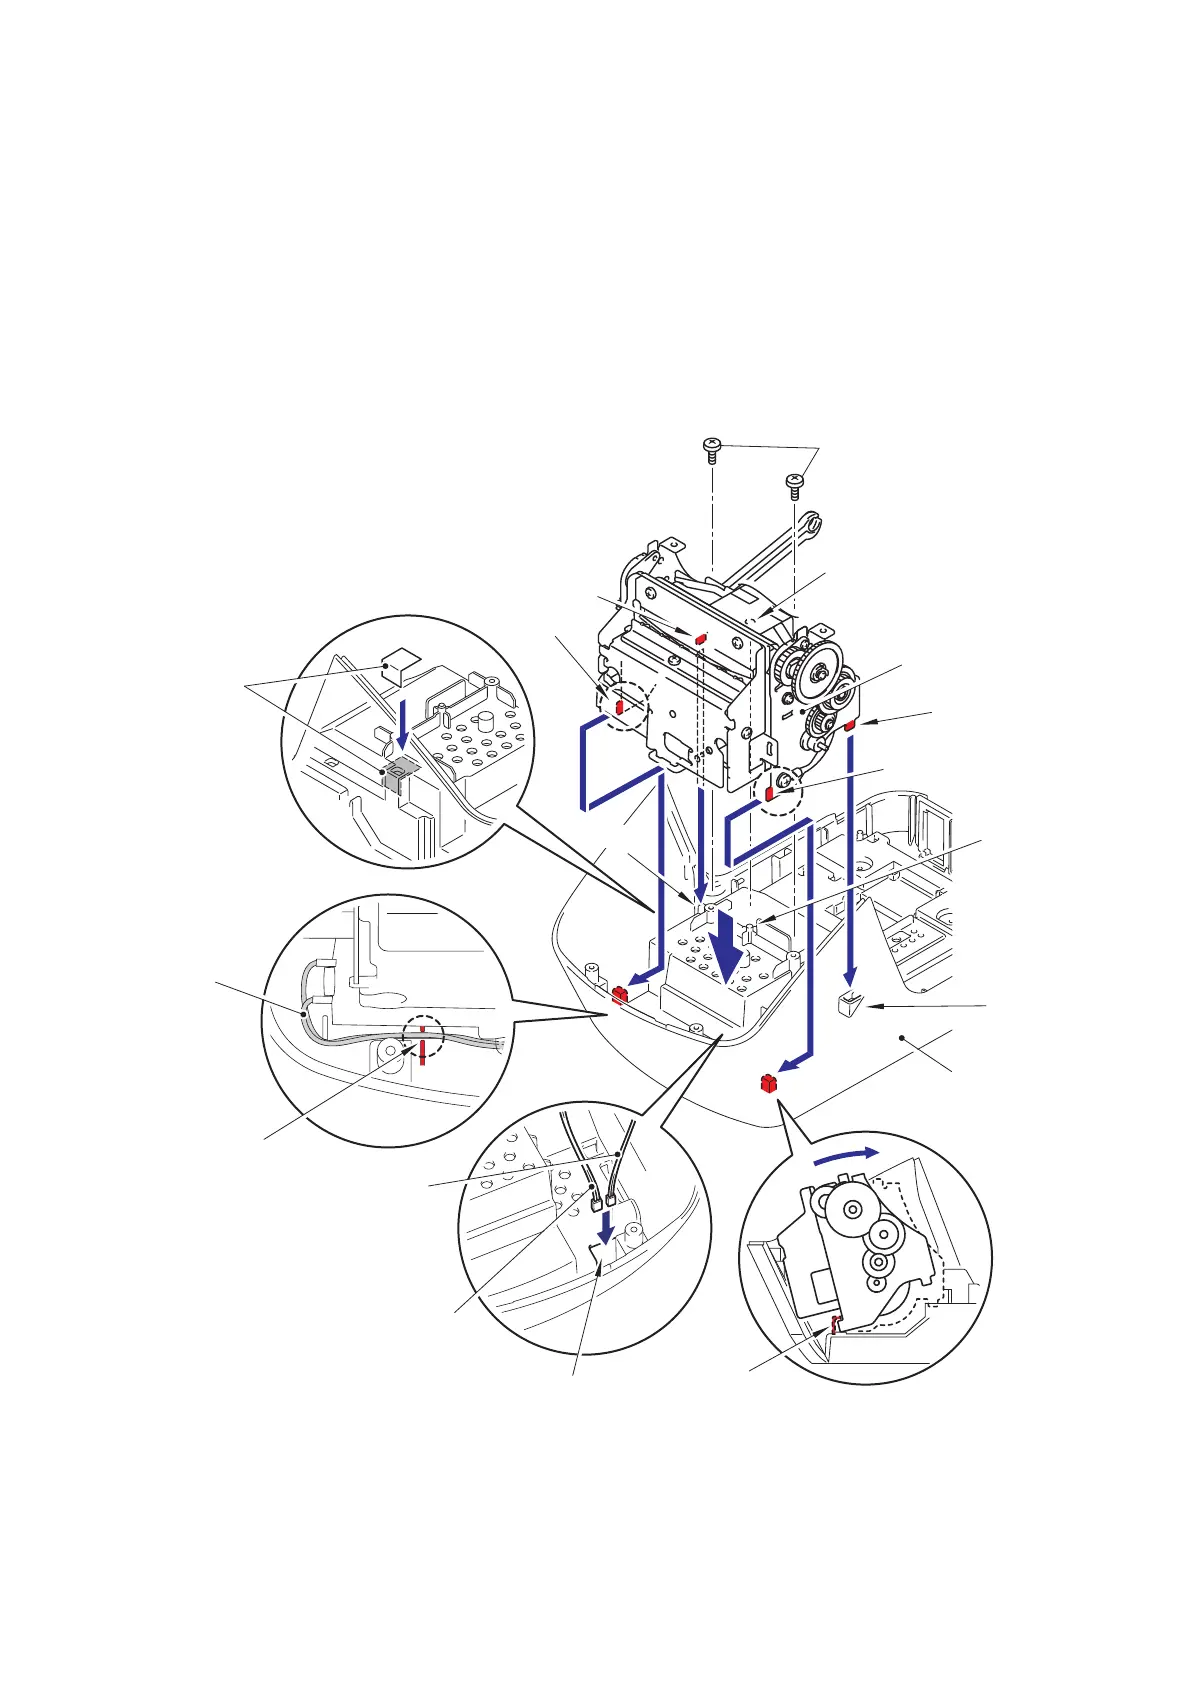
[4] Installing the Mecha ASSY
(1) Attach the filament tape on the under cover.
(2) Pass the harness of the cutter motor and the harness of the cutter sensor through
the hole A of the under cover.
(3) Set the two hooks A of the mecha ASSY to the grooves on the under cover.
(4) Fit the hole B of the mecha ASSY into the boss on the under cover, and fit the two
ribs of the mecha ASSY into the holes C on the under cover.
(5) Secure the mecha ASSY with the two screws.
Fig. 3.5-14 Installing the Mecha ASSY
Mecha ASSY
Screws
Hook A
Under cover
Hook A
Hook A
Rib
Rib
Hole C
Hole C
Boss
Hole A
Harness of
the cutter sensor
Harness of
the cutter motor
Hole B
Harness of
the cutter motor
Slit
Filament tape
 Loading...