HOME
2002 Buell S3T: Chassis 2-69
Seat Lock
1. See Figure 2-113. Place O-ring (3) and lock (4) in tail
section as shown.
2. See Figure 2-110. Install O-ring (4) and D-washer (5).
Secure seat lock using nut (6). Tighten nut until seat lock
does not rotate in tail section.
3. See Figure 2-113. Position cam (2) on seat tang (1).
Install assembly on lock.
4. See Figure 2-110. Install star washer (9) and nut (10).
5. Test lock action.
a. Key should only be removable in the locked position.
Check cam (7) position if there is problem.
b. Seat tang and key should smoothly rotate without
binding. If assembly binds, remove and reinstall.
11WARNING1WARNING
After installing seat, pull upward on front of seat to be
sure it is locked in position. If seat is loose, it could shift
during vehicle operation and startle the rider, causing
loss of control which could result in death or serious
injury.
6. Install seat and test as described.
Seat Release
1. See Figure 2-111. Place bushing (5) on top of seat latch
lever (4).
2. See Figure 2-114. Place washer (3) and spring (2) under
seat latch lever (4).
3. Hook edge of spring (2) over seat latch lever (4). Small
loop of spring will rest against frame as shown.
4. Align seat release assembly under tail section. Secure
with shoulder bolt (1). Shoulder bolt must not compress
washer or seat latch lever.
5. If installed, attach remote seat release cable to seat latch lever.
After installing seat, pull upward on front of seat to be
sure it is locked in position. If seat is loose, it could shift
during vehicle operation and startle the rider, causing
loss of control which could result in death or serious
injury.
6. Install seat and test as described.
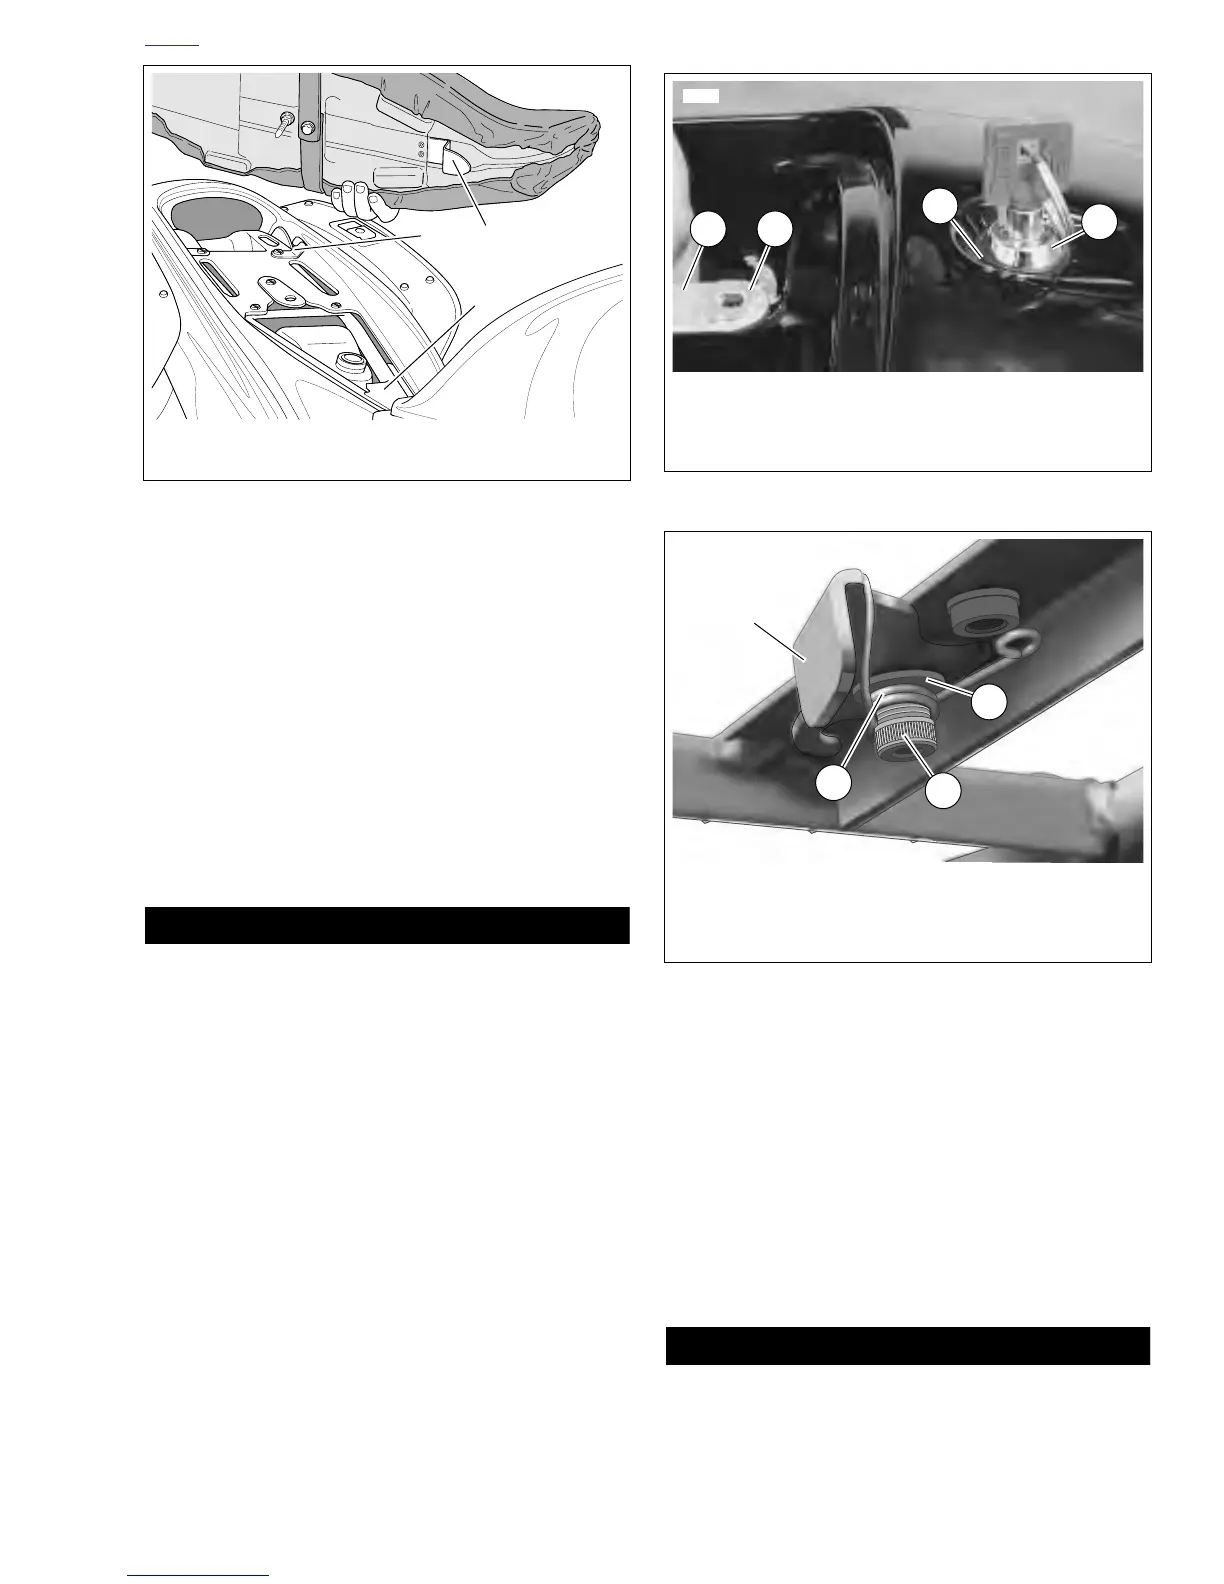
Figure 2-112. Seat
b0311aox
1
1. Helmet Bracket
2. Metal Locating Tab
3. Frame Tab
2
3
Figure 2-113. Installing Seat Lock
Figure 2-114. Installing Seat Release
1
6308
2
1. Seat Tang
2. Cam
3. O-Ring
4. Lock
3
4
1
1. Shoulder Bolt
2. Spring
3. Washer
4. Seat Latch Lever
2
3
b0441x2x
4