7-26 2002 Buell S3T: Electrical
HOME
ALTERNATOR 7.9
REMOVAL/DISASSEMBLY
11WARNING1WARNING
To protect against shock and accidental start-up of vehi-
cle, disconnect the negative battery cable before pro-
ceeding. Inadequate safety precautions could result in
death or serious injury.
1. Disconnect negative battery cable from battery.
2. Remove primary cover. See PRIMARY COVER under
6.2 PRIMARY CHAIN.
3. Removing the left fairing lower. See 2.38 FAIRING LOW-
ERS.
4. Remove clutch assembly, primary chain and engine
sprocket/rotor assembly as a unit. See PRIMARY
CHAIN/DRIVE under 6.5 PRIMARY DRIVE/CLUTCH.
5. Remove/disassemble rotor and/or stator, as required.
Refer to the following procedures.
Rotor
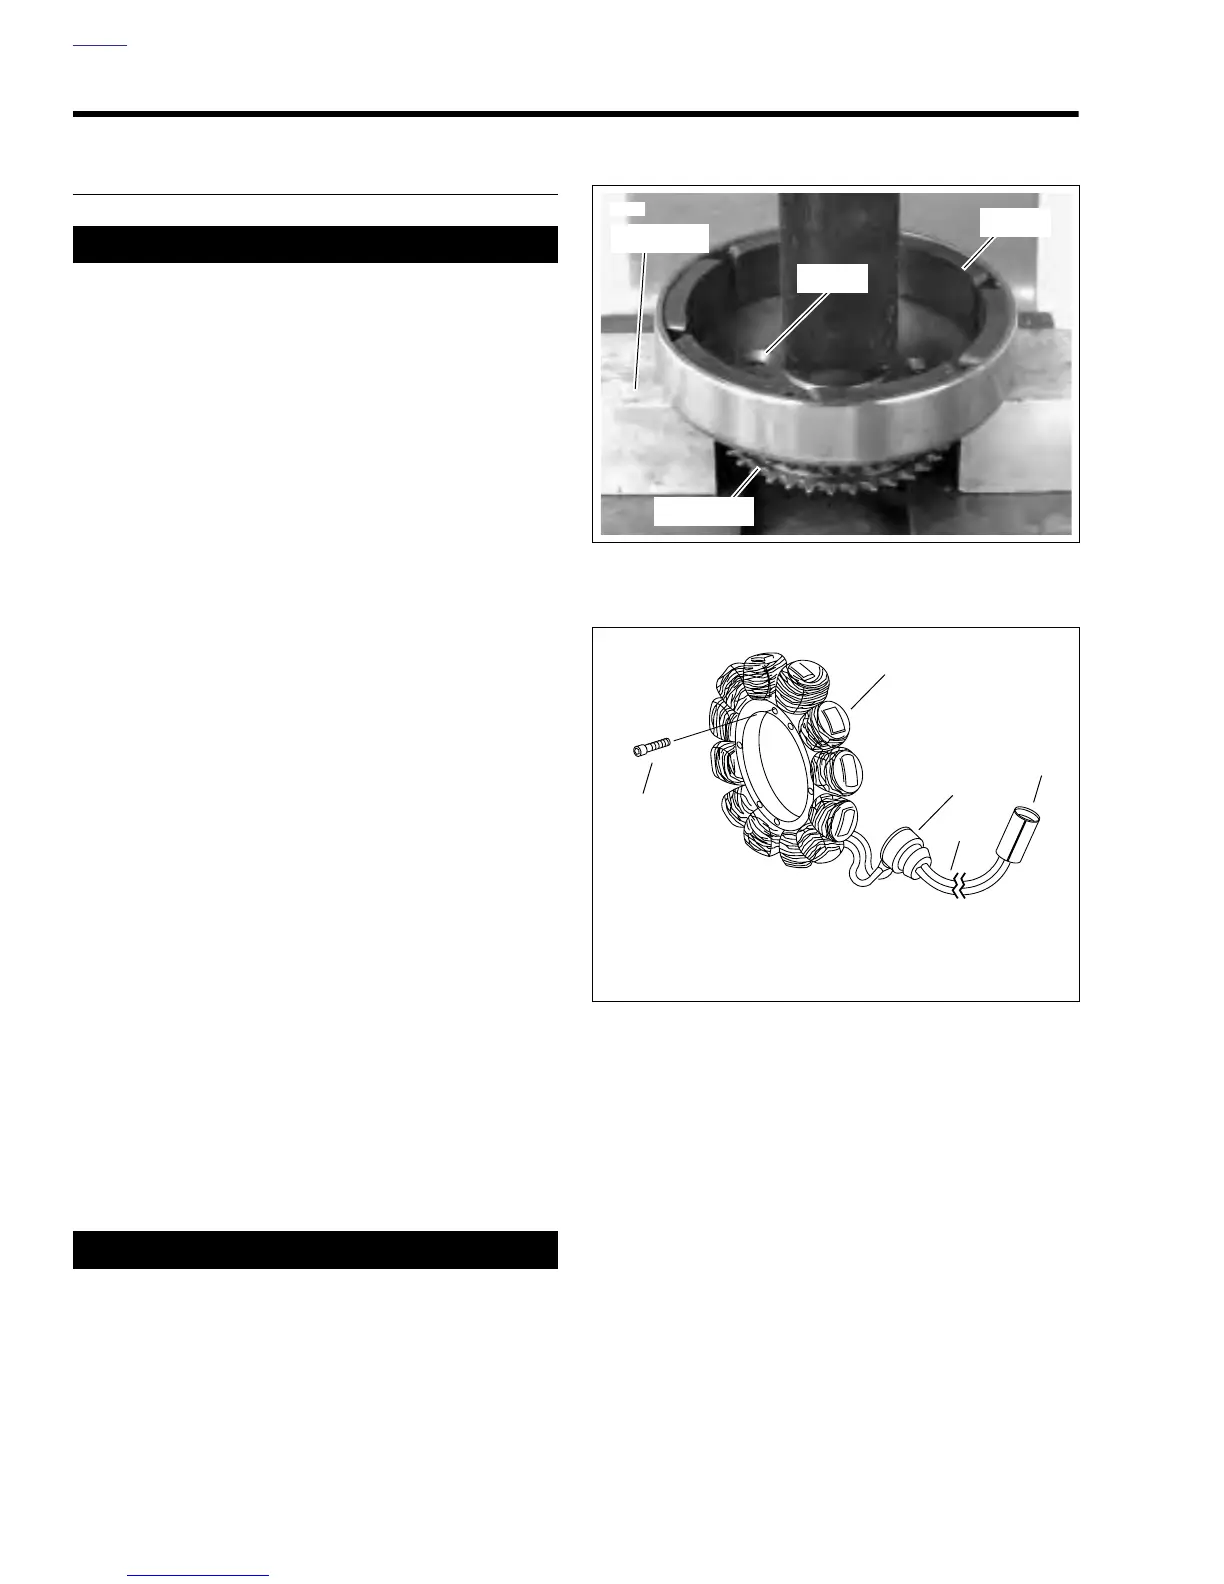
1. See Figure 7-27. Remove the eight bolts which secure
alternator rotor to engine sprocket.
2. See Figure 7-27. Position blocking under rotor. Press
sprocket free of rotor.
NOTE
Resistance to sprocket/rotor disassembly is due in part to the
magnetic force of the permanent rotor magnets.
Stator
1. See Figure 7-28. Disconnect stator wiring (4) from volt-
age regulator wiring at connector (5) [46] near the oil
pump.
2. Remove cable straps holding stator wire to oil filter hose.
3. Withdraw stator wiring (4) from behind the gearcase
cover.
4. Remove and discard the four TORX screws (2) which
secure stator (1) to left crankcase half.
CAUTION
Stator TORX screws contain a thread locking compound.
Do not reuse existing screws. Always use new screws
with the proper thread locking compound. Loss of torque
on TORX fasteners could result in alternator damage.
5. Remove stator wiring grommet (3) from left crankcase
half.
6. Withdraw stator wiring (4) from grommet hole in left
crankcase half. Remove stator (1).
Figure 7-27. Removing Rotor From Sprocket
Figure 7-28. Stator Assembly
Sprocket
3558
Rotor
Blocking
Bolts
1. Stator
2. TORX Screw (4)
3. Grommet
4. Stator Wiring
5. Connector [46]
b0082x7x
1
3
5
4
2