4-34 2002 Buell S3T: Fuel System
HOME
FUEL PRESSURE TEST 4.14
INSPECTION
11WARNING1WARNING
The gasoline in the fuel supply line downstream of the
fuel pump is under high pressure (49 psi [338 kPa]). To
avoid an uncontrolled discharge or spray of gasoline,
always purge the system of high pressure gas before
attaching fuel pressure gauge. Gasoline is extremely
flammable and highly explosive. Inadequate safety pre-
cautions could result in death or serious injury.
1. Purge the fuel supply line of high pressure gasoline.
a. See Figure 4-31. Disconnect the 4-place fuel pump
connector [86]. Connector is on the left side, above
the rear cylinder spark plug.
b. With the motorcycle in neutral, start the engine and
allow vehicle to run.
c. When the engine stalls, press the starter button for 3
seconds to remove any remaining fuel from fuel line.
2. Wrap a shop towel around the fuel supply fitting.
11WARNING1WARNING
A small amount of gasoline will drain from the valve
when the gauge is installed. Thoroughly wipe up any spilt
fuel immediately. Dispose of rags in a suitable manner.
Gasoline is extremely flammable and highly explosive.
Inadequate safety precautions could result in death or
serious injury.
3. See Figure 4-32. Attach FUEL PRESSURE GAUGE
(Part No. HD-41182) to Schraeder valve on fuel supply
fitting.
a. Verify that fuel valve (2) and air bleed petcock (4) on
the gauge are closed.
b. See Figure 4-33. Remove protective cap (3) from
Schraeder valve (2).
c. Thread gauge into Schraeder valve.
4. See Figure 4-31. Attach fuel pump connector to main
wiring harness.
5. See Figure 4-32. Pressurize the fuel system.
a. Start and idle engine to pressurize the fuel system.
b. Open fuel valve (2) on fuel pressure gauge to allow
fuel to flow down the gauge hose.
c. Position the air bleed tube (5) in the beaker.
d. Open and close the air bleed petcock (4) to purge
the fuel pressure gauge and hose of air. Repeat this
step several times until only solid fuel (without bub-
bles) flows from the air bleed tube (5).
e. Close the air bleed petcock (4).
Figure 4-31. Fuel Pump Connector [86]
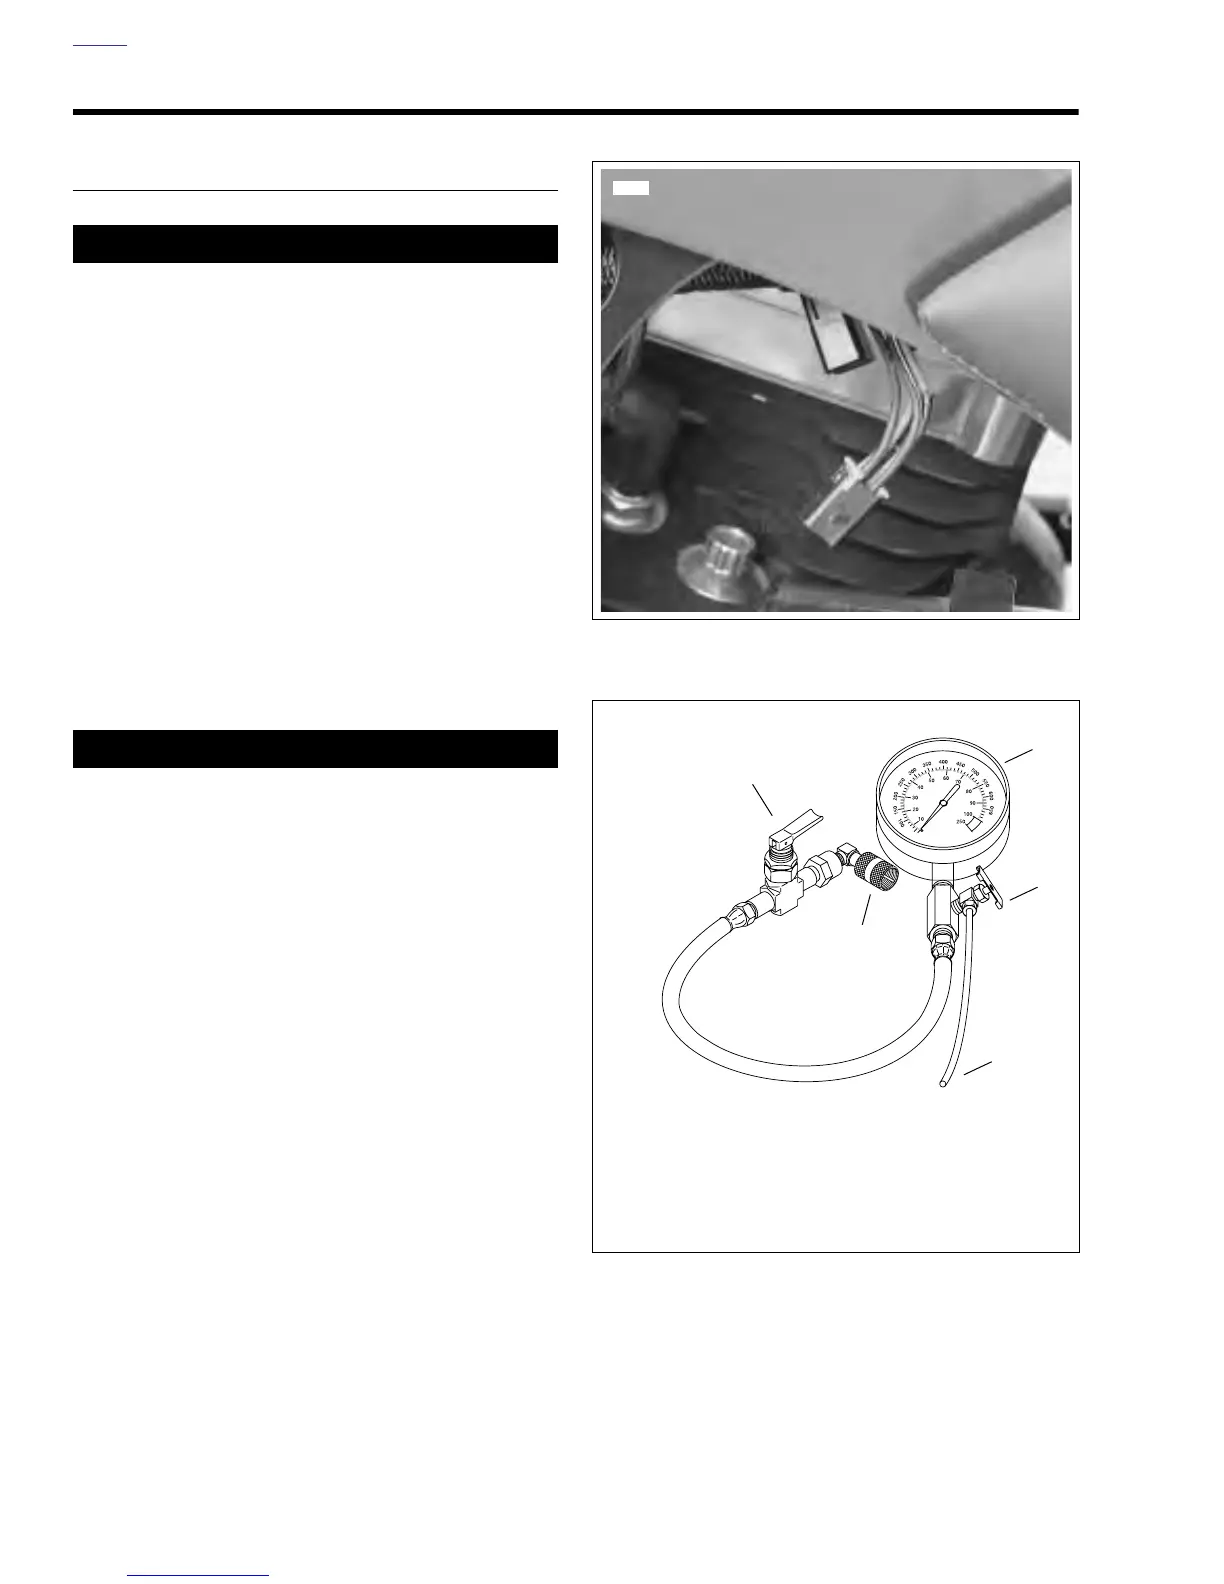
Figure 4-32. Fuel Pressure Gauge
6881
1. Attachment Fitting
2. Fuel Valve (shown closed)
3. Fuel Pressure Gauge
4. Air Bleed Petcock
5. Air Bleed Tube
2
b0616x4x
1
5
4
3