2-28 2002 Buell S3T: Chassis
HOME
REAR BRAKE CALIPER 2.14
REMOVAL
NOTE
Steps 1 and 2 are not required for detaching caliper from
rotor. Drain fluid only when disassembling caliper.
1. Drain and discard brake fluid. See Step 1 under 2.13
REAR BRAKE MASTER CYLINDER.
11WARNING1WARNING
Any leak in brake system will adversely affect brake
operation. Damaged banjo bolt seating surfaces will leak
when reassembled. Prevent damage to seating surfaces
by carefully removing brake line components. Failure to
comply could result in death or serious injury.
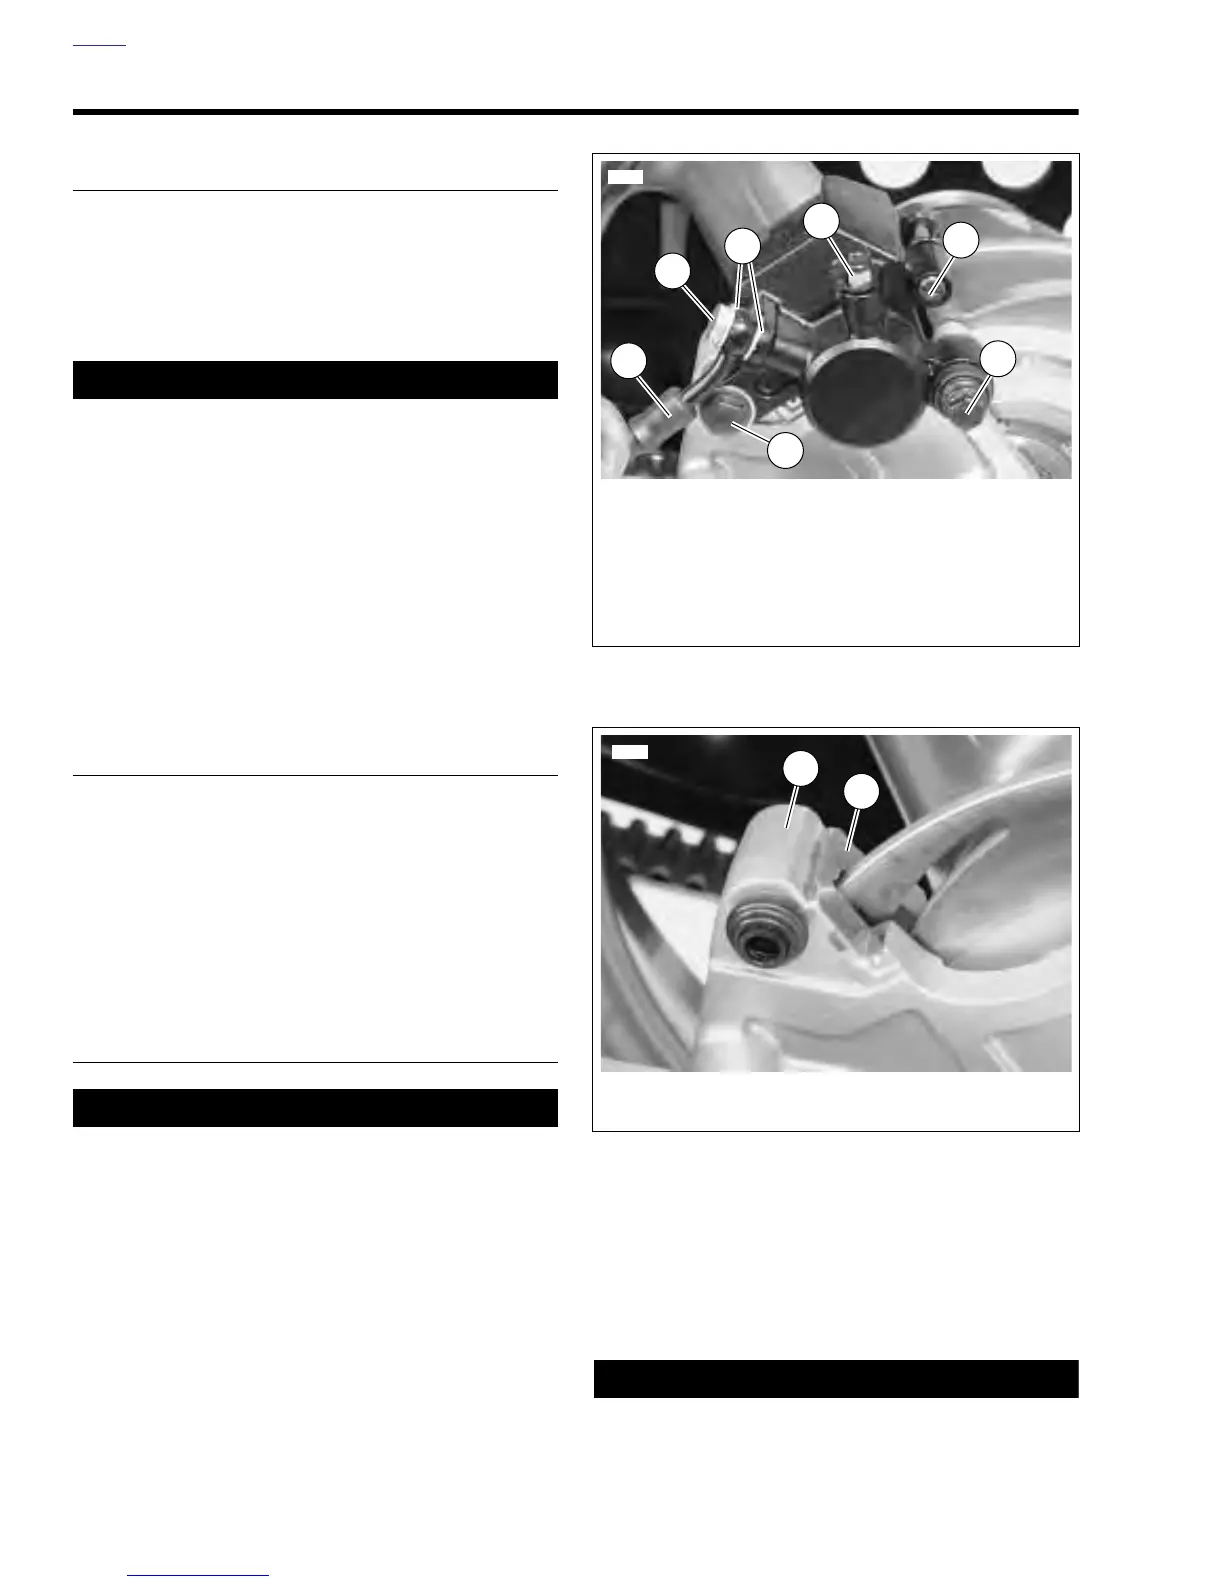
2. See Figure 2-38. Remove banjo bolt (2) (metric) and two
banjo washers (3) to disconnect brake line (1) from cali-
per. Discard banjo washers.
3. Remove small screw (6) (metric) and large screw (7)
(metric) to detach caliper from mount.
4. See Figure 2-39. Remove clip (1) from rear caliper
mount (2) if necessary.
DISASSEMBLY
1. See Figure 2-38. Remove pin plug and pad hanger (5)
(metric) to free brake pads.
2. See Figure 2-40. Remove clip (1) from caliper body.
3. See Figure 2-41. Remove piston (3) using BRAKE CALI-
PER PISTON REMOVER (1) (Part No. B-42877) with
adaptor (2).
4. Remove two O-rings from groove in caliper bore. Discard
O-rings.
CLEANING AND INSPECTION
11WARNING1WARNING
Clean brake system components using denatured alco-
hol. Do not use mineral-base cleaning solvents, such as
gasoline or paint thinner. Use of mineral-base solvents
causes deterioration of rubber parts that continues after
assembly. This could result in improper brake operation
which could result in death or serious injury.
1. Clean all parts with denatured alcohol or D.O.T. 4
BRAKE FLUID. Do not contaminate with mineral oil or
other solvents. Wipe dry with a clean, lint free cloth. Blow
out drilled passages and bore with a clean air supply. Do
not use a wire or similar instrument to clean drilled pas-
sages.
2. Carefully inspect all components. Replace any parts that
appear damaged or worn. Do not hone caliper piston
bore.
3. Inspect brake rotor.
a. Measure rotor thickness. Replace if minimum thick-
ness is less than 0.18 in. (4.5 mm).
b. Check rotor surface. Replace if warped or badly
scored.
11WARNING1WARNING
Failure to install brake pads as a set may adversely affect
brake operation. Always replace brake pads in complete
sets for correct brake operation. Never replace just one
brake pad. Failure to comply could result in death or seri-
ous injury.
Figure 2-38. Rear Brake Caliper (Typical)
Figure 2-39. Caliper Mount Clip
6483a
2
4
1
1. Brake Line
2. Banjo Bolt (metric)
3. Banjo Washers (2 - typical)
4. Bleeder Valve (metric)
5. Pin Plug and Pad Hanger (metric)
6. Small Screw (metric)
7. Large Screw (metric)
3
5
6
7
6486
1
2
1. Clip
2. Rear Caliper Mount