7-36 2002 Buell S3T: Electrical
HOME
TAIL LAMP 7.2
REMOVAL/DISASSEMBLY
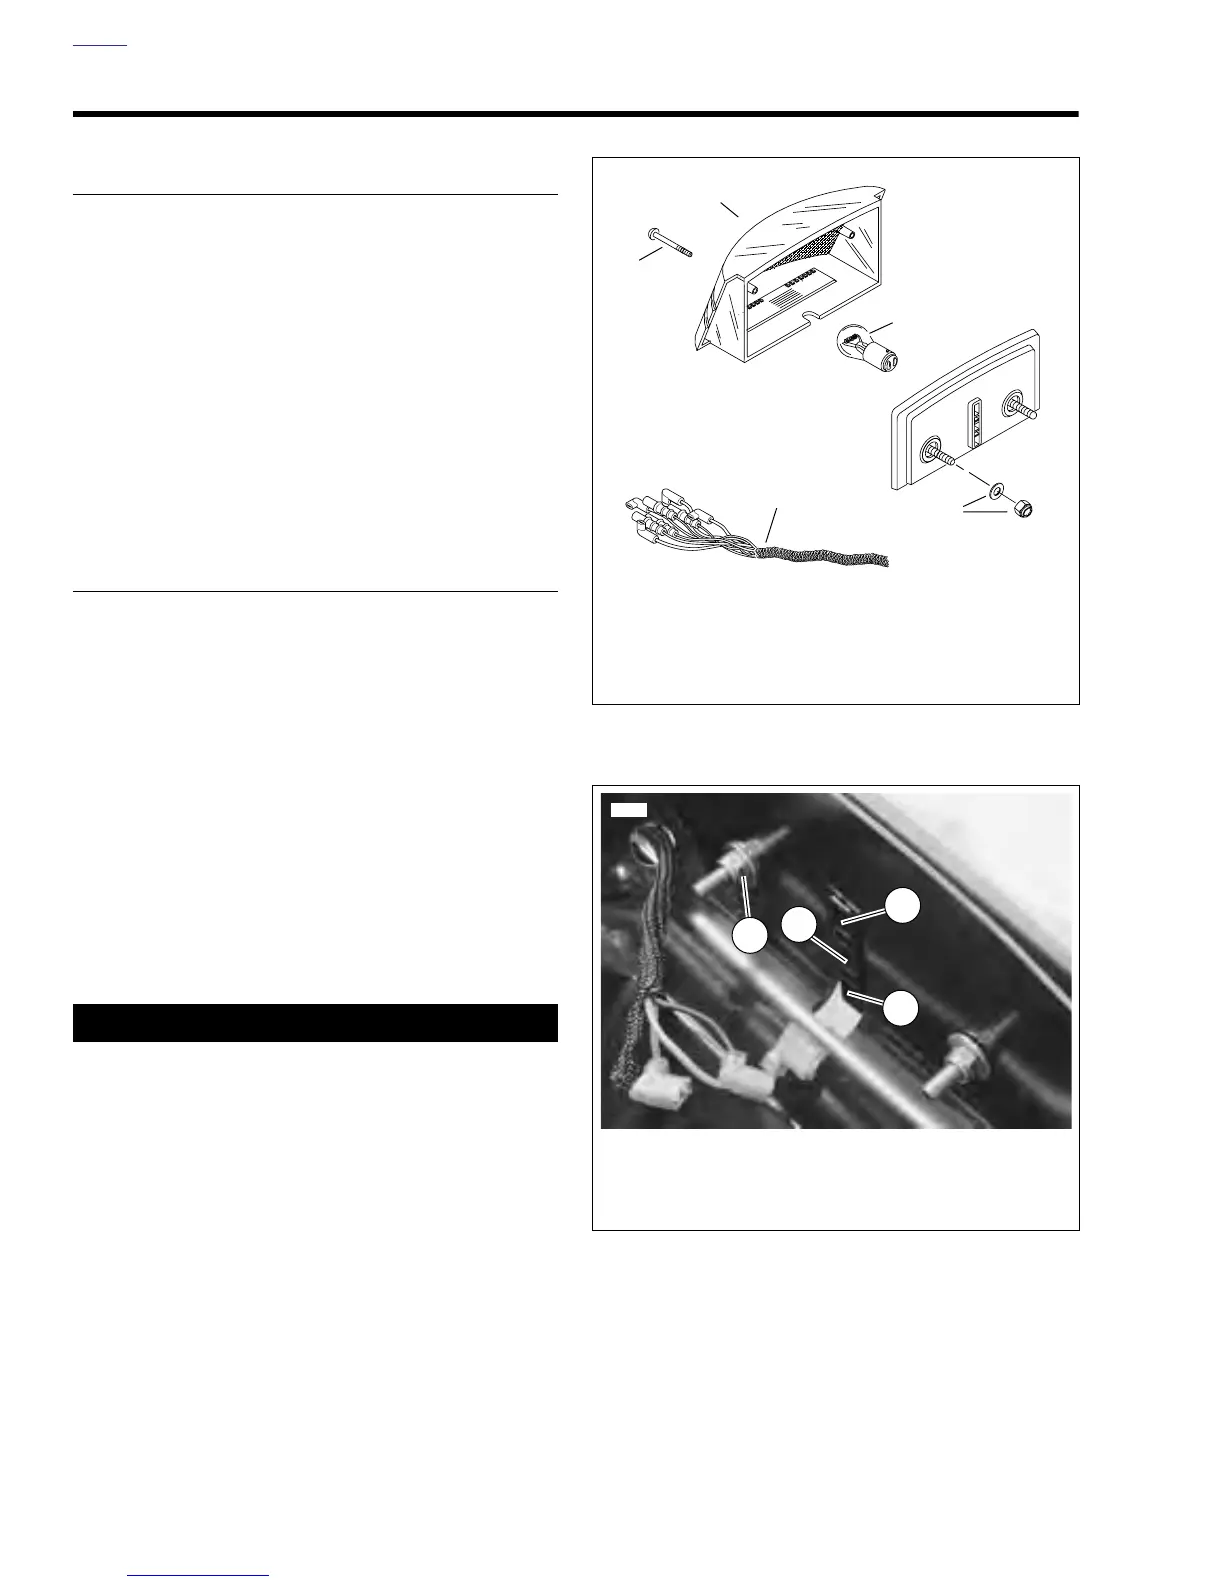
1. See Figure 7-40. Remove two screws (1) to detach tail
lamp lens.
2. If necessary, remove tail lamp bulbs (3). Push bulbs
inward and turn counterclockwise to remove.
3. Remove seat and tail section. See 2.33 TAIL SECTION.
4. See Figure 7-41. Disconnect the three tail lamp wires (2,
3 and 4).
5. Remove two locknuts (metric) and washers (1).
6. Remove tail lamp mount from glove box.
ASSEMBLY/INSTALLATION
1. See Figure 7-41. Attach tail lamp mount to glove box with
two locknuts (metric) and washers (1).
NOTE
Slots on glove box allow adjustment of tail lamp mount. As a
general rule, install tail lamp mount as high as possible within
slots.
2. Attach the three tail lamp wires (2, 3 and 4).
3. See Figure 7-40. If removed, install tail lamp bulbs (3).
Push bulb in and turn clockwise to install.
4. Install seat and tail section. See 2.33 TAIL SECTION.
5. Install tail lamp lens with two screws (1).
11WARNING1WARNING
Check for proper brake lamp operation before riding
motorcycle (see Step 6). Visibility is a major concern for
motorcyclists. Failure to have proper brake lamp opera-
tion could result in death or serious injury.
6. Check tail lamp for proper operation. If operation fails,
reread procedure and verify that all steps were per-
formed.
a. Turn ignition key switch to IGN.
b. Check for tail lamp illumination.
c. Squeeze front brake hand lever. Check for brake
lamp illumination. Release front brake hand lever.
d. Press rear brake pedal. Check for brake lamp illumi-
nation. Release rear brake pedal.
e. Turn ignition key switch to OFF.
Figure 7-40. Tail Lamp
Figure 7-41. Tail Lamp Wiring
b0415x7a
1. Screw (2)
2. Tail Lamp
3. Tail Lamp Bulb (2)
4. Locknut (metric) and Washer (2)
5. From Main Harness
5
1
2
3
4
6255
1
4
2
3
1. Locknut (metric) and Washer (2)
2. R/Y Stop Lamp Wire
3. B Ground Wire
4. O/W Tail Lamp Wire