2002 Buell S3T: Engine 3-33
HOME
OIL TANK 3.9
REMOVAL/DISASSEMBLY
1. Remove seat, fuel tank and tail section. See 2.33 TAIL
SECTION.
2. Remove rear fender. See 2.32 REAR FENDER.
3. Drain oil tank. See 1.4 ENGINE LUBRICATION SYS-
TEM. The oil filter need not be removed unless it is due
to be replaced.
4. See Figure 3-46. Remove clamps to detach hoses from
oil tank. Label each hose upon removal.
a. Remove feed hose worm clamp (3) from T-fitting.
b. Remove 3/8 in. drain hose clamp (5) from T-fitting.
c. Remove 1/4 in. clamp (8) from vent hose (7).
d. Remove 3/8 in. clamp (10) from return hose (9).
5. Remove four bolts and lockwashers from wellnuts (1).
6. Detach oil tank from frame.
ASSEMBLY/INSTALLATION
1. See Figure 3-46. Place oil tank on frame and align
mounts. Loosely install bolts and lockwashers (1) at all
four mounting points.
NOTE
Starting at the top mounting points will simplify installation.
2. Connect the four oil tank hoses. Tighten
new
clamps (5,
8 and 10) using HOSE CLAMP PLIERS (Part No. HD-
41137).
NOTE
Worm clamp (3) may be reused on feed hose (4).
3. Fill oil tank. See 1.4 ENGINE LUBRICATION SYSTEM.
4. Install rear fender. See 2.32 REAR FENDER.
11WARNING1WARNING
After installing seat, pull upward on front of seat to be
sure it is locked in position. If seat is loose, it could shift
during vehicle operation and startle the rider, which
could result in death or serious injury.
5. Install tail section, fuel tank and seat. See 2.33 TAIL
SECTION.
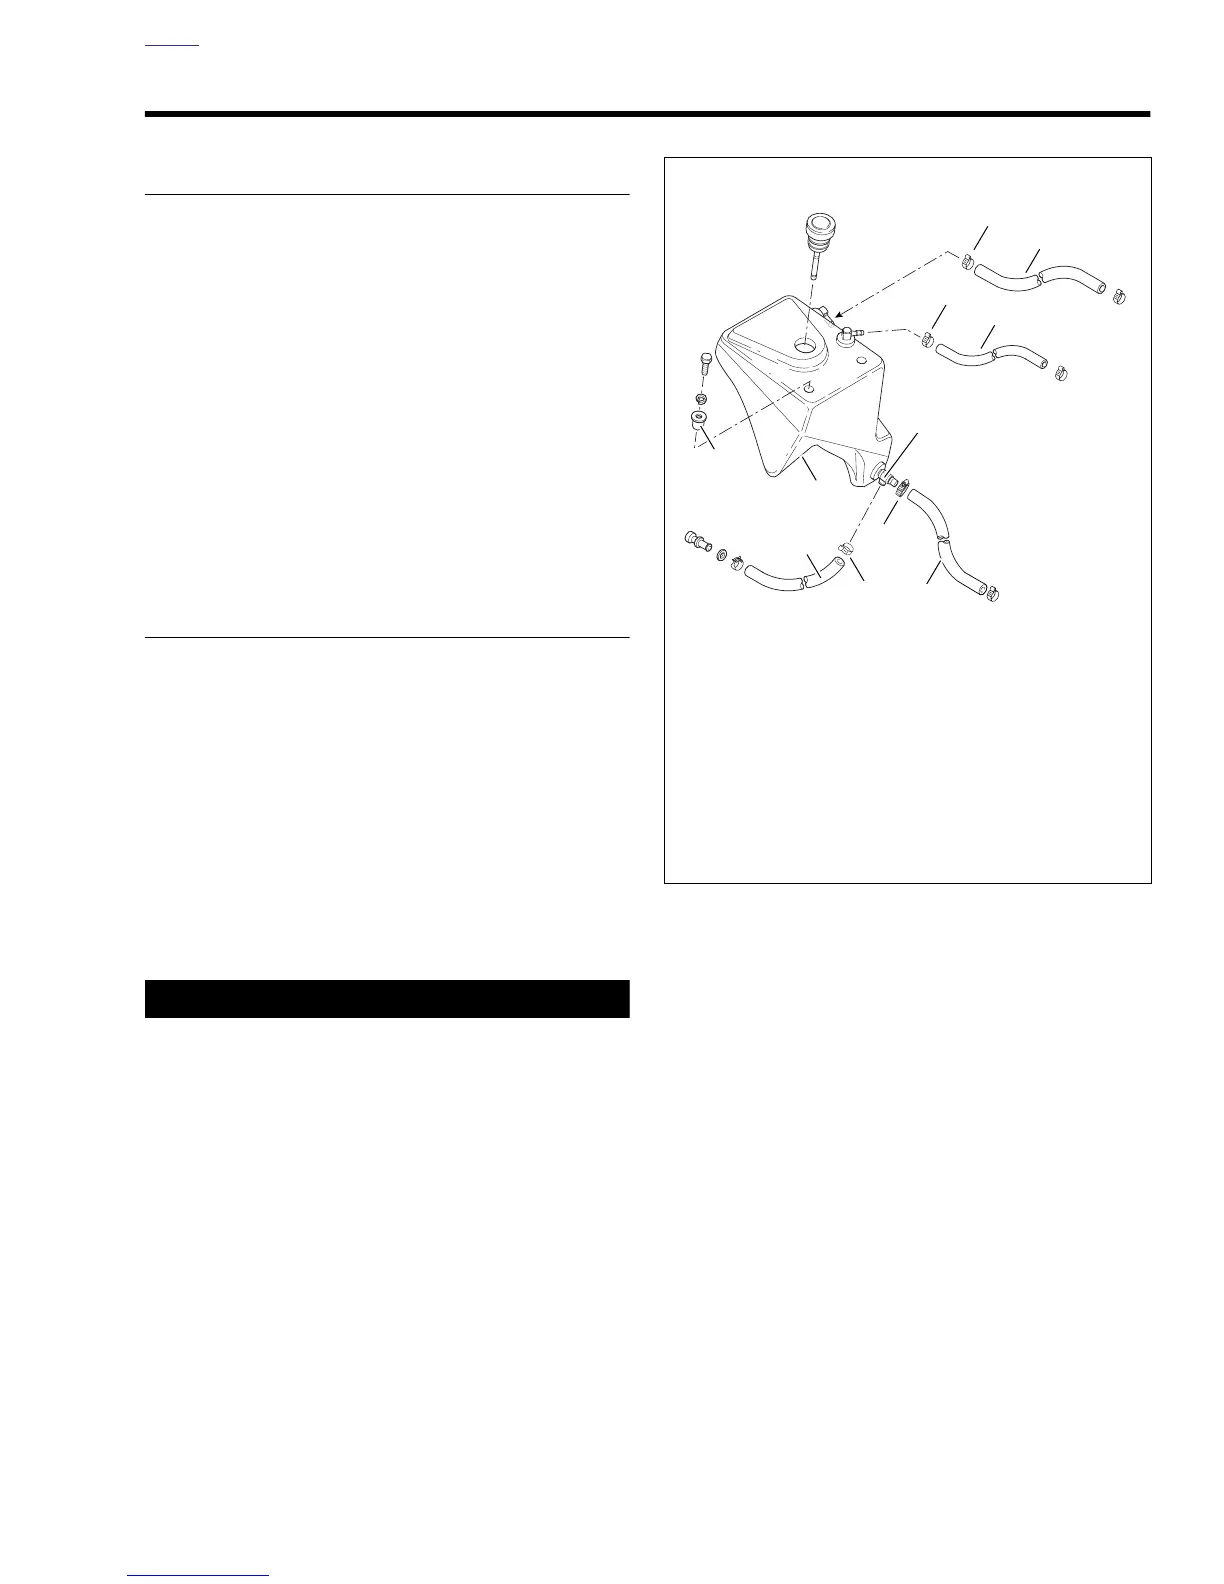
Figure 3-46. Oil Tank
b0247a3x
3
1. Bolt, Lockwasher and Wellnut (4)
2. Oil Tank
3. Worm Clamp, 3/8 in.
4. Feed Hose
5. Hose Clamp, 3/8 in.
6. Drain Hose
7. Vent Hose
8. Hose Clamp, 1/4 in.
9. Return Hose
10. Hose Clamp, 3/8 in.
4
5
6
7
8
10
9
1
2
T-Fitting on Tank