2006 Buell Lightning: Chassis 2-17
HOME
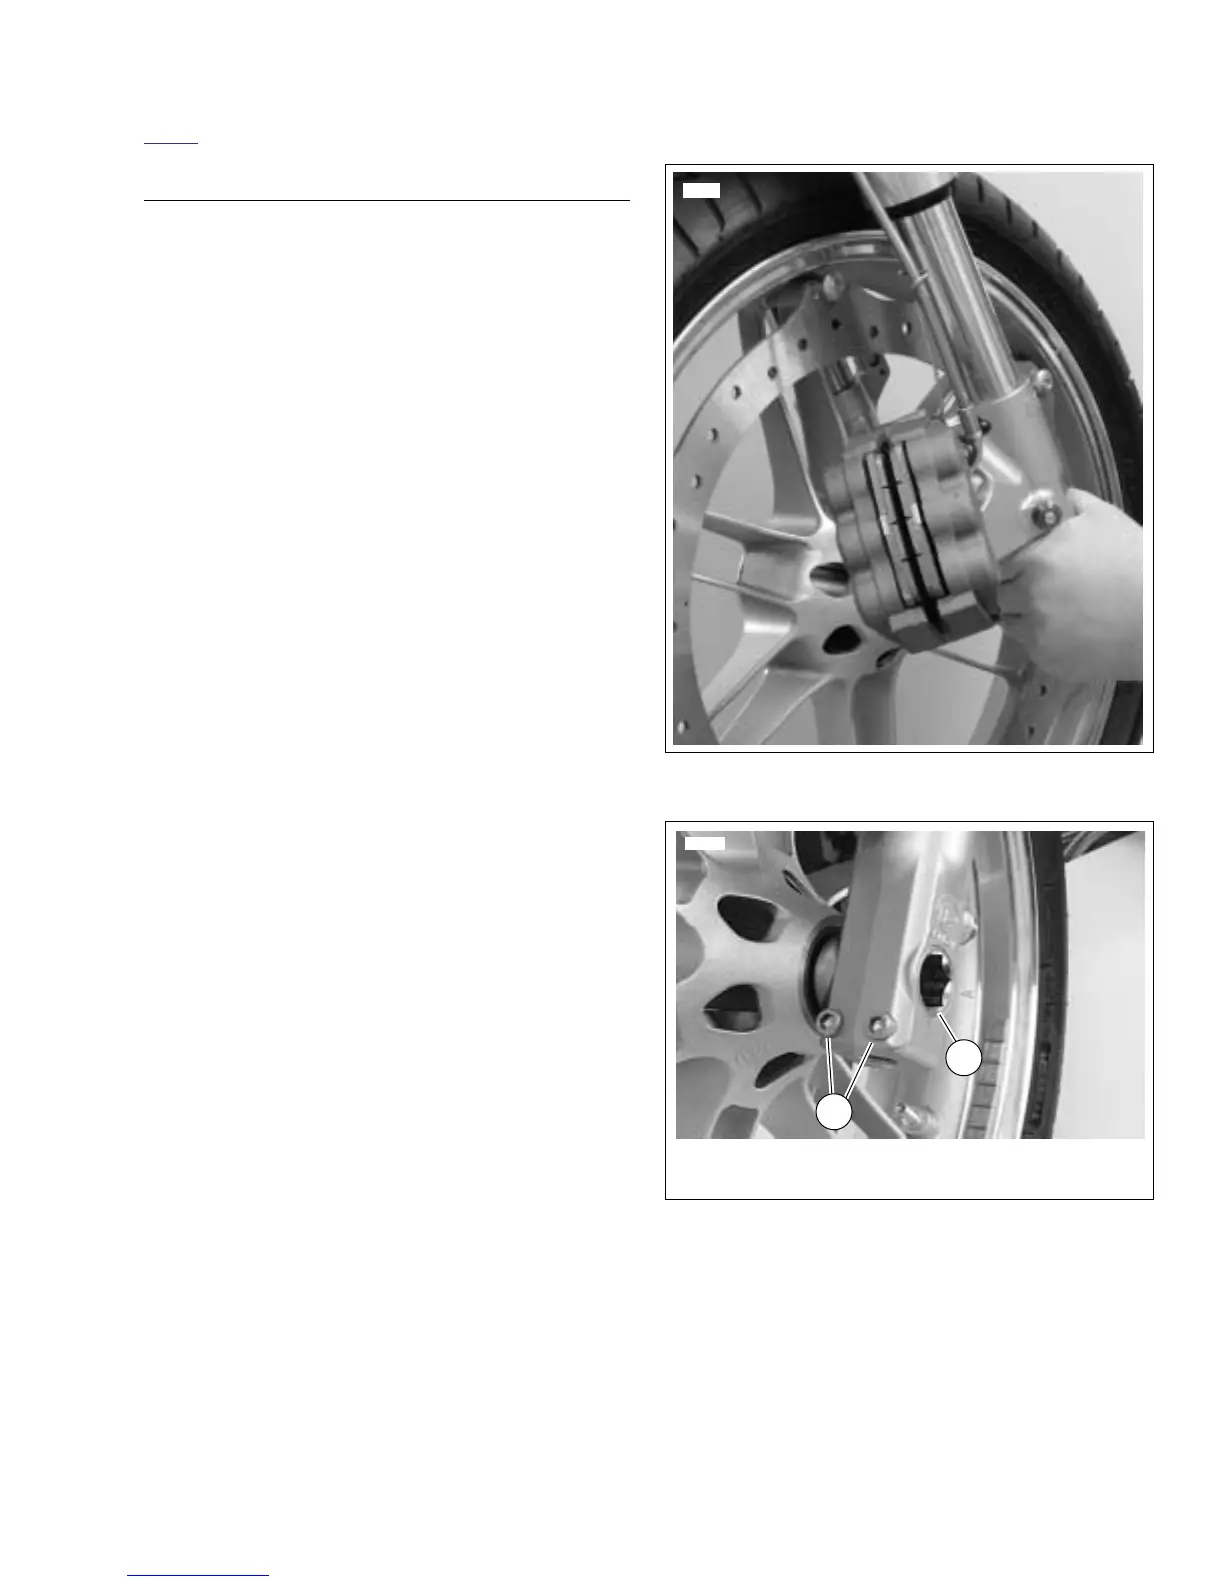
INSTALLATION
1. Raise front wheel to allow clearance for the caliper to
swing under and inside the front rotor.
NOTE
To prevent cosmetic damage to the wheel, center caliper
between spokes before removal.
2. See Figure 2-19. Install caliper.
a. Align wheel so that rotor mounting fasteners strad-
dle caliper.
b. Rotate right front fork counterclockwise to align cali-
per with rotor.
c. Lower front wheel into caliper assembly.
3. Install front axle.
a. Apply LOCTITE ANTI-SEIZE LUBRICANT to axle.
b. See Figure 2-20. With pinch fasteners (metric)
loose, insert threaded end of axle (1) through left
side fork, wheel hub and thread into right fork.
c. Compress the front suspension to make sure it is
free and not binding.
d. Tighten axle (1) (metric) to 39-41 ft-lbs (53-56 Nm).
NOTE
The front axle is left handed thread.
4. See Figure 2-20.Tighten the front axle pinch fasteners
(2) to 20-22 ft-lbs (27-30 Nm).
5. Install right side fender fasteners. See 2.34 FENDERS.
Figure 2-19. Front Wheel Installation
Figure 2-20. Front Wheel Mounting