2-16 2006 Buell Lightning: Chassis
HOME
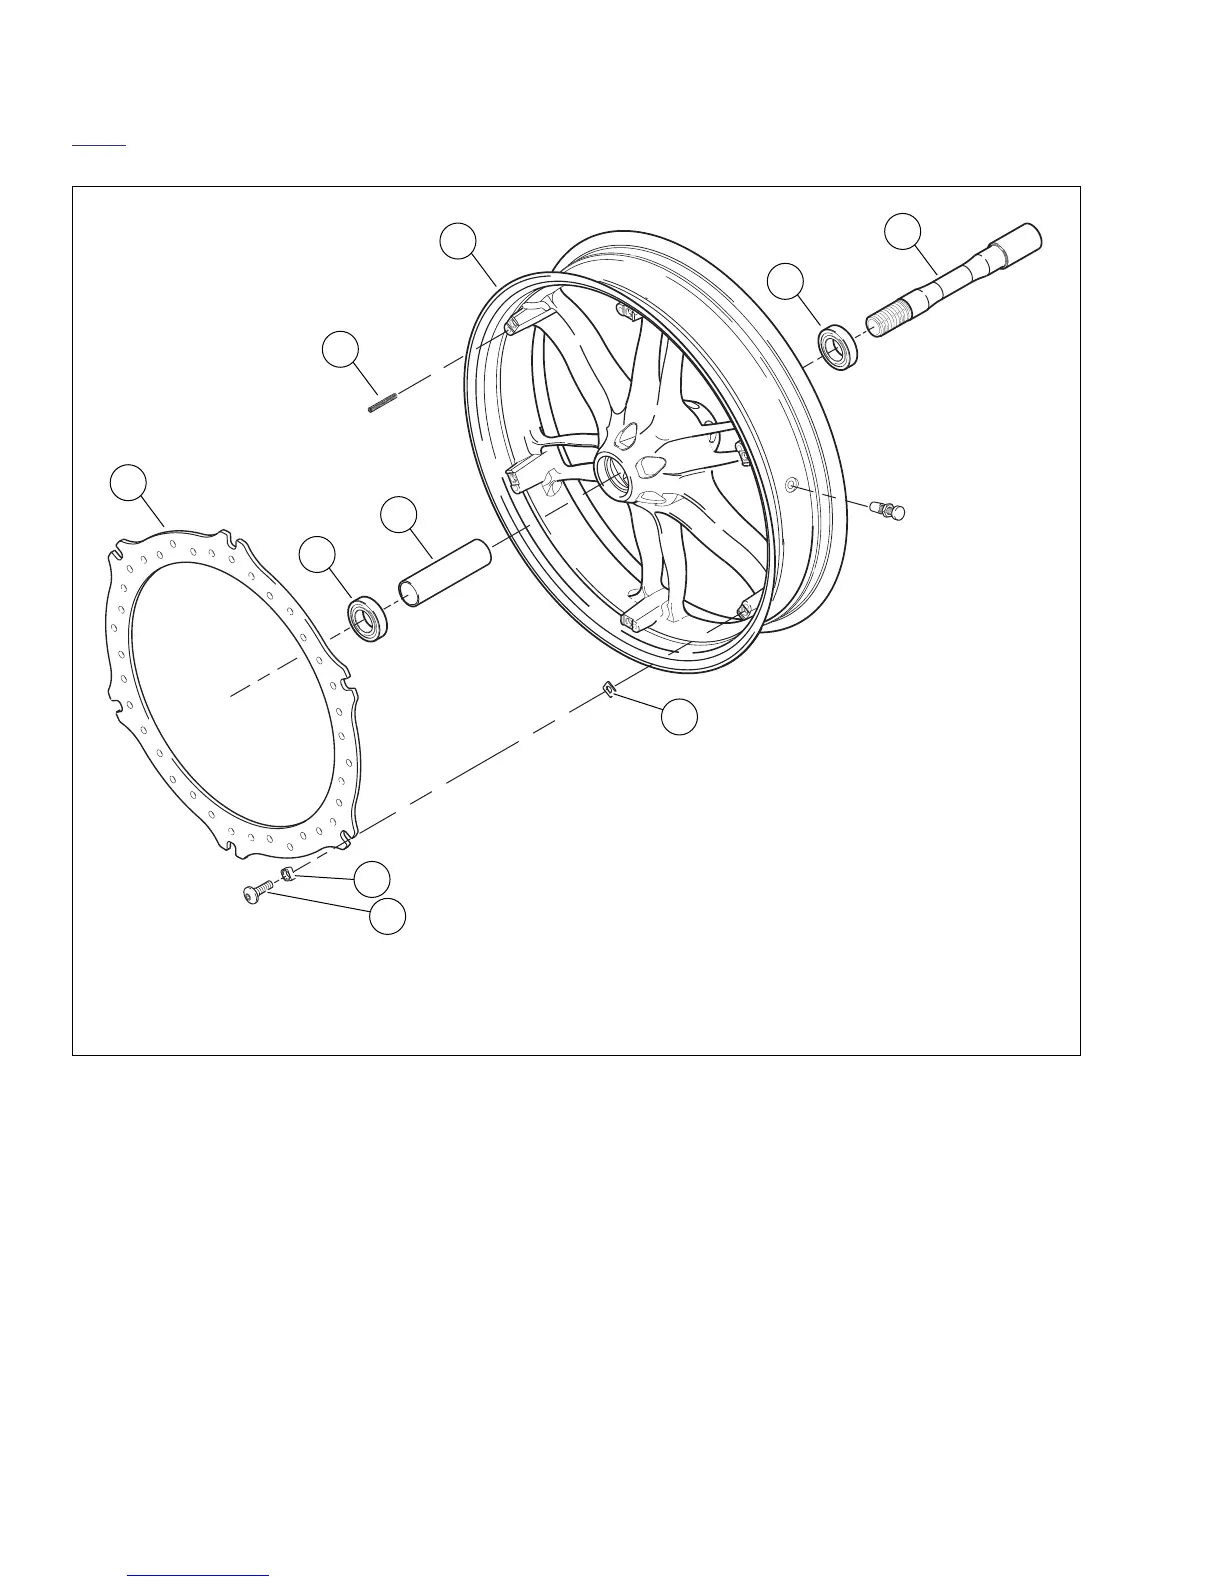
Front Rotor Installation
1. See Figure 2-18. Install
new
spring (4).
2. Install
new
washers (9).
3. Install
new
drive bushings (8) into rotor.
NOTE
Note the identifying mark of rotor is up and radius end of drive
bushing (8) toward center of wheel.
4. Align reference dot on front rotor with the valve stem.
5. Install
new
rotor mounting fasteners in a criss-cross pat-
tern around the wheel to insure proper fitting between
rotor, fastener and bushing. Tighten to 25-27 ft-lbs (34-
37 Nm).
NOTE
Rotor mounting fasteners must be seated into drive bushings
and drive bushings must be fitted into rotor properly. Failure
to comply may affect braking ability and lead to brake failure
which could result in death or serious injury.
Figure 2-18. Front Wheel Assembly
1. Front axle
2. Wheel bearing
3. Front wheel
4. Front brake springs (6)
5. Front wheel spacer
6. Front brake rotor
7. Rotor mount fastener (6)
8. Drive bushings (6)
9. Washers (6)
b0935x2x
7
8
1
2
3
4
5
2
6
9