2-72 2006 Buell Lightning: Chassis
HOME
ASSEMBLY/INSTALLATION
Clutch Cable
1. Install
new
oring on the clutch cable fitting before install-
ing.
2. Apply 565 thread sealer to fitting on clutch cable and
screw the clutch cable fitting into the primary cover and
tighten to 36-108
in-lbs
(4-12 Nm).
3. See Figure 2-100. Install cable end into slot in coupling.
Install the outer ramp and hook (1) onto the cable end (3)
and coupling (2) and place assembly back into the clutch
inspection area in the primary cover. See 6.3 CLUTCH
RELEASE MECHANISM.
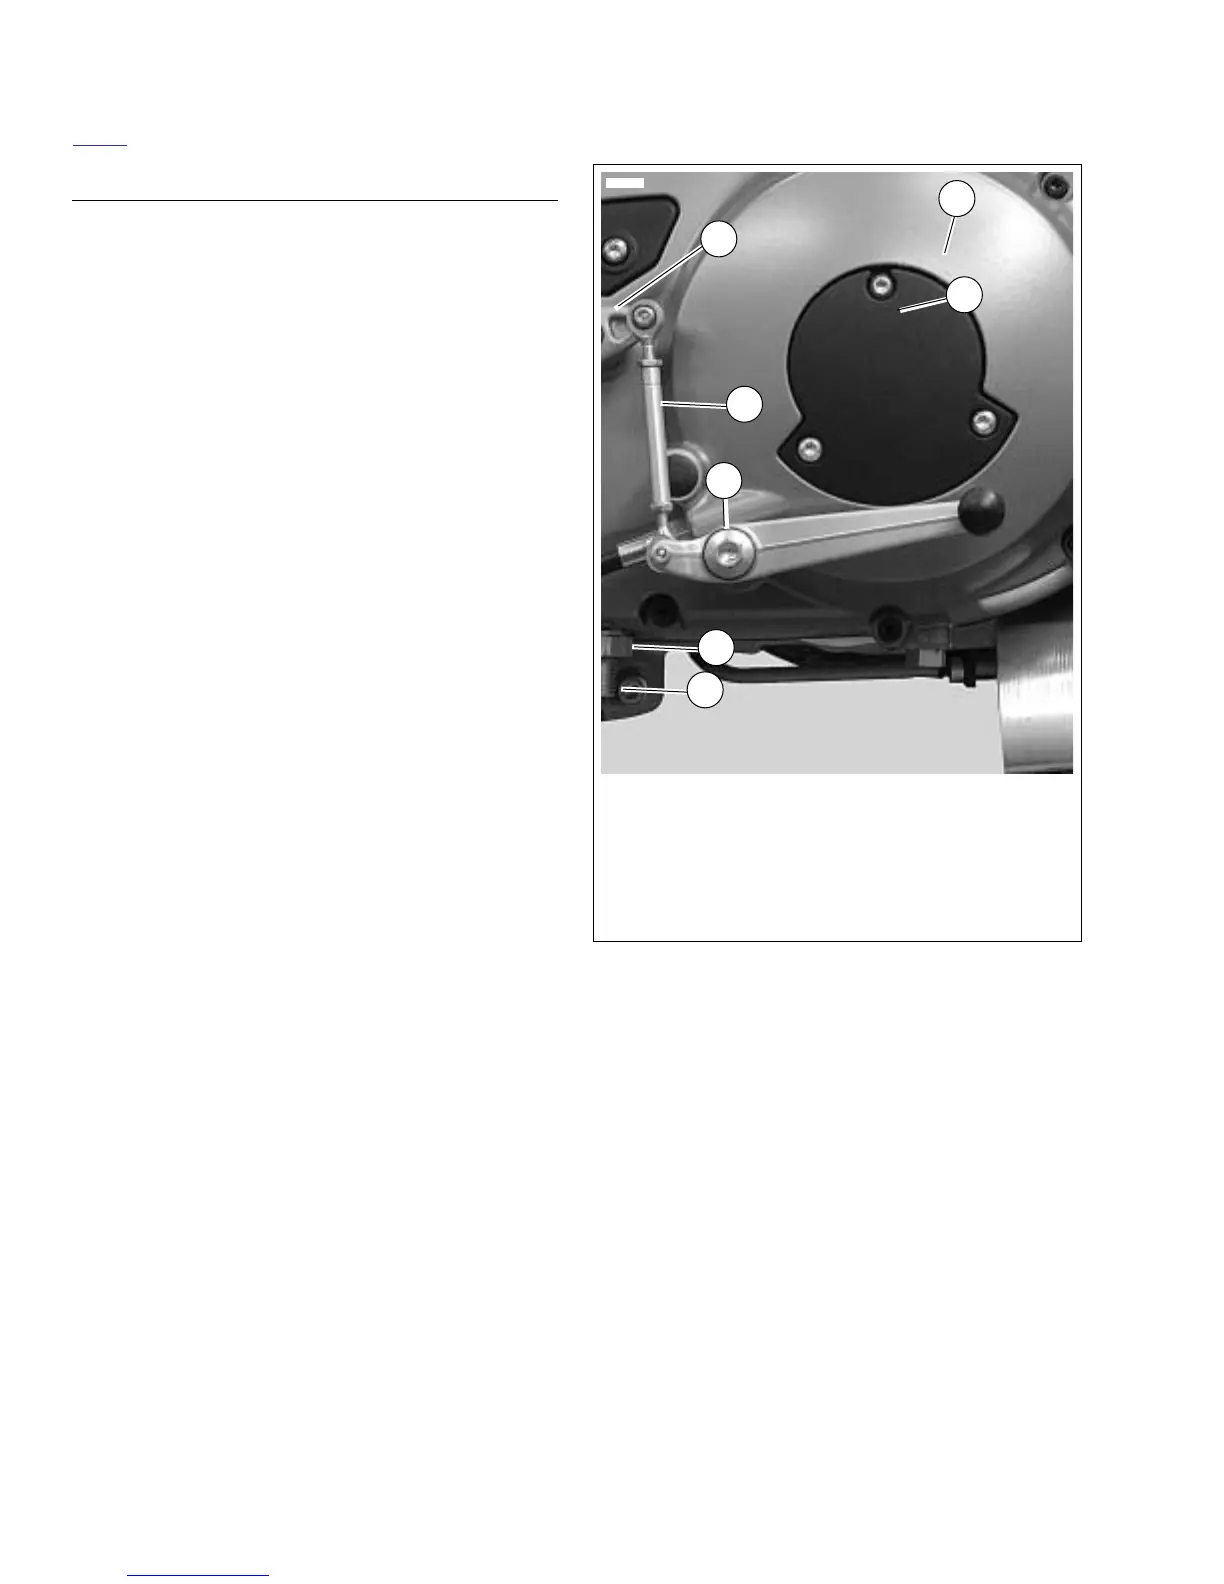
4. See Figure 2-102. Install rubber washer and engine shift
lever assembly (1).
5. After applying LOCTITE 272, install flange bolt (5) and
shift pedal to primary cover, and tighten to 22-24 ft-lbs
(30-32.5Nm).
6. After applying LOCTITE 272 (red), tighten engine shift
lever pinch screw to 48-60
in-lbs
(5.4-6.8 Nm).
NOTE
See D.1 HOSE AND WIRE ROUTING in Appendix D.
7. Route clutch cable through upper triple clamp.
Figure 2-102. Installing Shift Linkage
1. Engine shift lever
2. Primary cover
3. Clutch inspection cover
4. Flange head bolt
5. Chain adjuster screw
6. Locknut
7. Shift linkage assembly
3
2
12257
5
1
4
7
6