4-114 2006 Buell Lightning: Fuel System
HOME
INSTALLATION
1. See Figure 4-96. Replace o-rings (3). Lubricate new o-
rings with clean engine oil.
2. Install new o-rings on fuel supply stud (2). Larger o-ring
is located in groove closer to fuel pump.
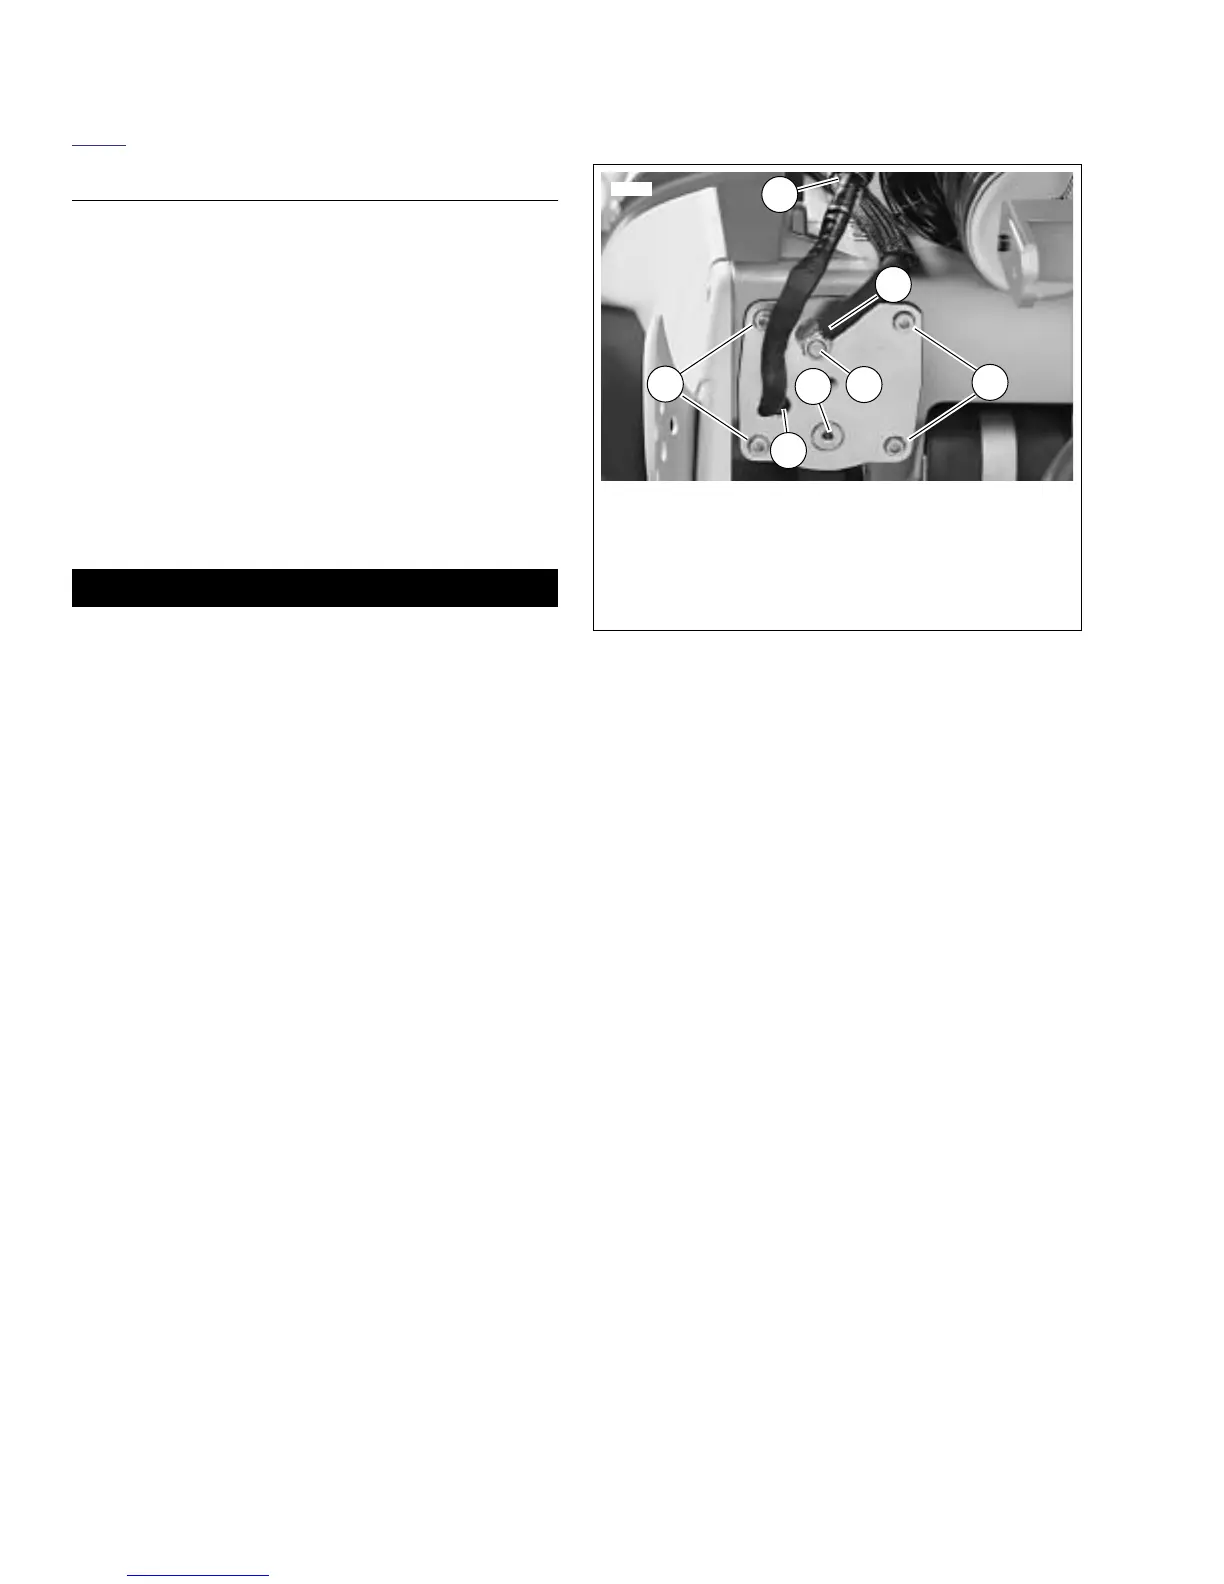
3. See Figure 4-101. Insert fuel pump into frame until resis-
tance is felt.
4. Insert four screws (5) through fuel pump and into frame.
NOTE
Use all four screws to draw fuel pump into frame. Using less
than four screws will damage fuel pump o-rings.
5. Using crosswise pattern, draw fuel pump into frame by
tightening screws. Final tighten screws to 48-51 in-lbs
(5.4-5.8 Nm).
1WARNING1WARNING
Do NOT overtighten fuel fitting nuts. Overtightening fas-
teners may result in excessive compression of sealing
components and fuel leakage which could result in death
or serious injury.
6. Install fuel supply line banjo fitting (2) over fuel supply
stud (3). Install new fastener. Tighten to 84-108 in-lbs
(9.5-12.2 Nm).
7. Fill tank with a small amount of fuel. Check for leaks.
8. Connect fuel pump connector [86] (1) and push cable
strap tab into hole in frame.
Figure 4-101. Fuel Pump Location
10718a
5
5
1
4
3
1. Connector [86]
2. Fuel supply fitting
3. Fuel supply stud
4. Drain plug
5. Fasteners
6. Wire harness
2
6